How to install Bravat Brushed Gold Shower Set With Valve Mixer 3-Way Concealed Wall Mounted | FS1054
Installation Instructions for Bathroom Shower Set
Before you begin, please read the following installation instructions carefully.
Ensure compliance with all local building and safety codes.
Unpack and inspect the product for any shipping damages.
If you find any damages, do not proceed with the installation.
Please note that all products must be installed by a professional and certified plumber to avoid voiding the warranty.
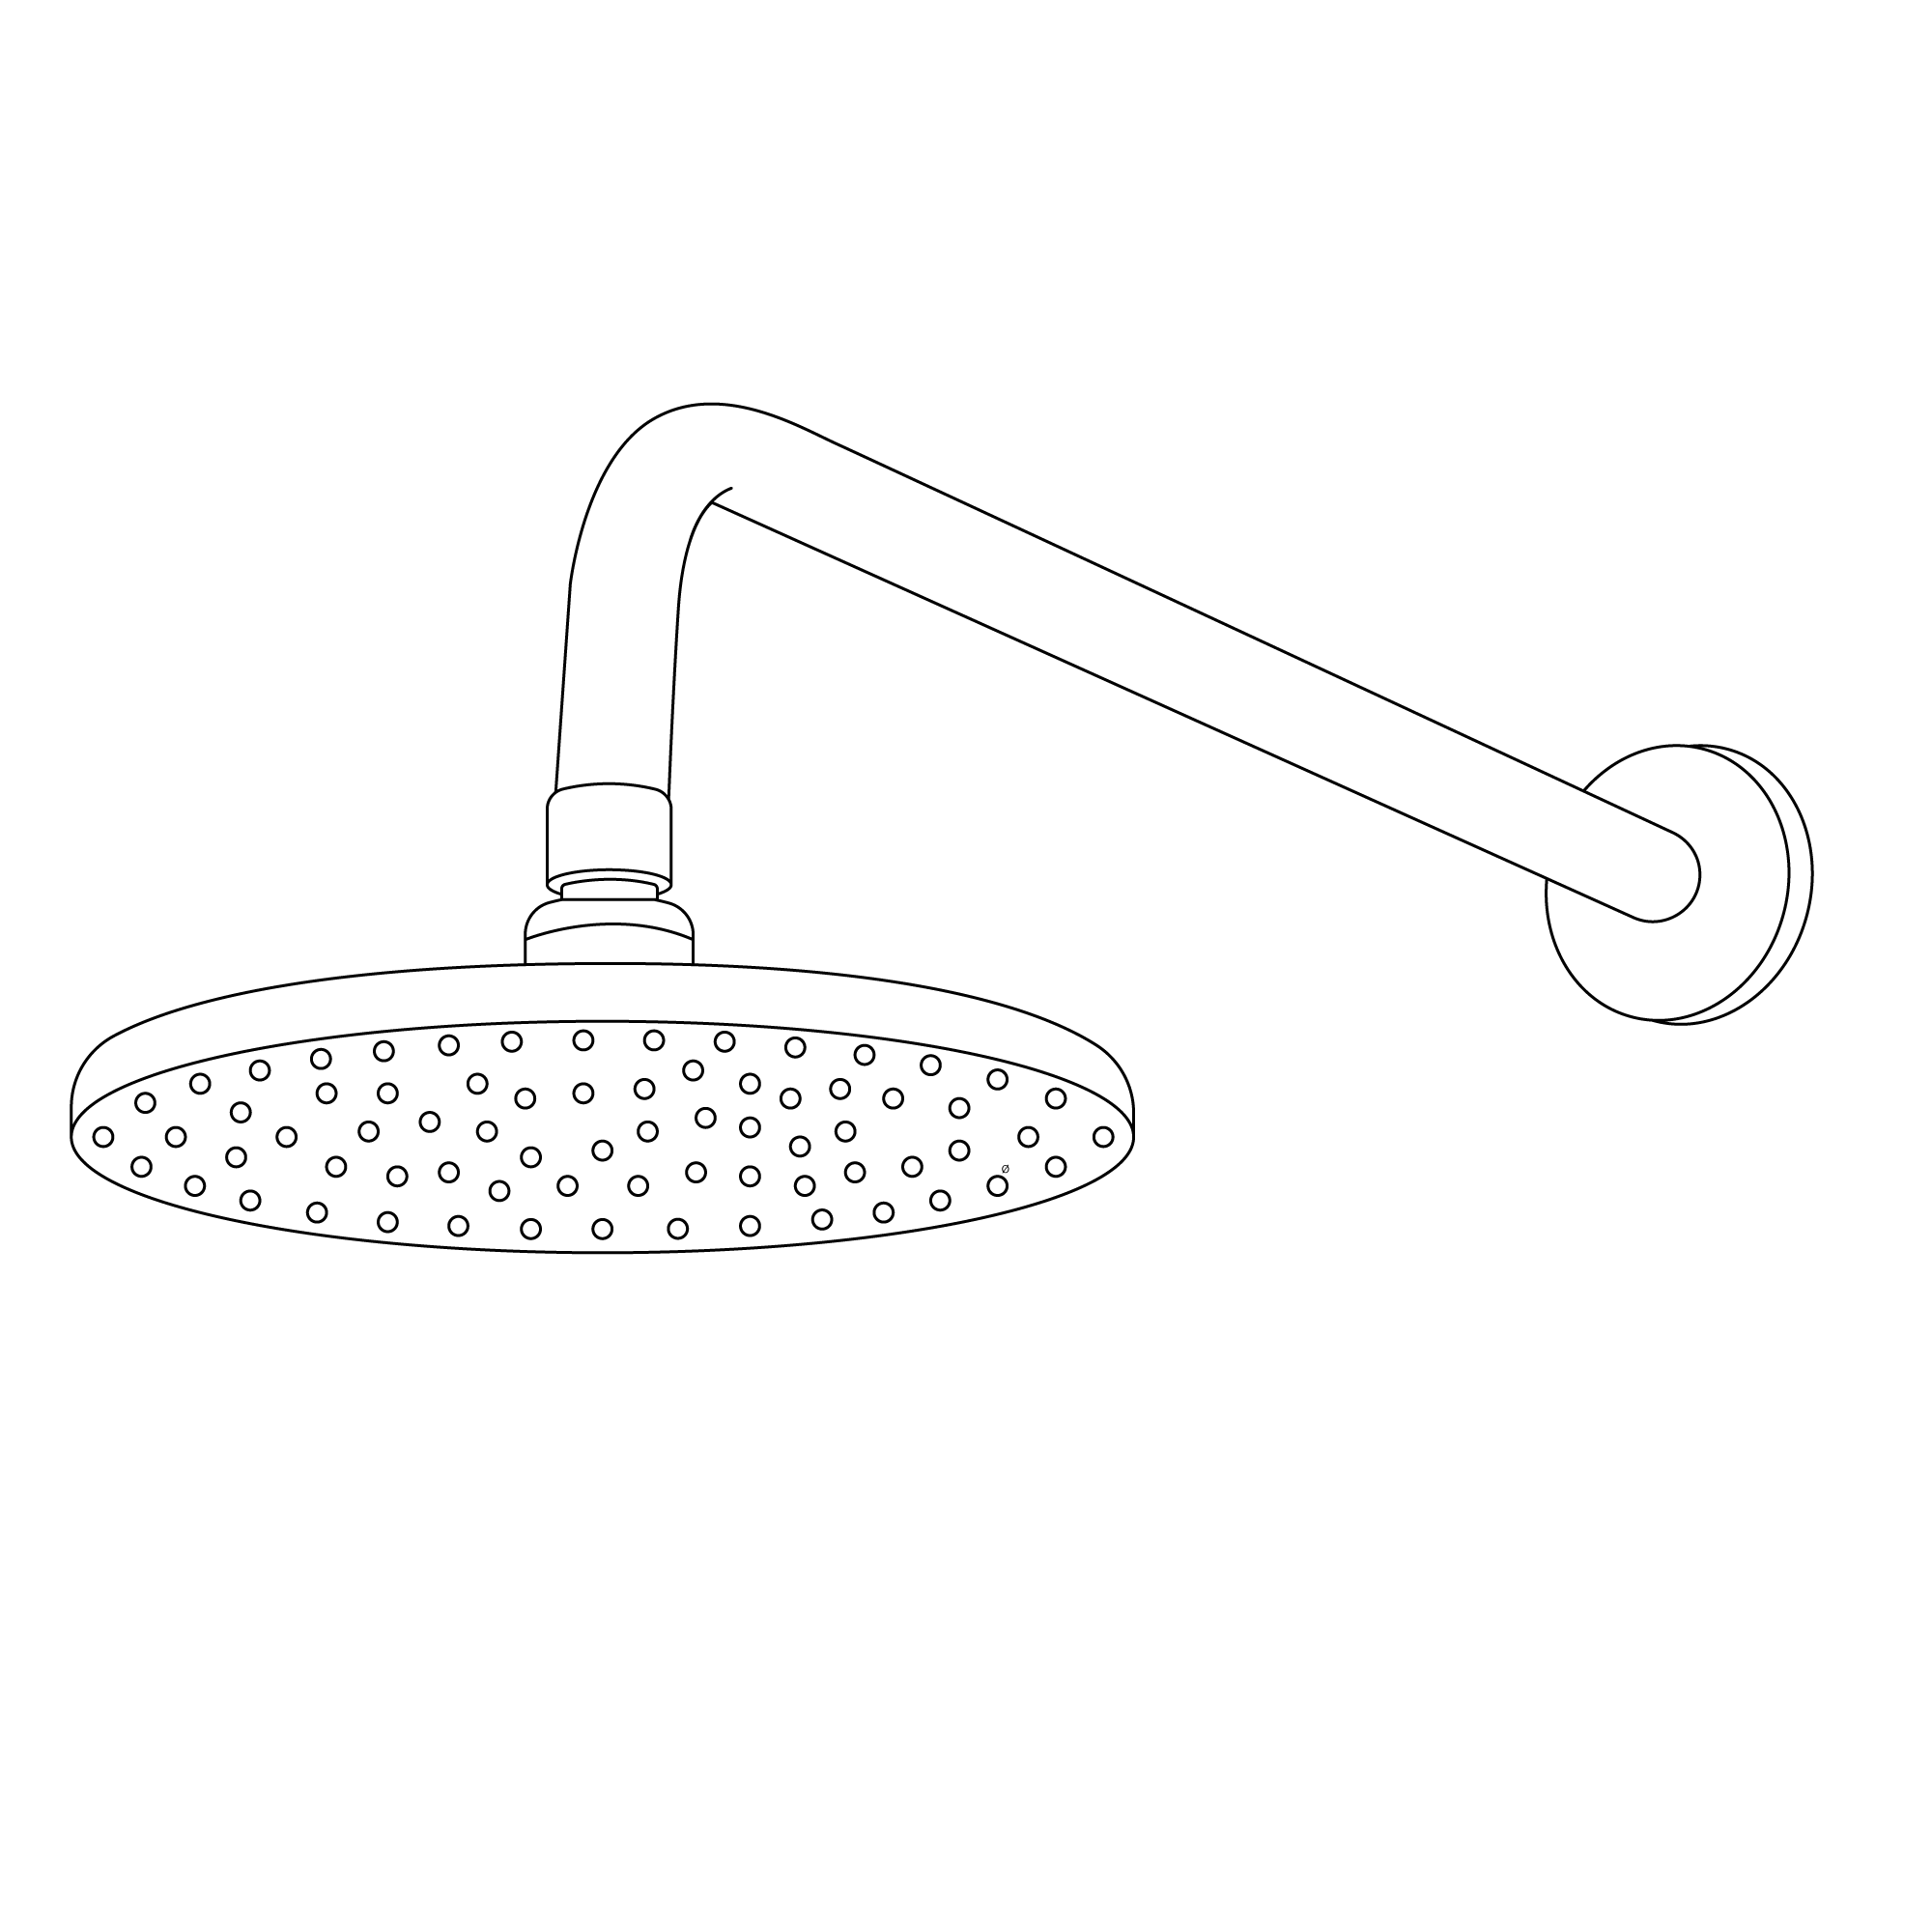
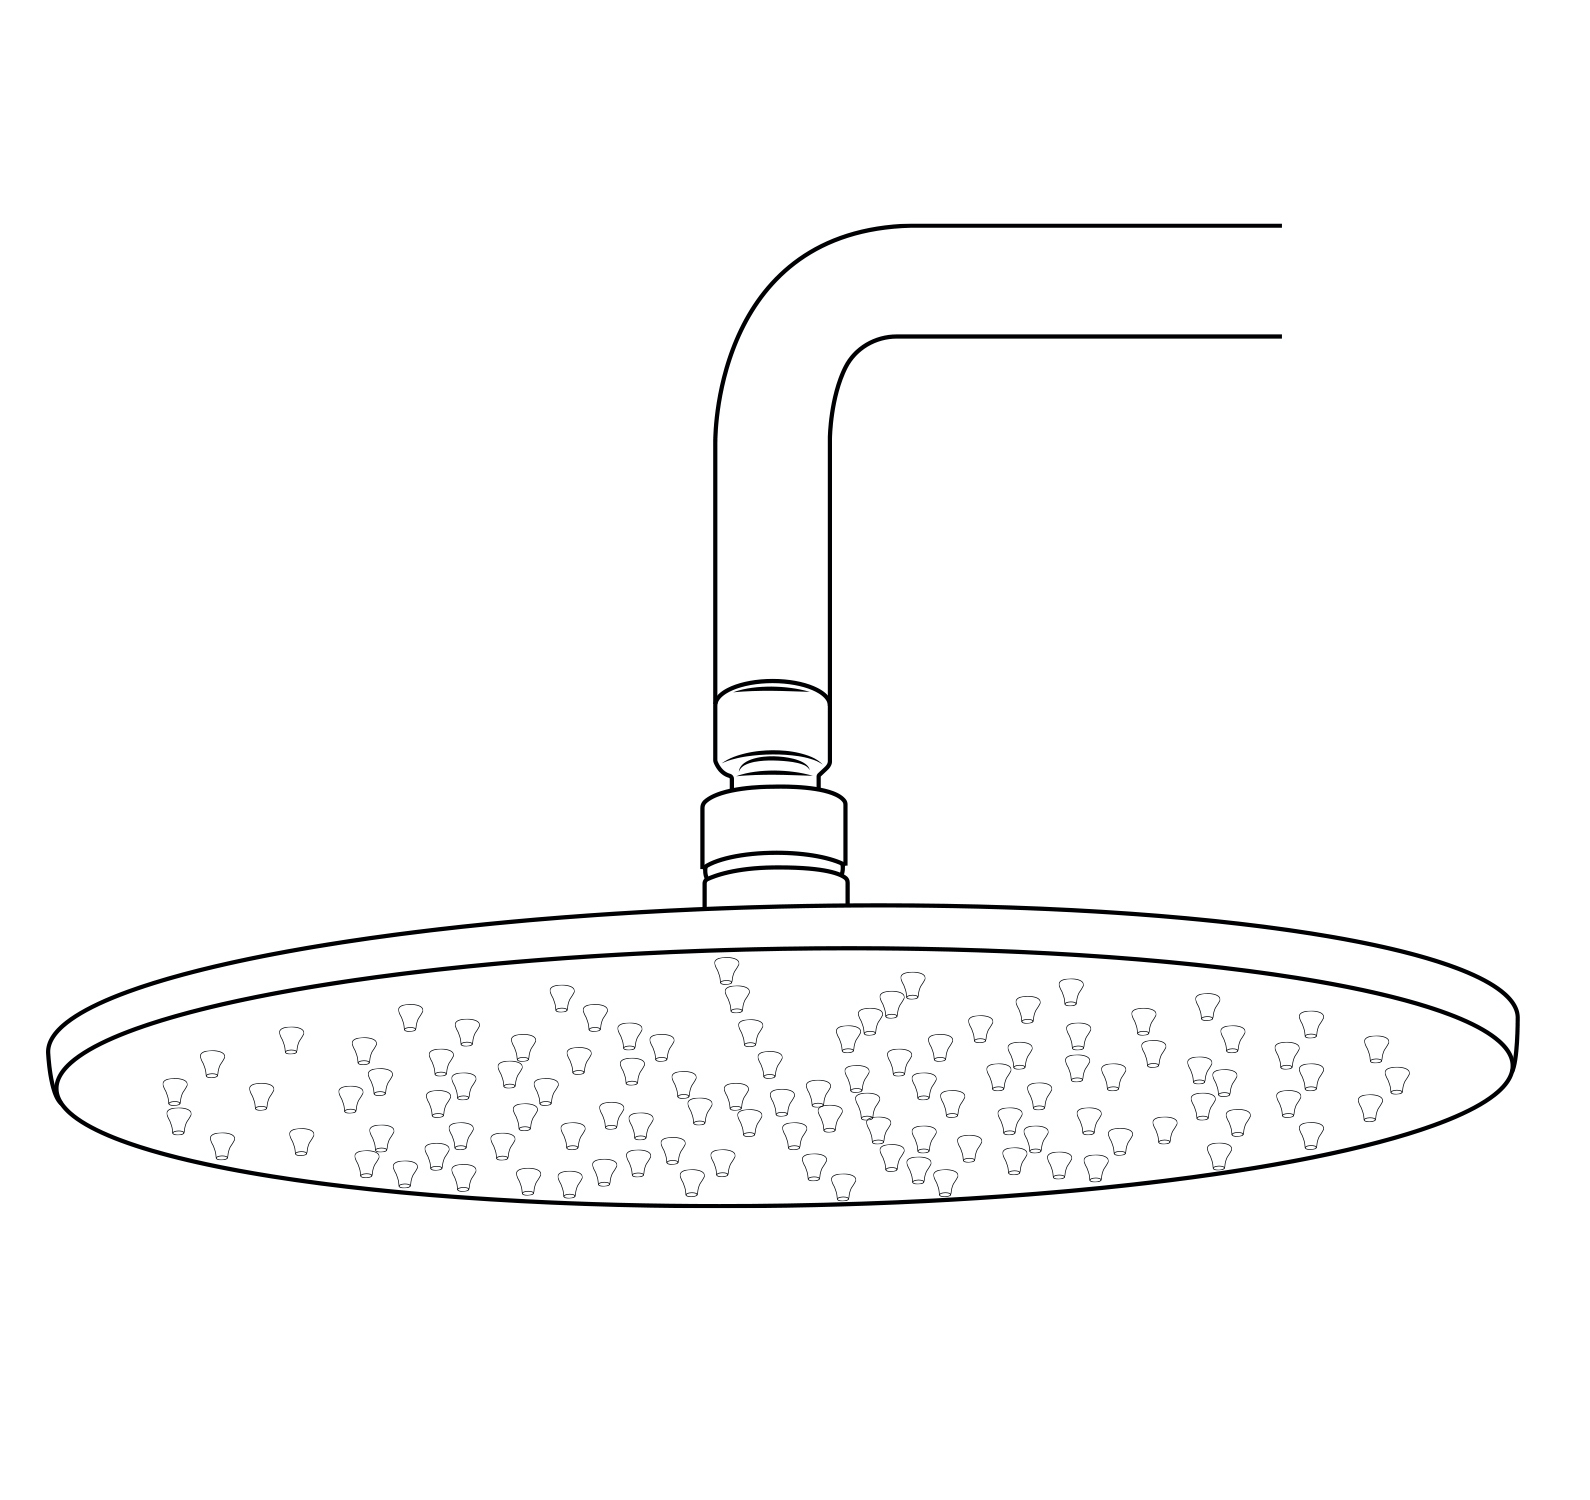
Shower Head Installation Instructions
Size
Step 1:
Round
Shower
Step 2:
Wall Mount Round Showerhead
Step 3:
Step 4:
Step 5:
Step 6:
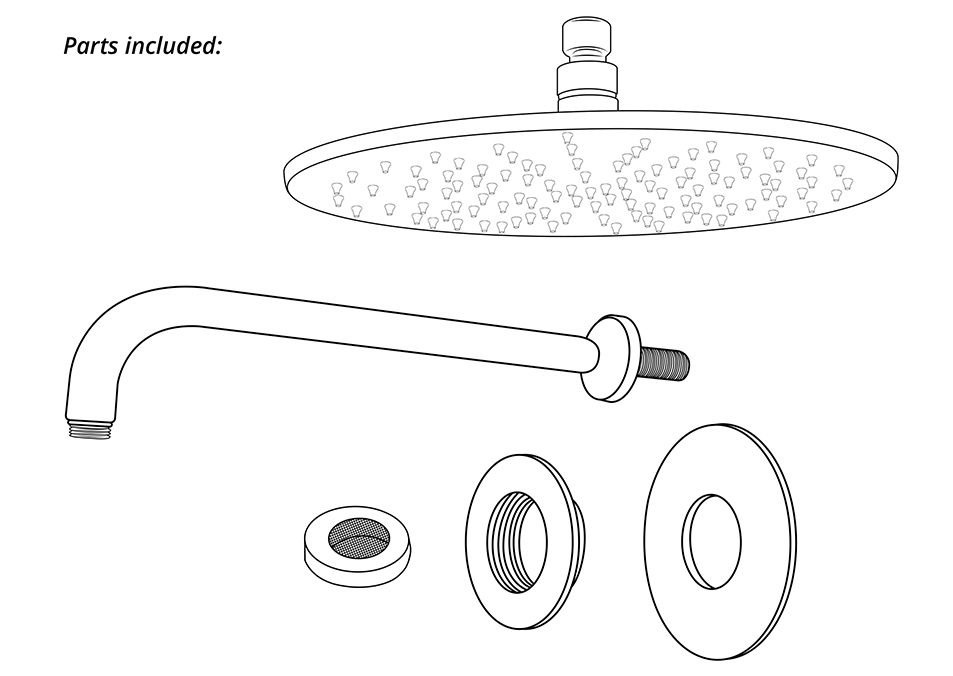
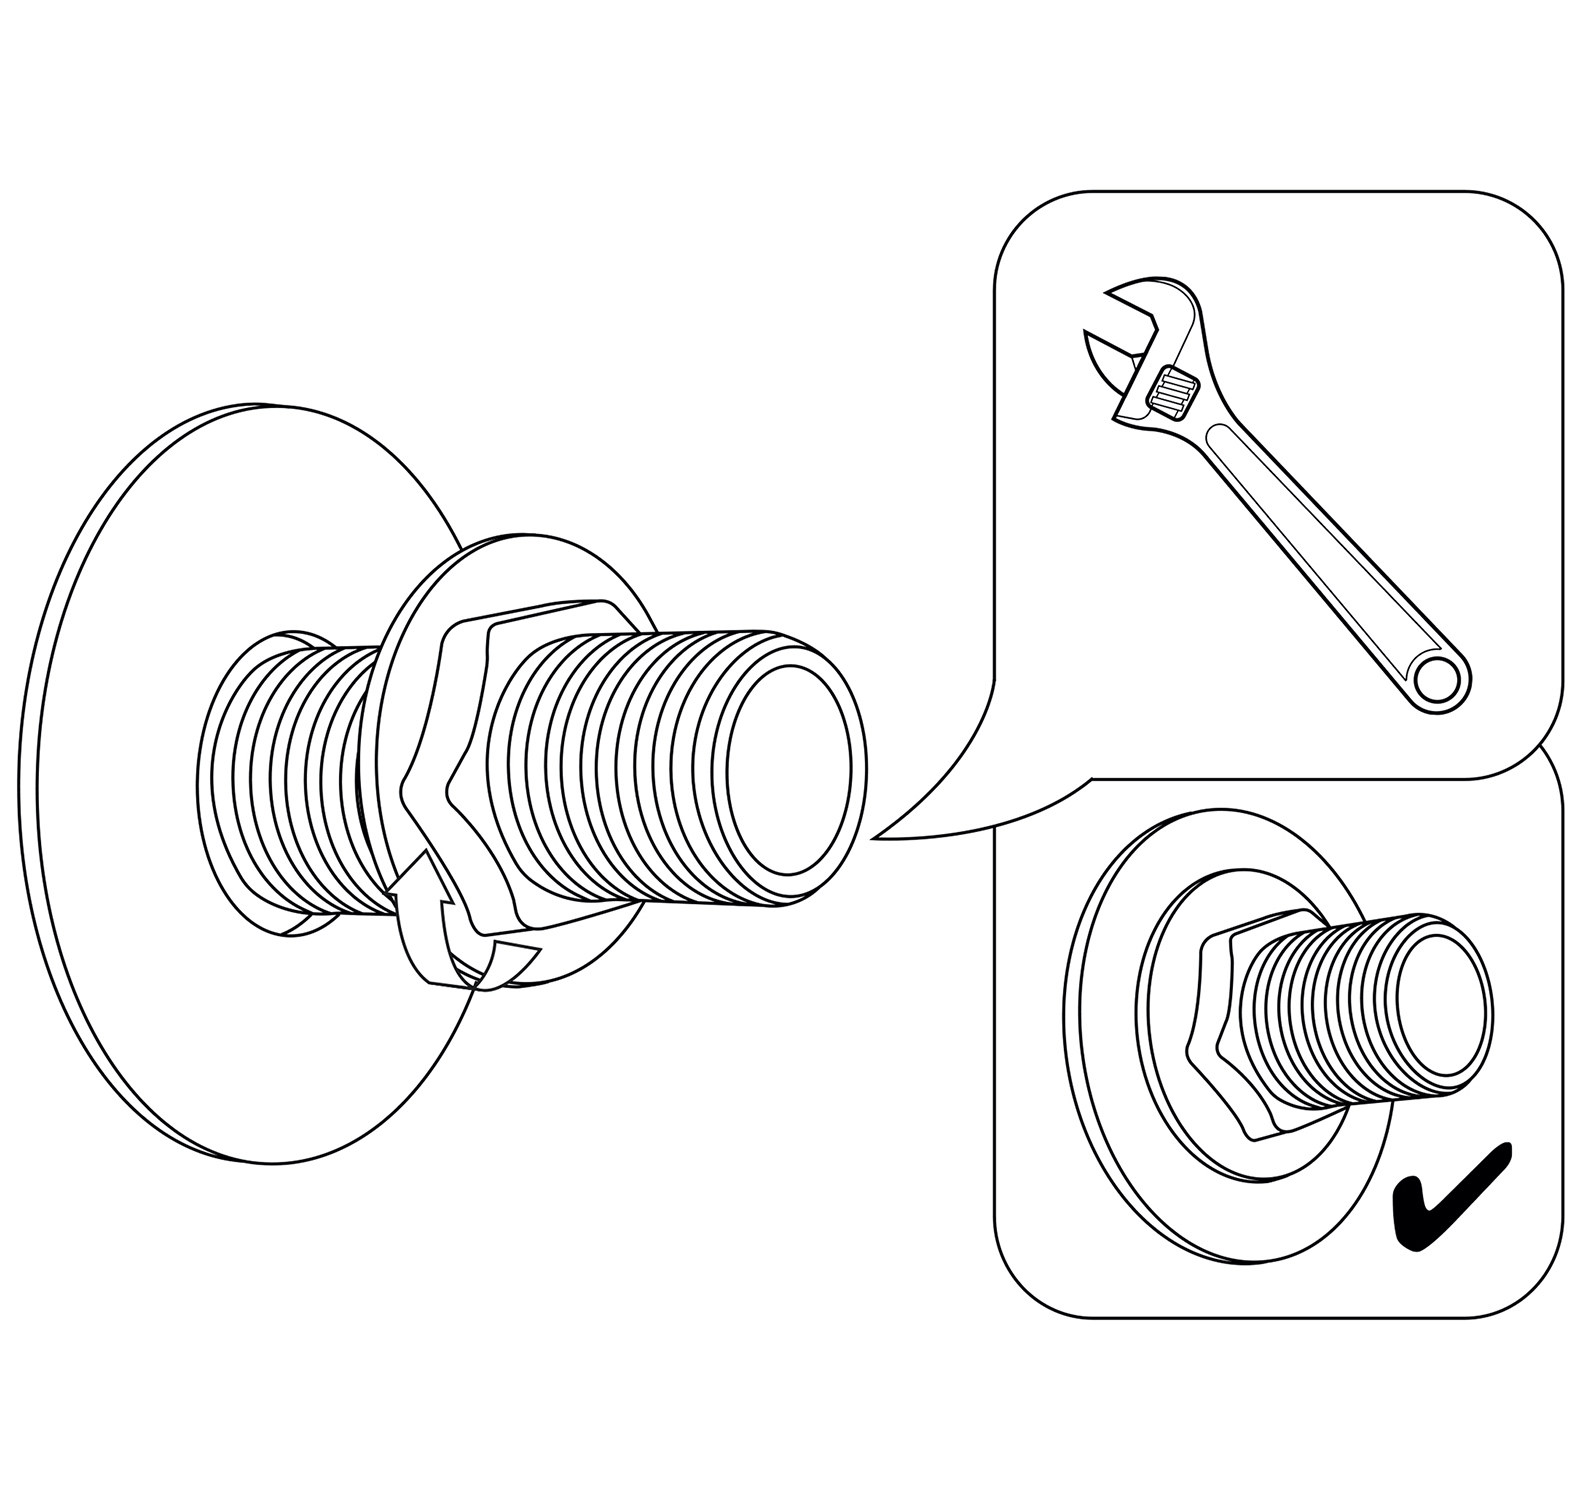
1. Remove the old shower head by using the channel lock pliers or monkey wrench. Be sure to turn the pliers counter-clockwise to loosen the old shower head. (Tip: Right is tight, left is loose.)
2. Remove the shower arm by turning it by hand counter-clockwise.Make sure you remember to apply putty or tape to the new arm. (Tip: Using teflon tape is less messy)
3. Apply teflon tape to the threading of the shower arm by wrapping it around the threads, go all the way around 3 or 4 times depending on the quality of the Teflon tape.
4. Install the new shower arm by going clockwise by hand until it is tight, then put painters tape around the arm and tighten the arm with the channel lock or monkey wrench.
5. Place Teflon tape around the threads on the shower head and then place the shower head onto the shower arm by turning the shower head clockwise after the shower arm is already in the wall.
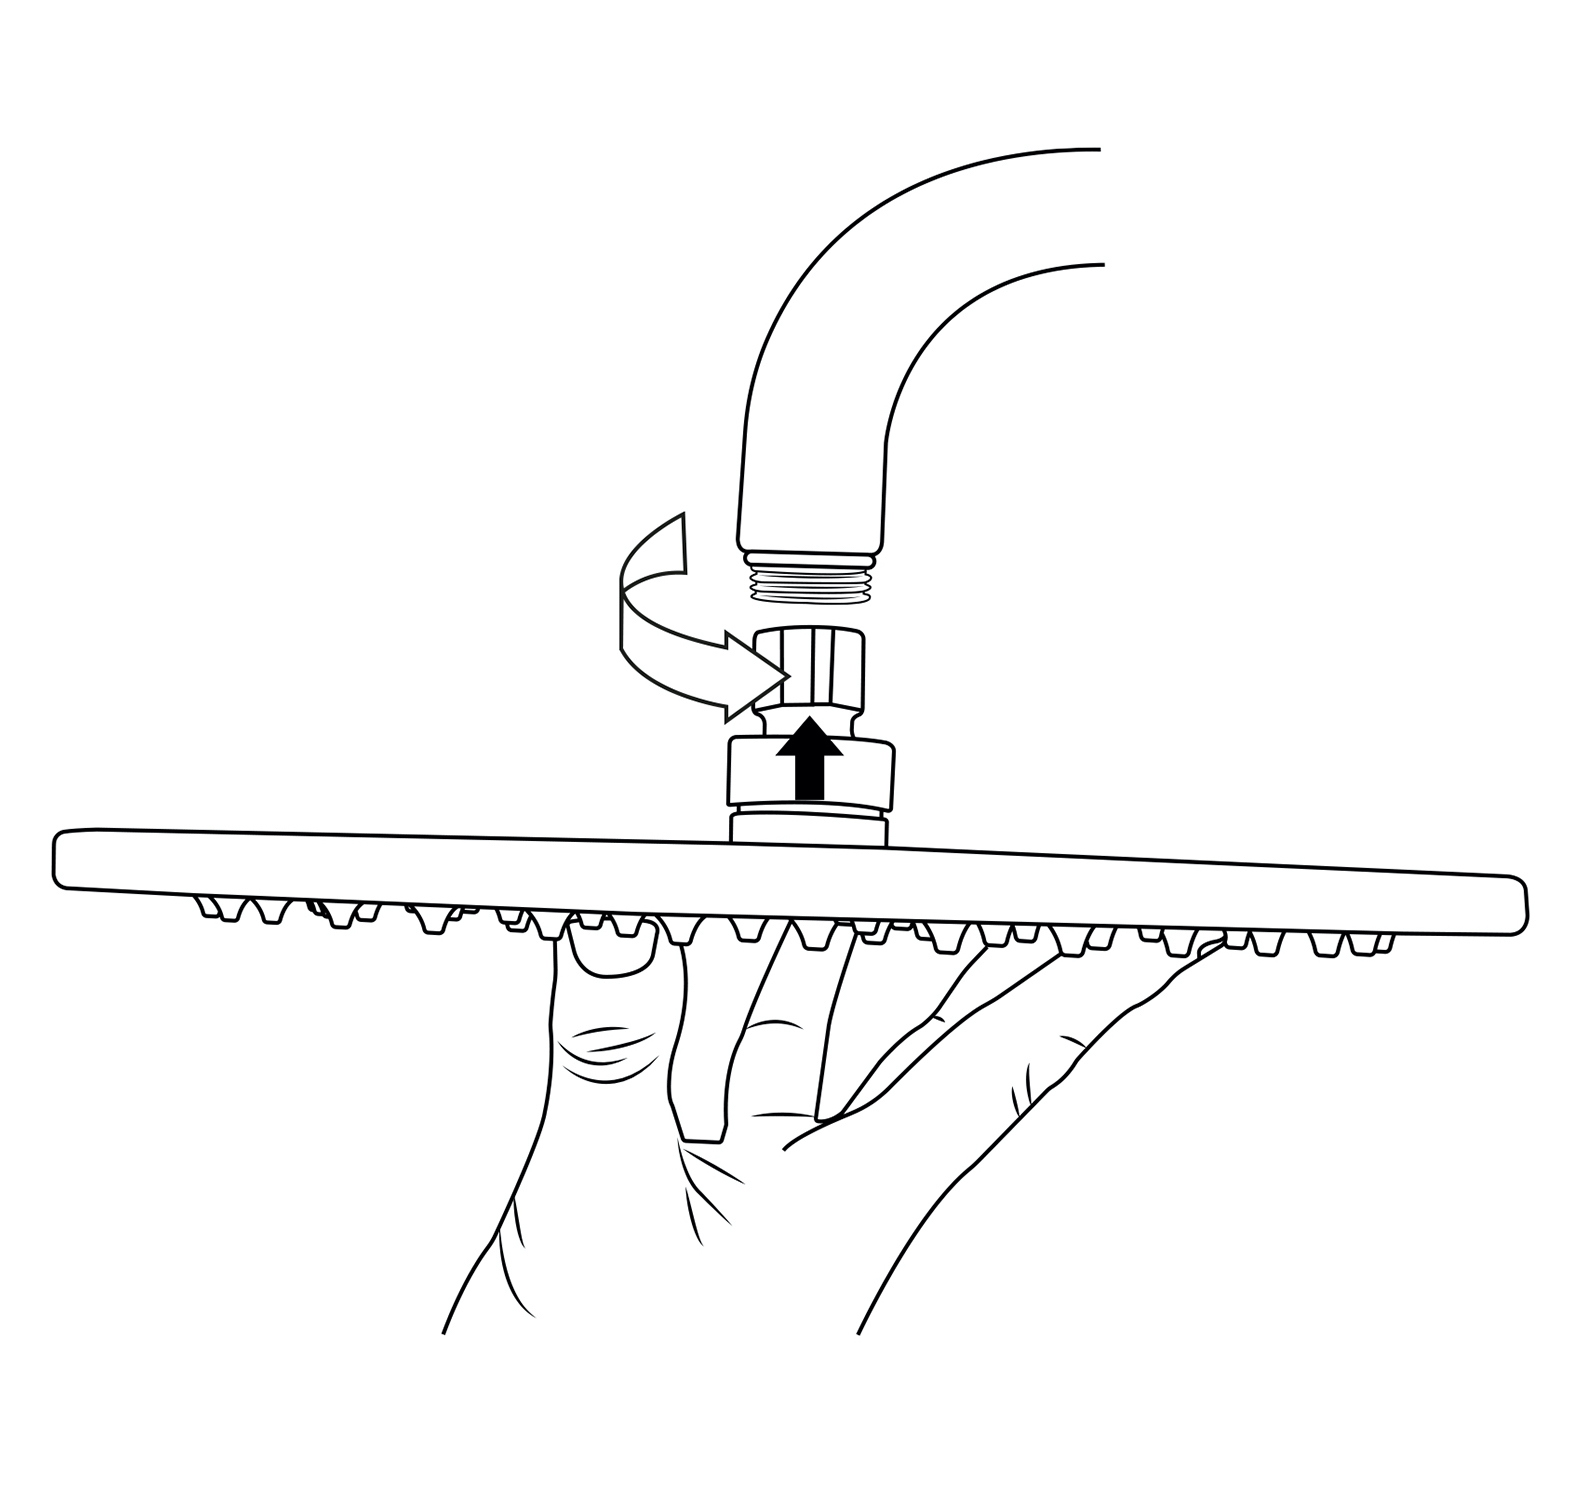
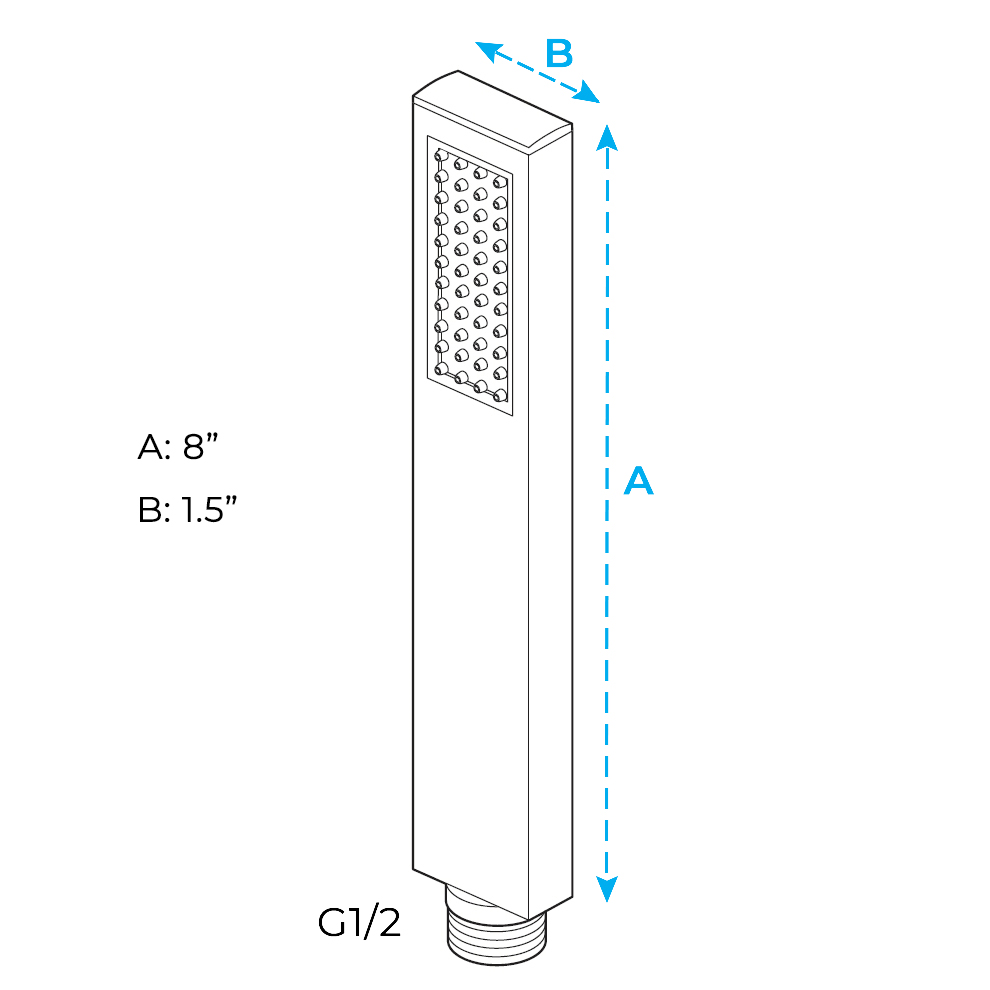
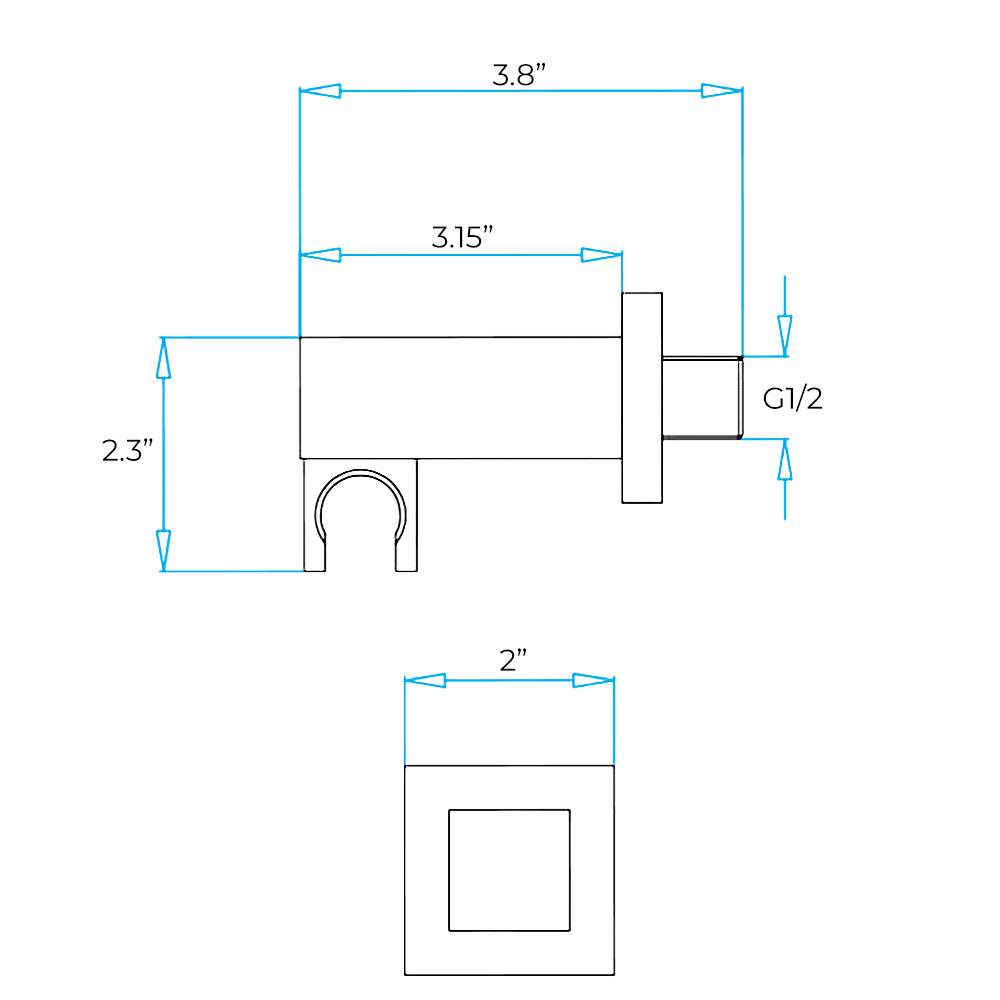
Hand Held Shower Installation Instructions
Step 1:
Step 2:
Hand
Held
Shower
Hand Held Shower
Handheld Shower
Step 3:
Size:
Handheld Shower
Holder Size
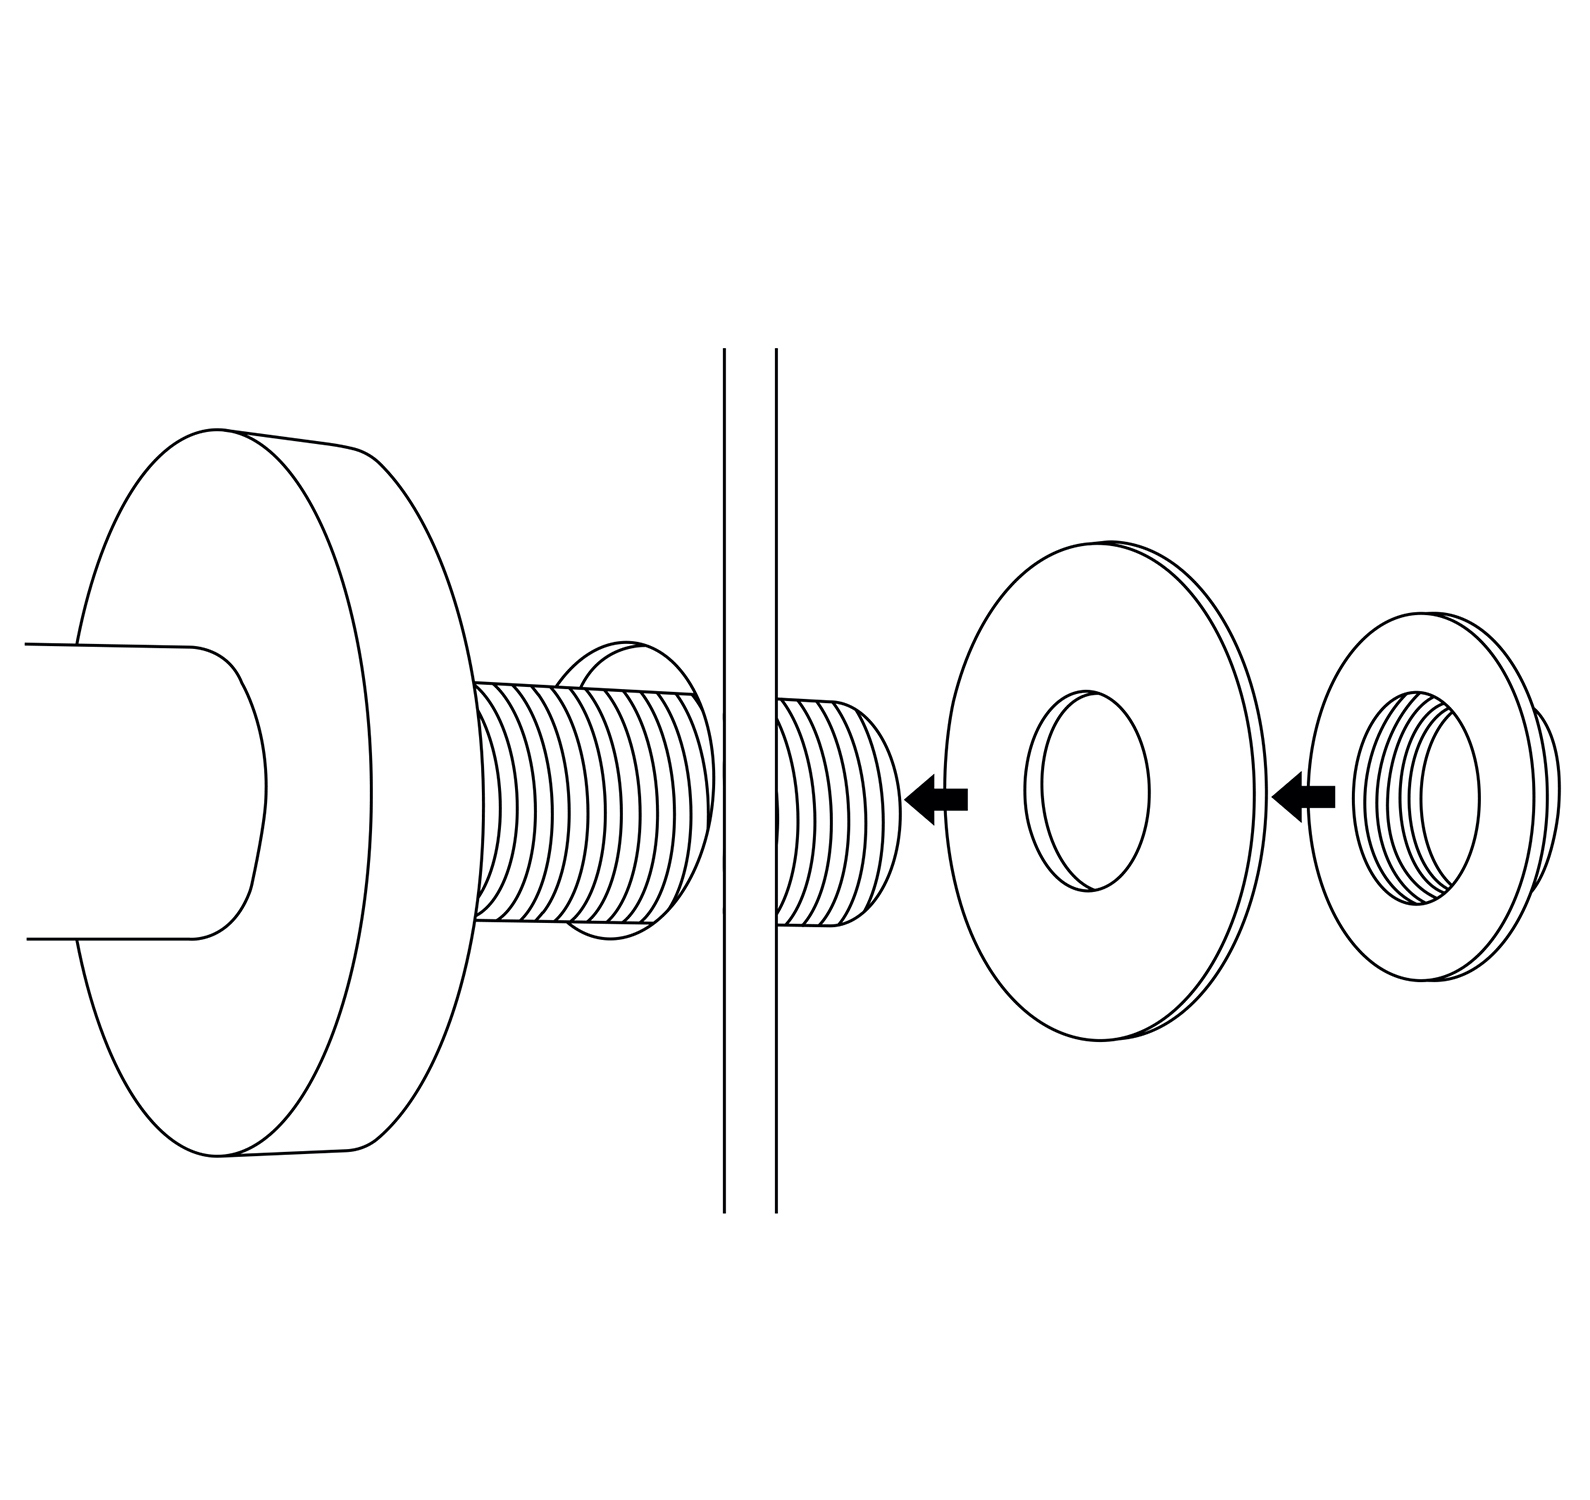
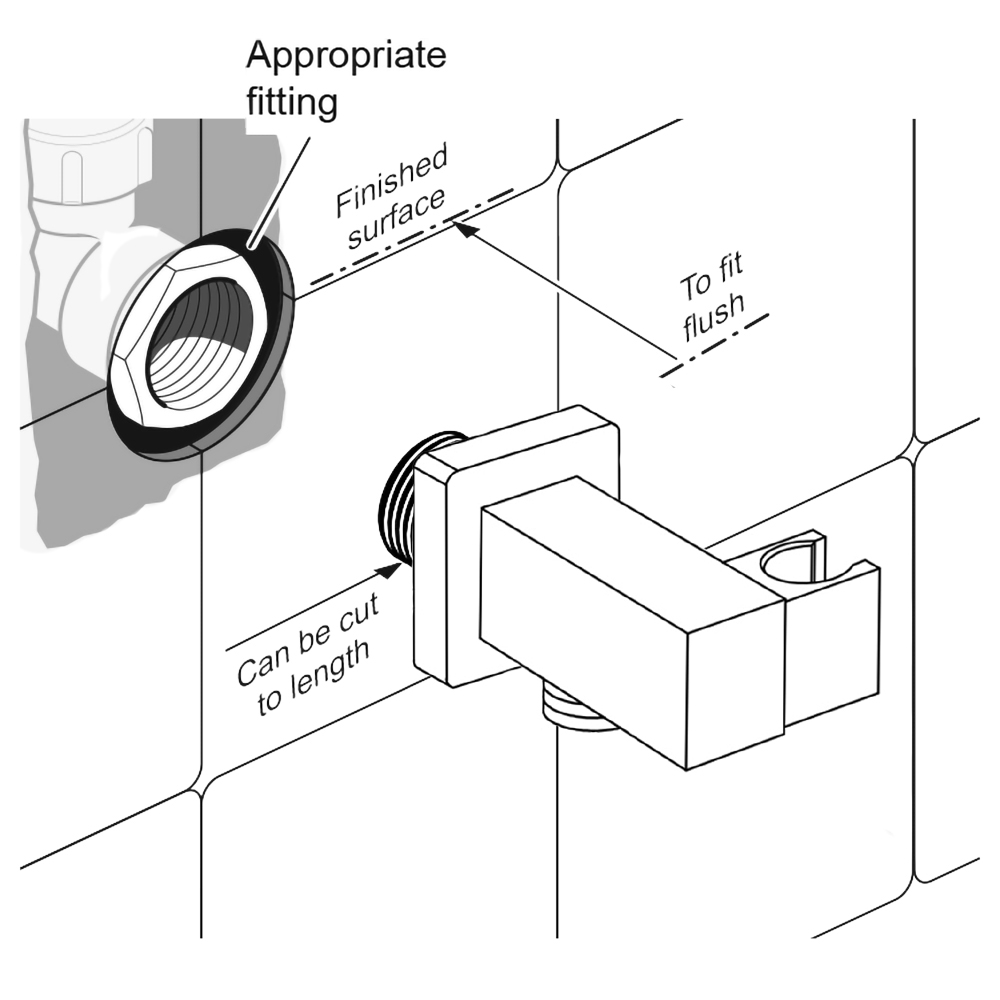
Hand Shower Outlet Installation • Complete the outlet pipework ensuring it ends in an appropriate 15mm x 1/2" BSP female thread elbow. Note: This fitting is not supplied as variations in installations require the selection of a suitable solder or compression fitting.
• Install the 'Wall Outlet', thread long male 1/2" BSP into the appropriate female fitting using PTFE tape to give a watertight joint. Note: The thread can be cut to size if required. Make sure that all debris is removed from the connector and the section that has been cut is dressed correctly, before installation.
The minimum required water pressure is 0.05 MPa (0.5 bar). Flow rate 2.5 GPM (9.5 LPM).
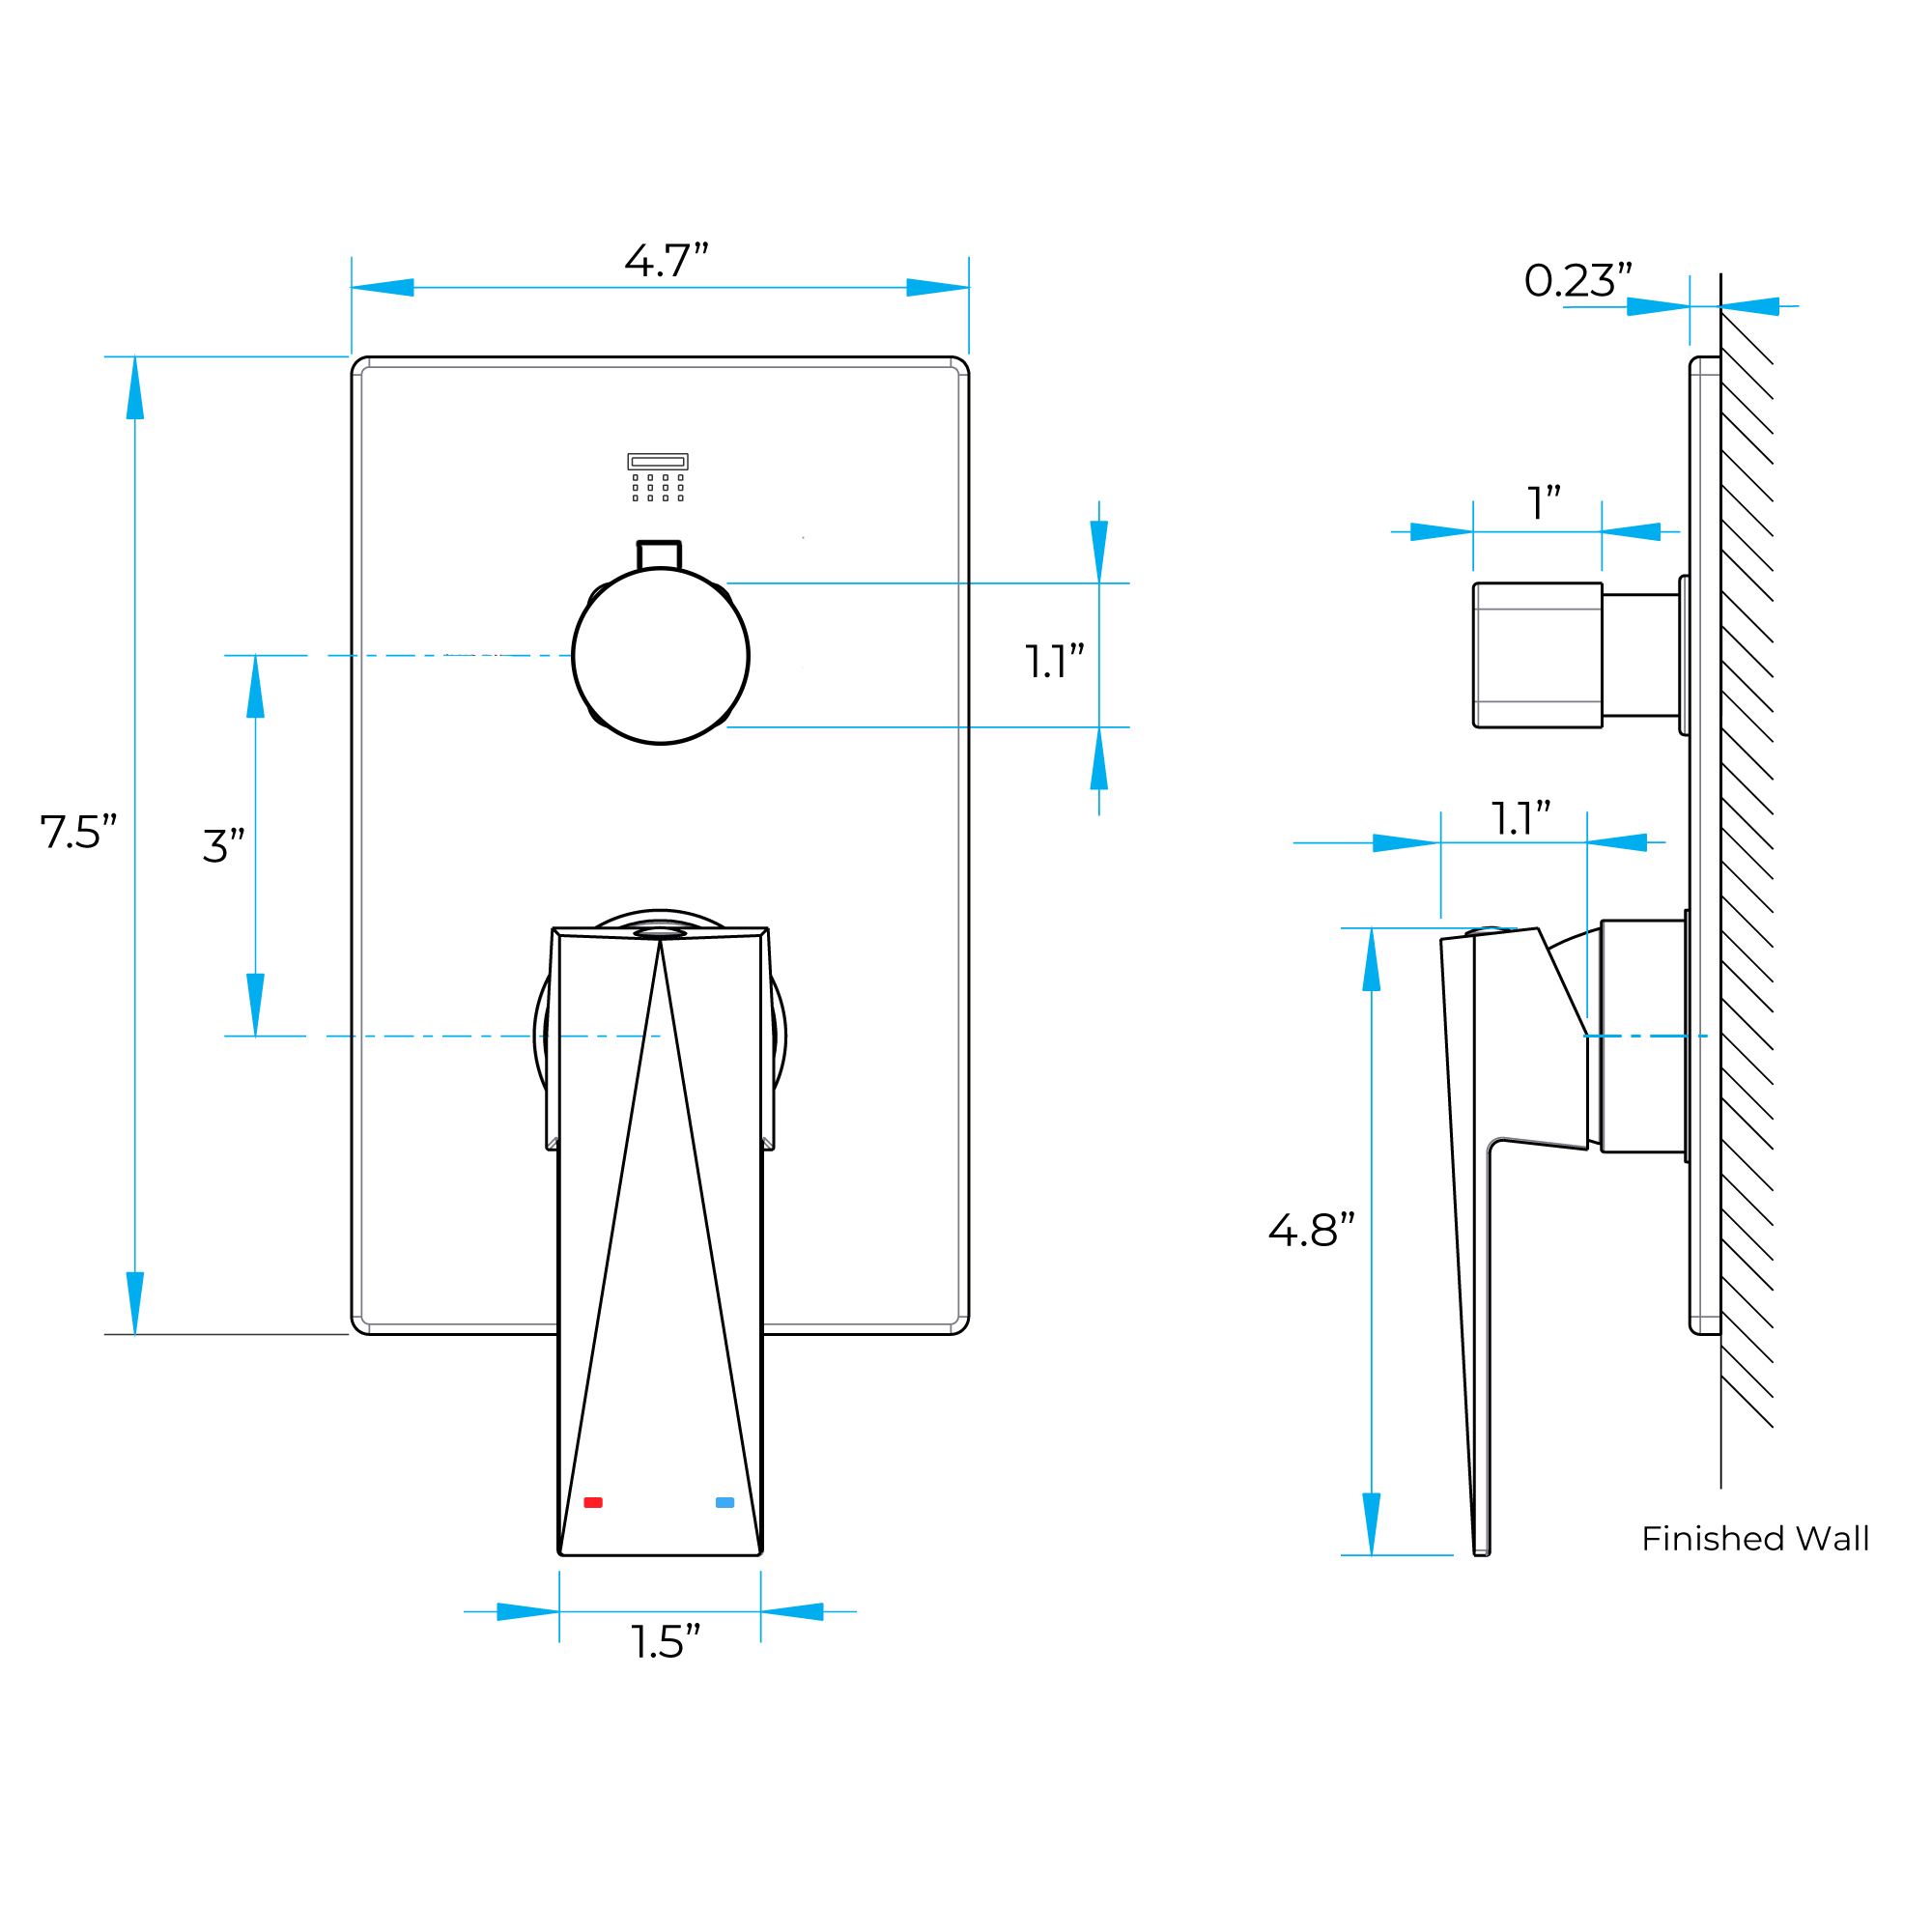
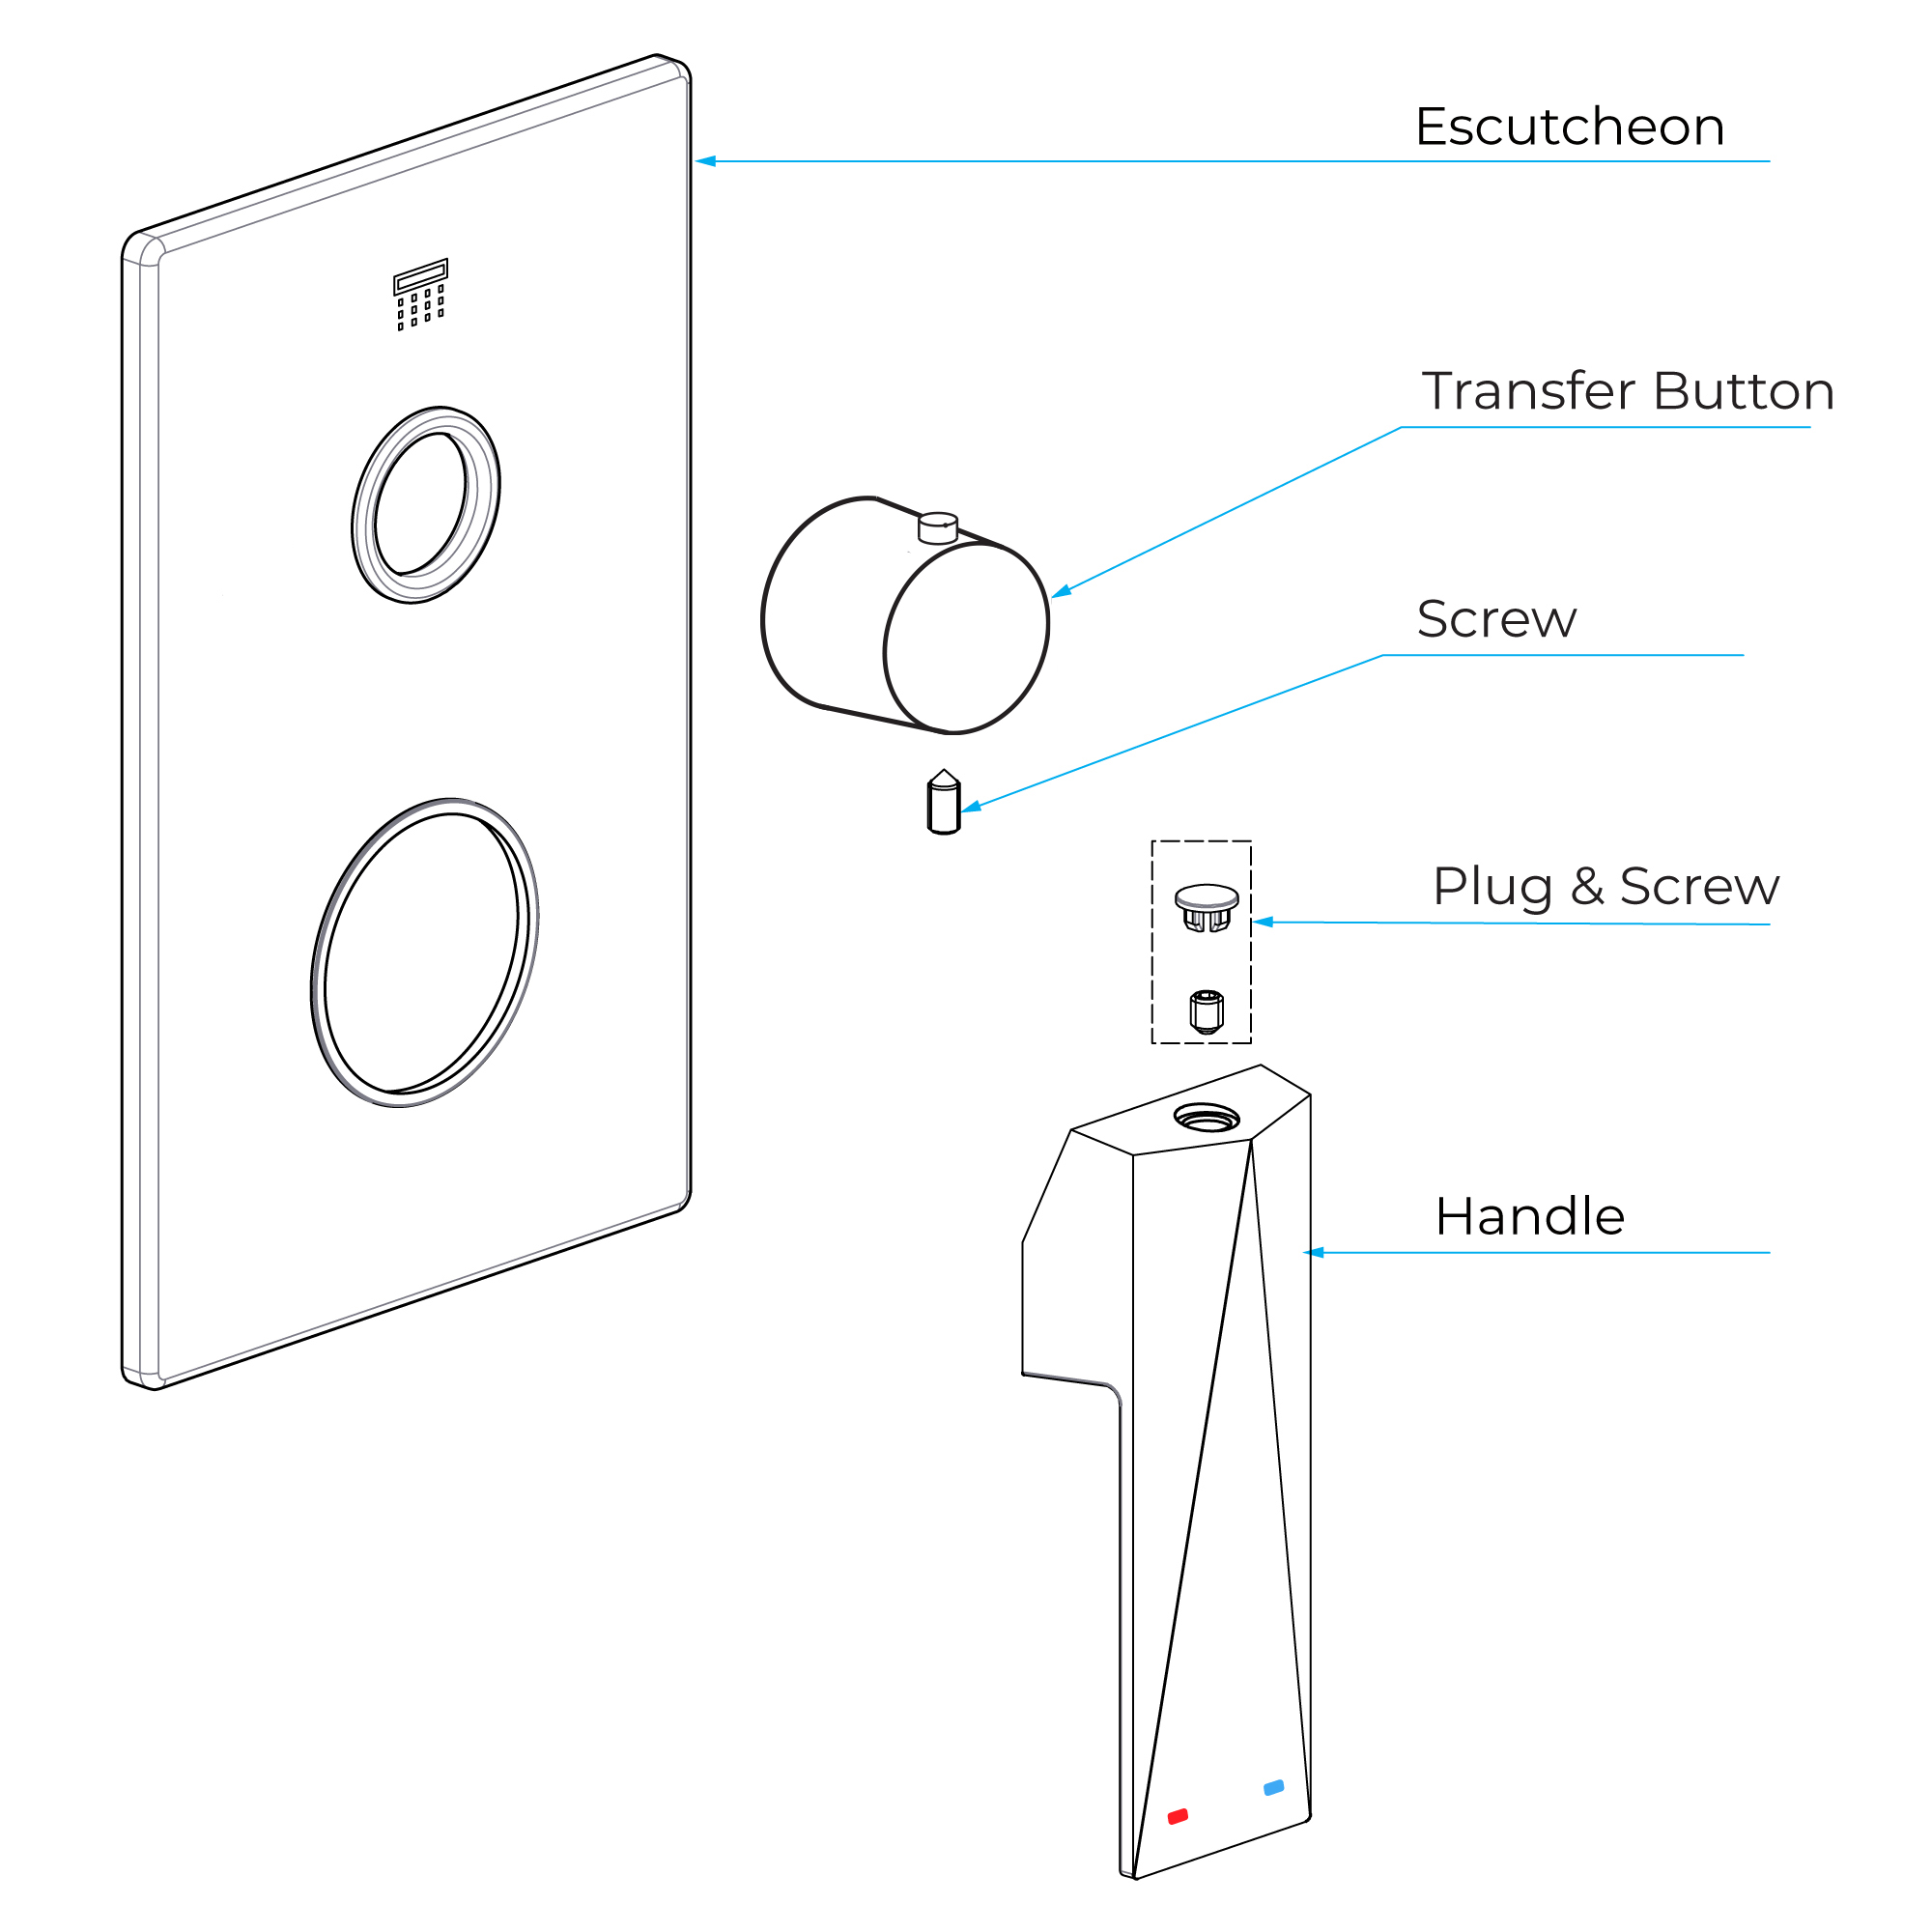
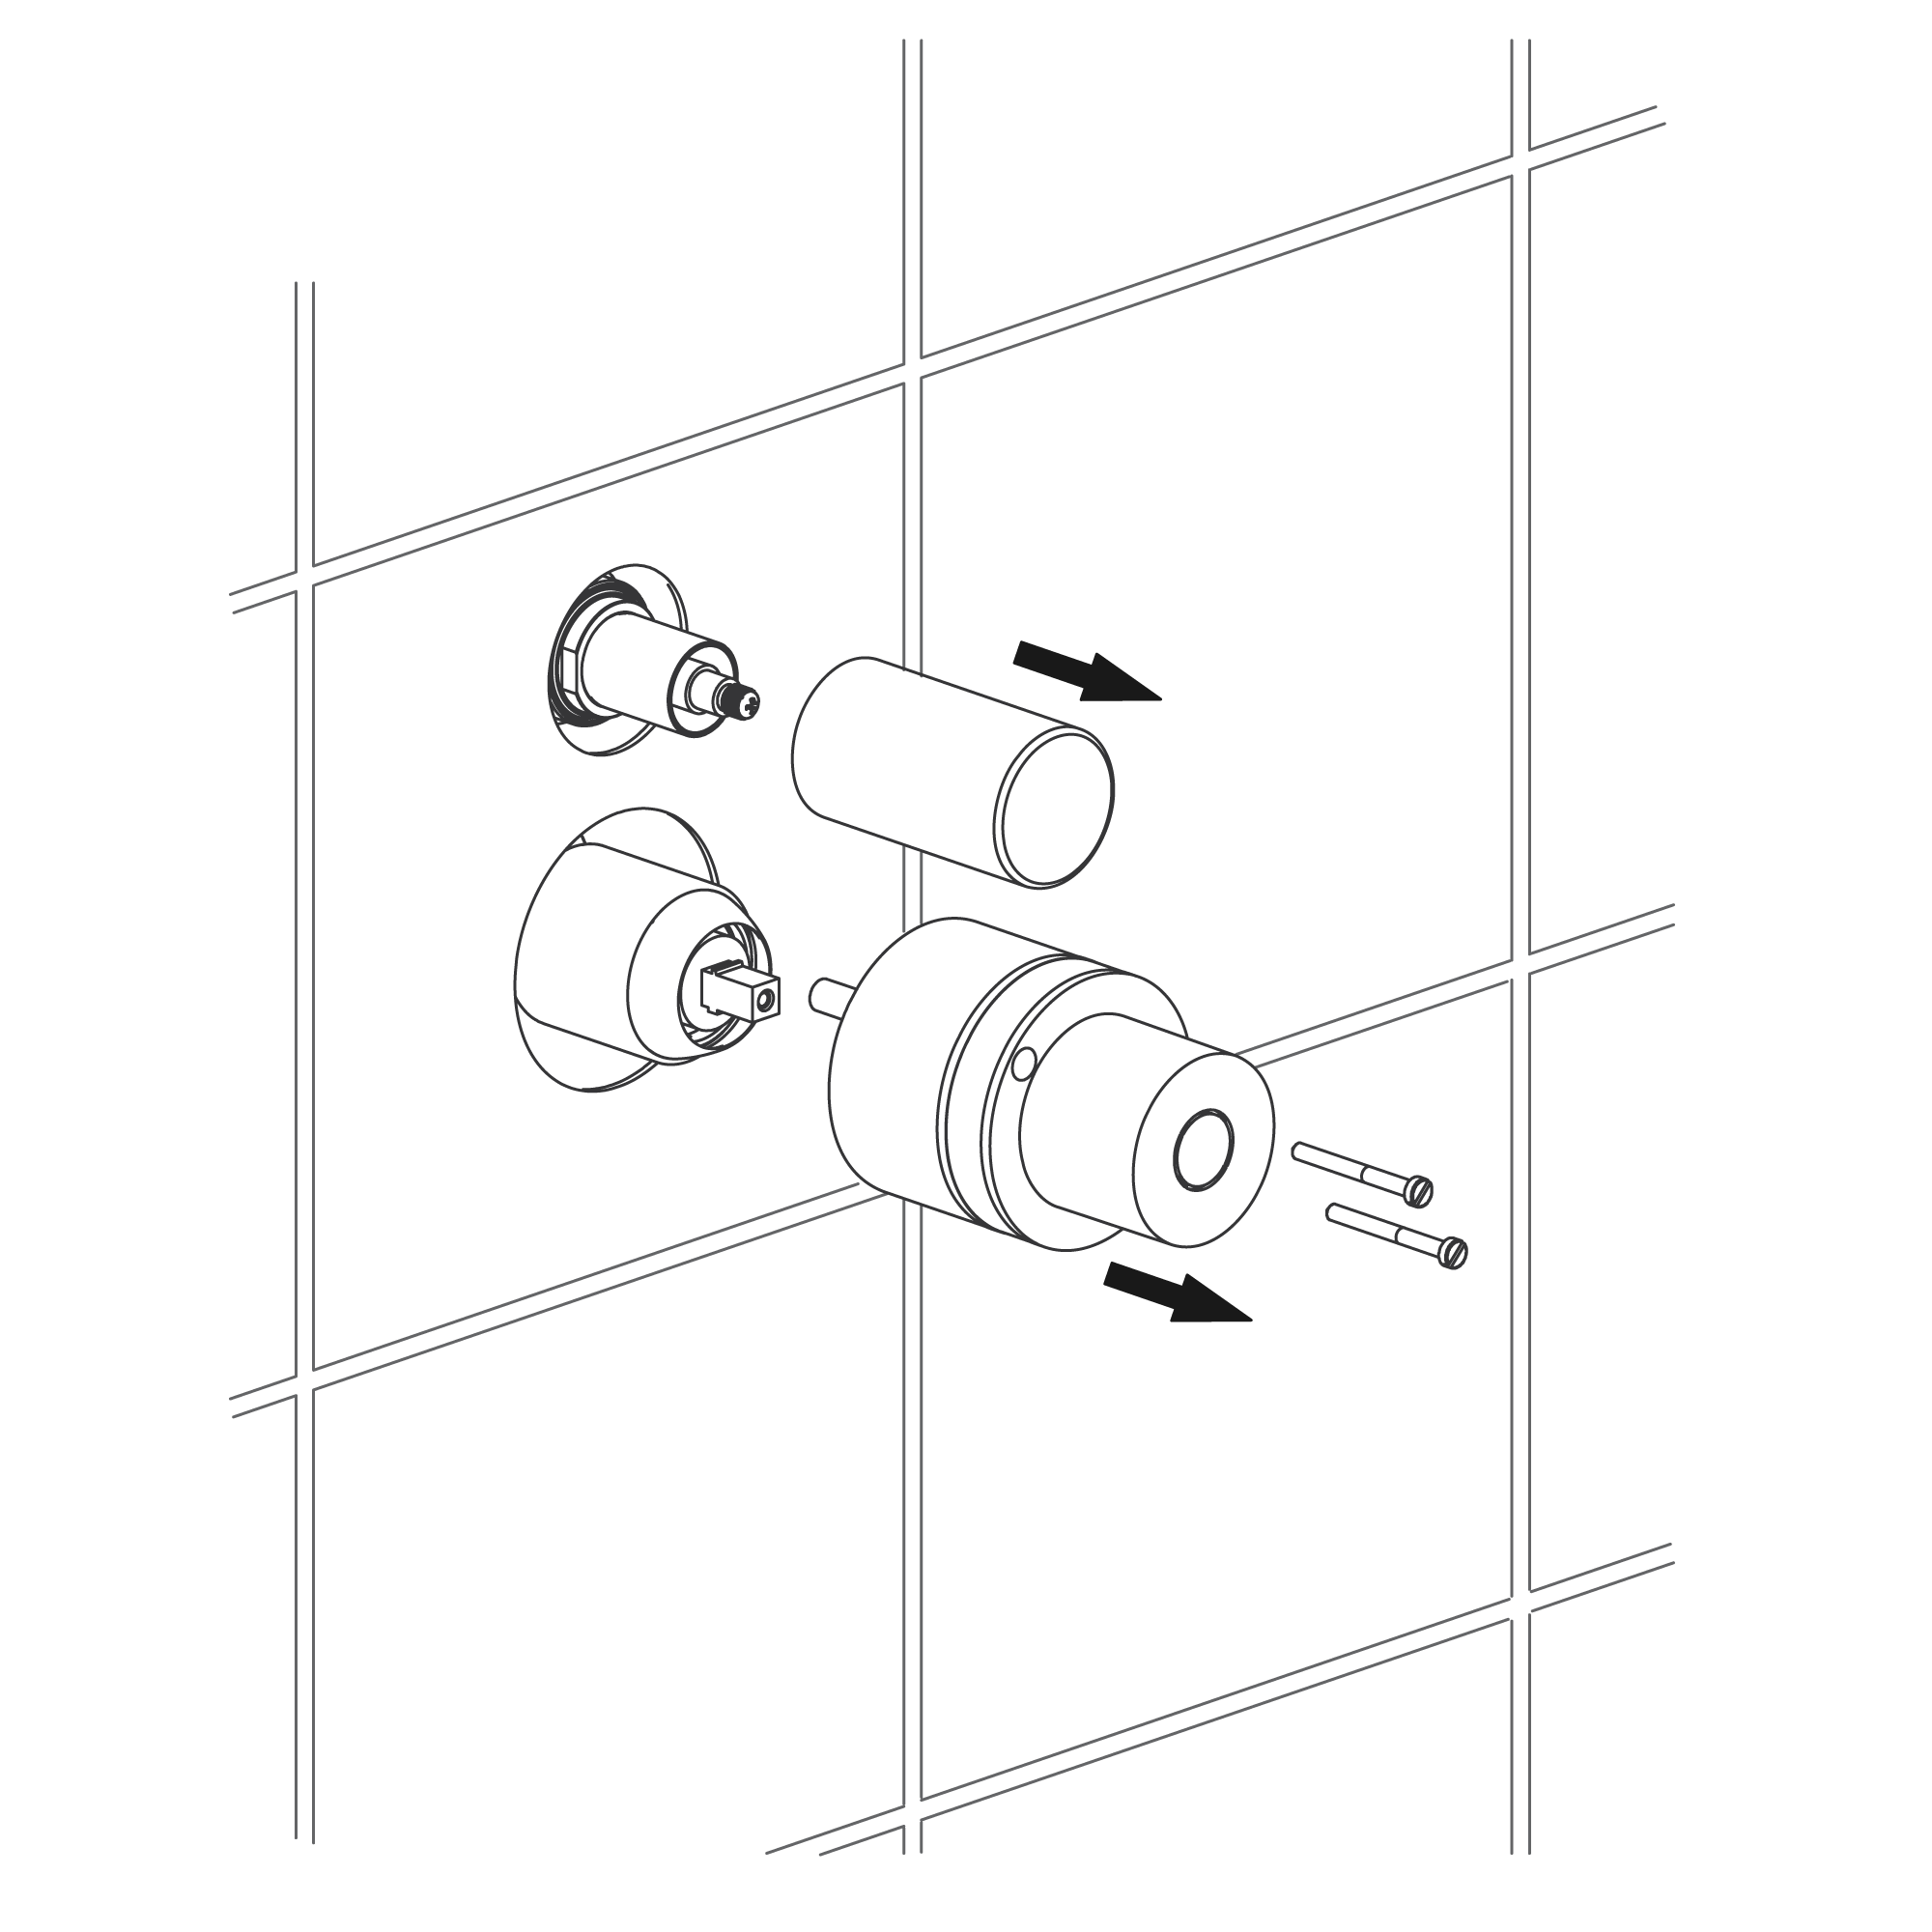
Shower Mixer Installation Instructions
shower mixer
shower mixer
Step 1:
mixer
Step 2:
shower mixer
shower mixer
Step 3:
Step 4:
shower mixer
shower mixer
Step 5:
mixer
Step 6:
shower mixer
shower mixer
Step 7:
1) Fix the shower valve into the wall with screws. Use a level to ensure that the valve is straight and level. (Important: Flush the water supply pipes to remove any dirt and debris before installing the valve body)
2) Wrap Teflon tape around the pipe thread. Connect hot and cold water supply lines and all the in-wall pipes (not included) as desired to the valve. Turn on the water supply and open the cartridge to check for leaks. Then, put on the protective cover.
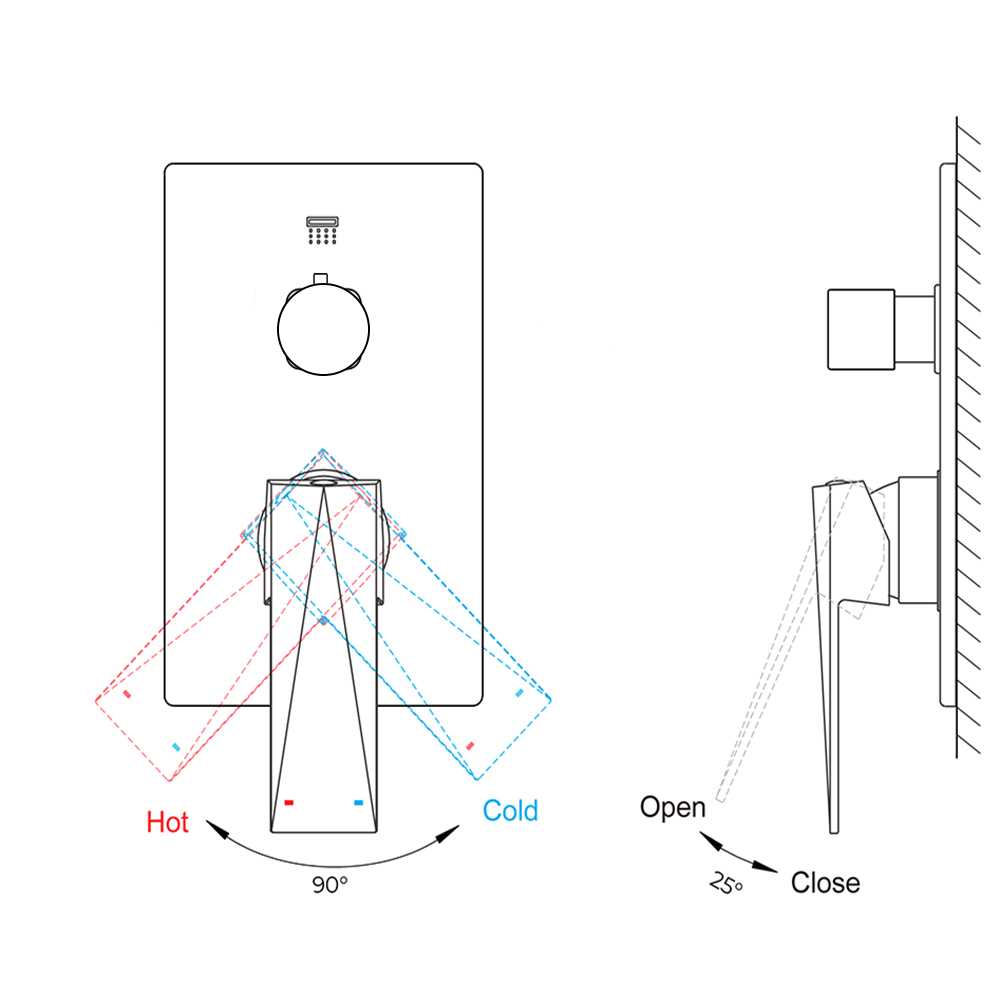
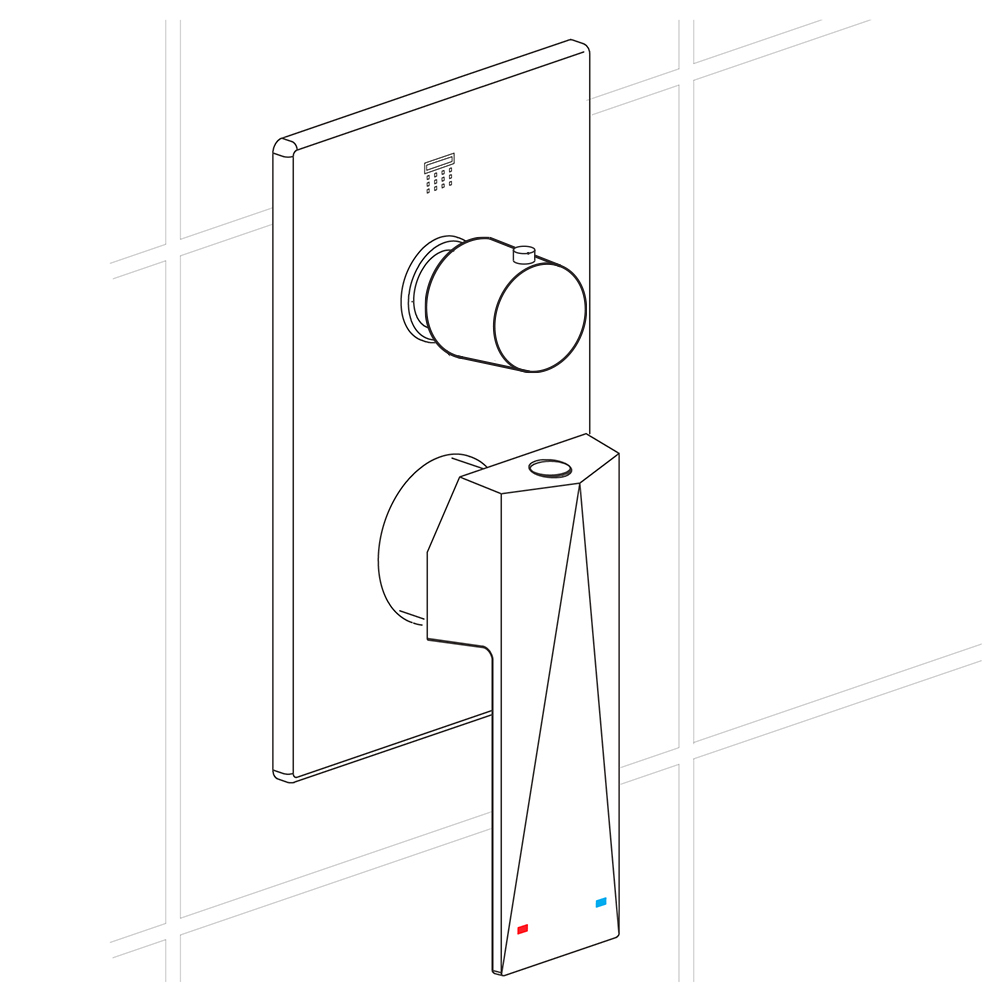
3) Remove the protective cover when the wall finished wall is completed. Install escutcheon onto the shower valve and press it against the finished wall. Then, install the handle and diverter knob to the valve and tighten set screws with the Allen key and put on the indication button.
Function: Check connections for leaks and check function of fitting. Flow is diverted automatically from shower outlet to bath inlet when the fitting is closed.
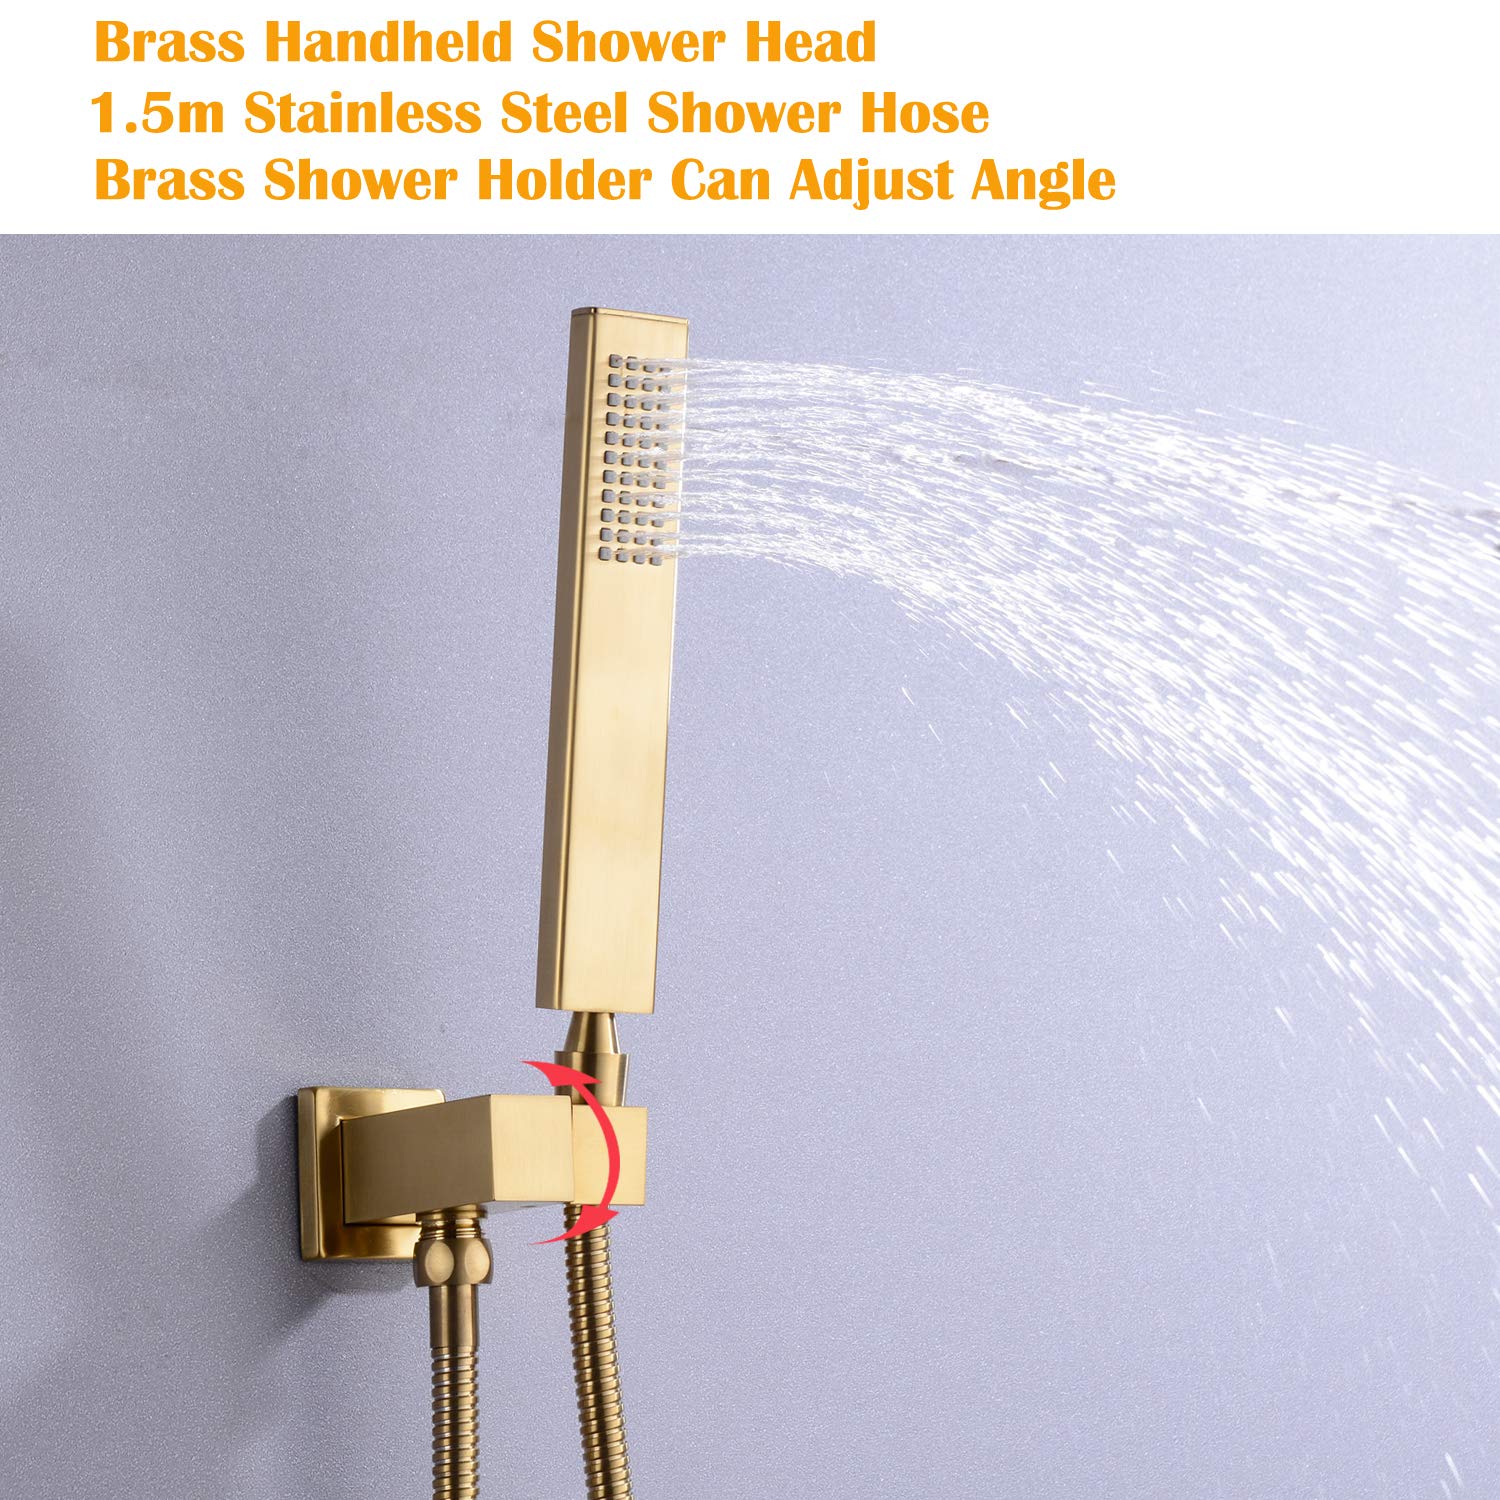
Hand Held Shower
Connection 1 :
Connection 2 :
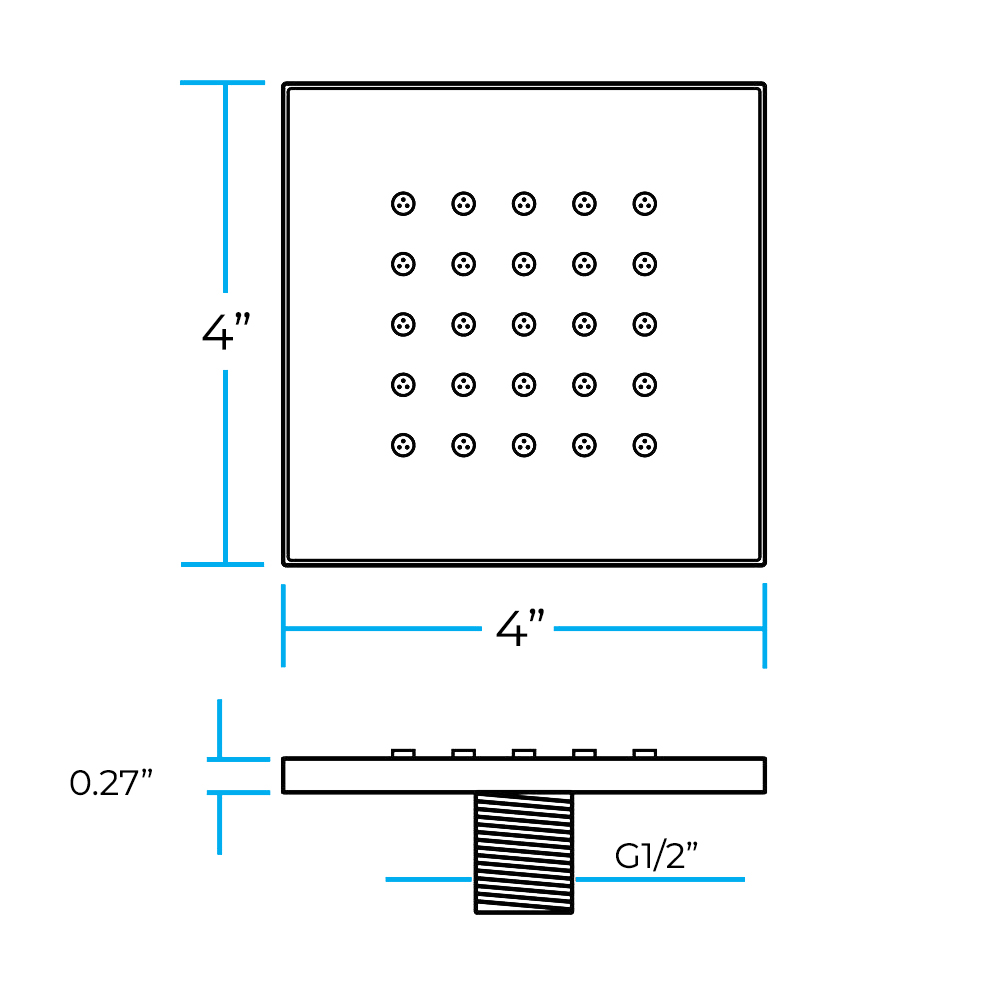
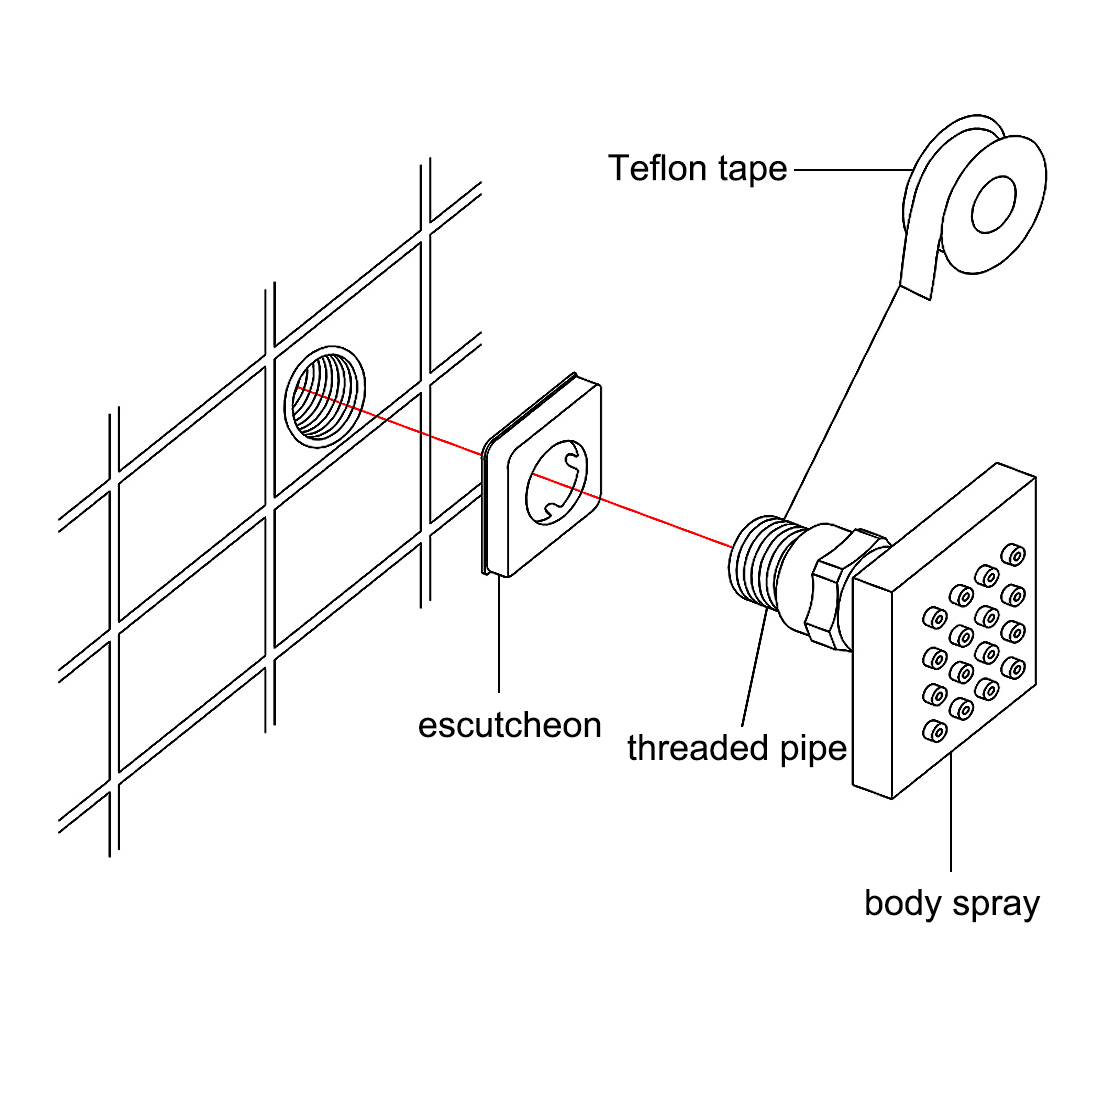
Shower Body Jets Installation Instructions
Step 1:
Step 2:
body spray
Step 3: (Pressure Balancing Loop)
Rough-in Suggestion: This installation requires a 1/2" male threaded pipe fitting to extend 1/4" beyond the finished surface. The plumber should install a properly anchored 1/2" female pipe fitting (i.e. a drop-ear ell) recessed into the wall, into which a brass pipe nipple of proper length can be fitted once the finished wall is complete. Note: The hole size opening should be 1.5" max diameter.
Bodyspray placement: Custom shower systems are sized to the user or users. Bodysprays are normally placed at the upper back, middle back, and upper thigh. Always position bodysprays according to the preferences of the user(s).
Pressure Balancing Loop: If installing bodysprays in a bank of 3 or fewer, a pressure balancing loop is not necessary. If installing bodysprays in a bank of 4 or greater, a pressure balancing loop must be used to keep the pressure even between the bodysprays.
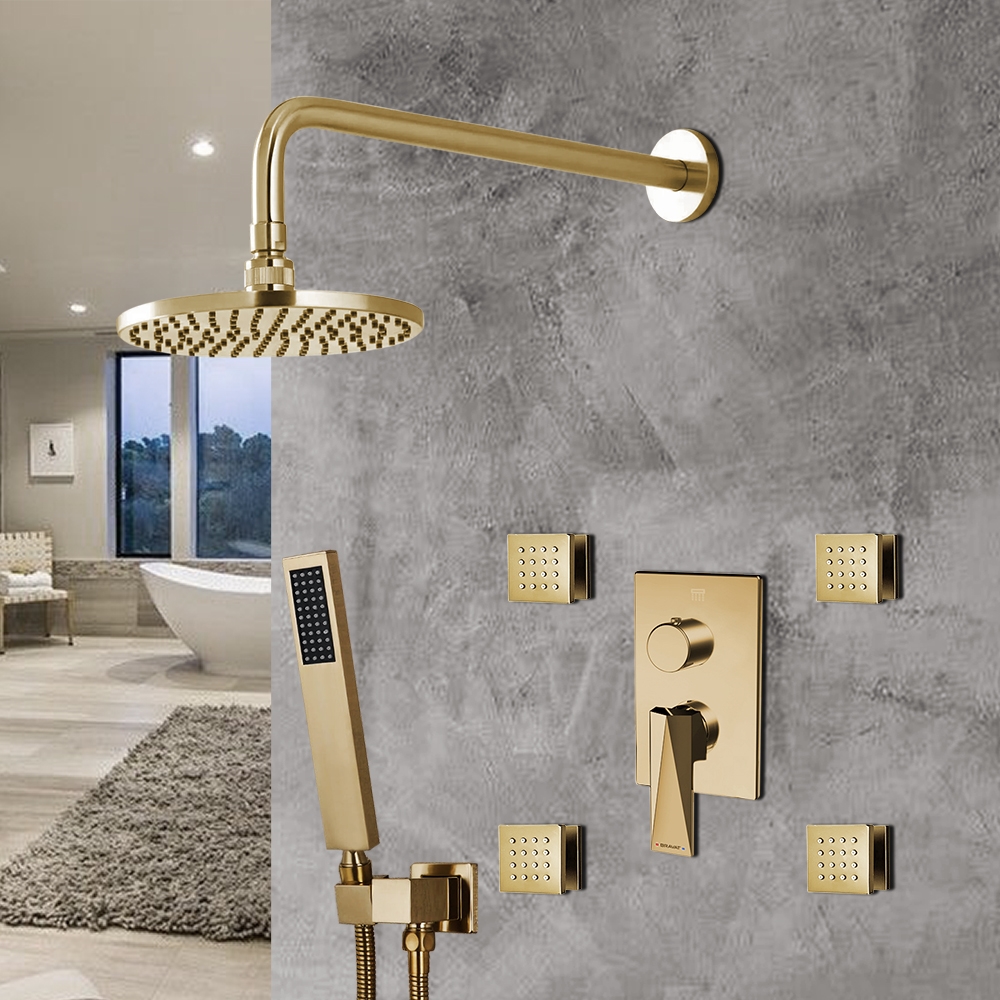
Bravat Brushed Gold Shower Set With Valve Mixer 3-Way Concealed Wall Mounted
The Bravat Brushed Gold Thermostatic Shower Set With Valve Mixer 3-Way Concealed Wall Mount is one of the most trendiest finishes across decor styles in the bathroom. It has a contemporary style with a beautiful gold finish. When it comes to new bathroom upgrades, FontanaShowers is offering shape, finishes and styles that you've looking for.
Features:
Visit Product Page
Brand Name: FontanaShowers
Model Number: FS1054
Type: Shower Set & Shower Mixer
Style: Contemporary
Type: Fixed Support Type
Surface Finish: Brushed Gold
Installation Type: Wall Mount
Number of Jets: Four
Control Type: Single Holder Dual Control
Size: 7.91"-11.85" (201-300mm)
Surface Treatment: Polished
Valve Core Material: Ceramic
Bath Shower Type: In-Wall Shower Mixer
Valve Type: Ceramic Valve
Faucet Handle Material: Zinc Alloy
Mixer Body Material: Brass
Valve Included: Yes
Embedment Depth: 2.16" (55mm)
Valve Panel Dimension: 6.29"x6.29" (160x160mm)
Connector: G1/2"B (Standard)
Our team of specialists is ready and available to assist you with all your needs.