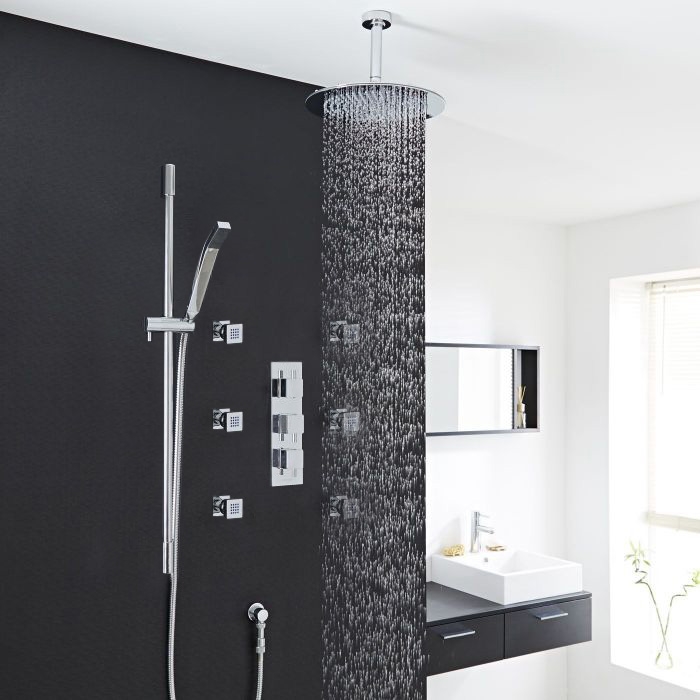
Installation Instructions For Fontana Atlantic Chrome Massage Shower System
Large Shower Head
|
|
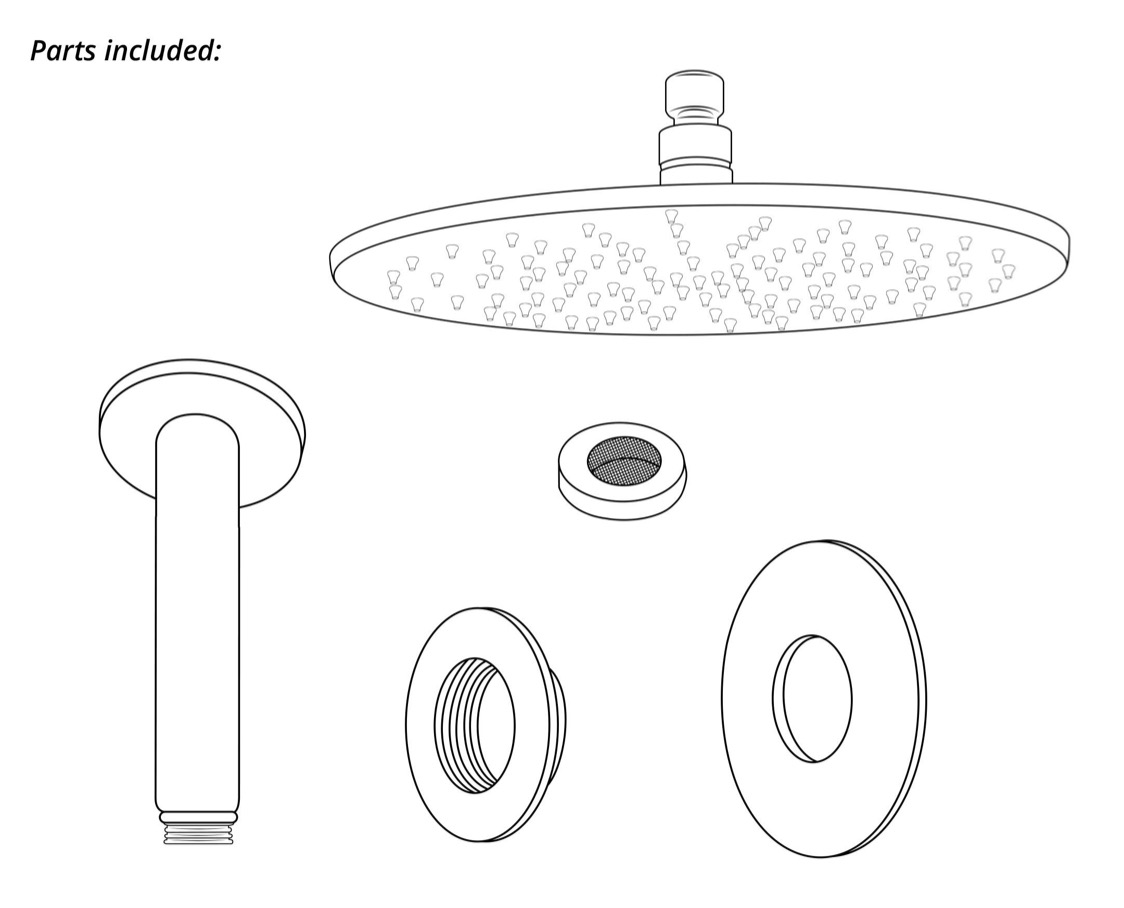
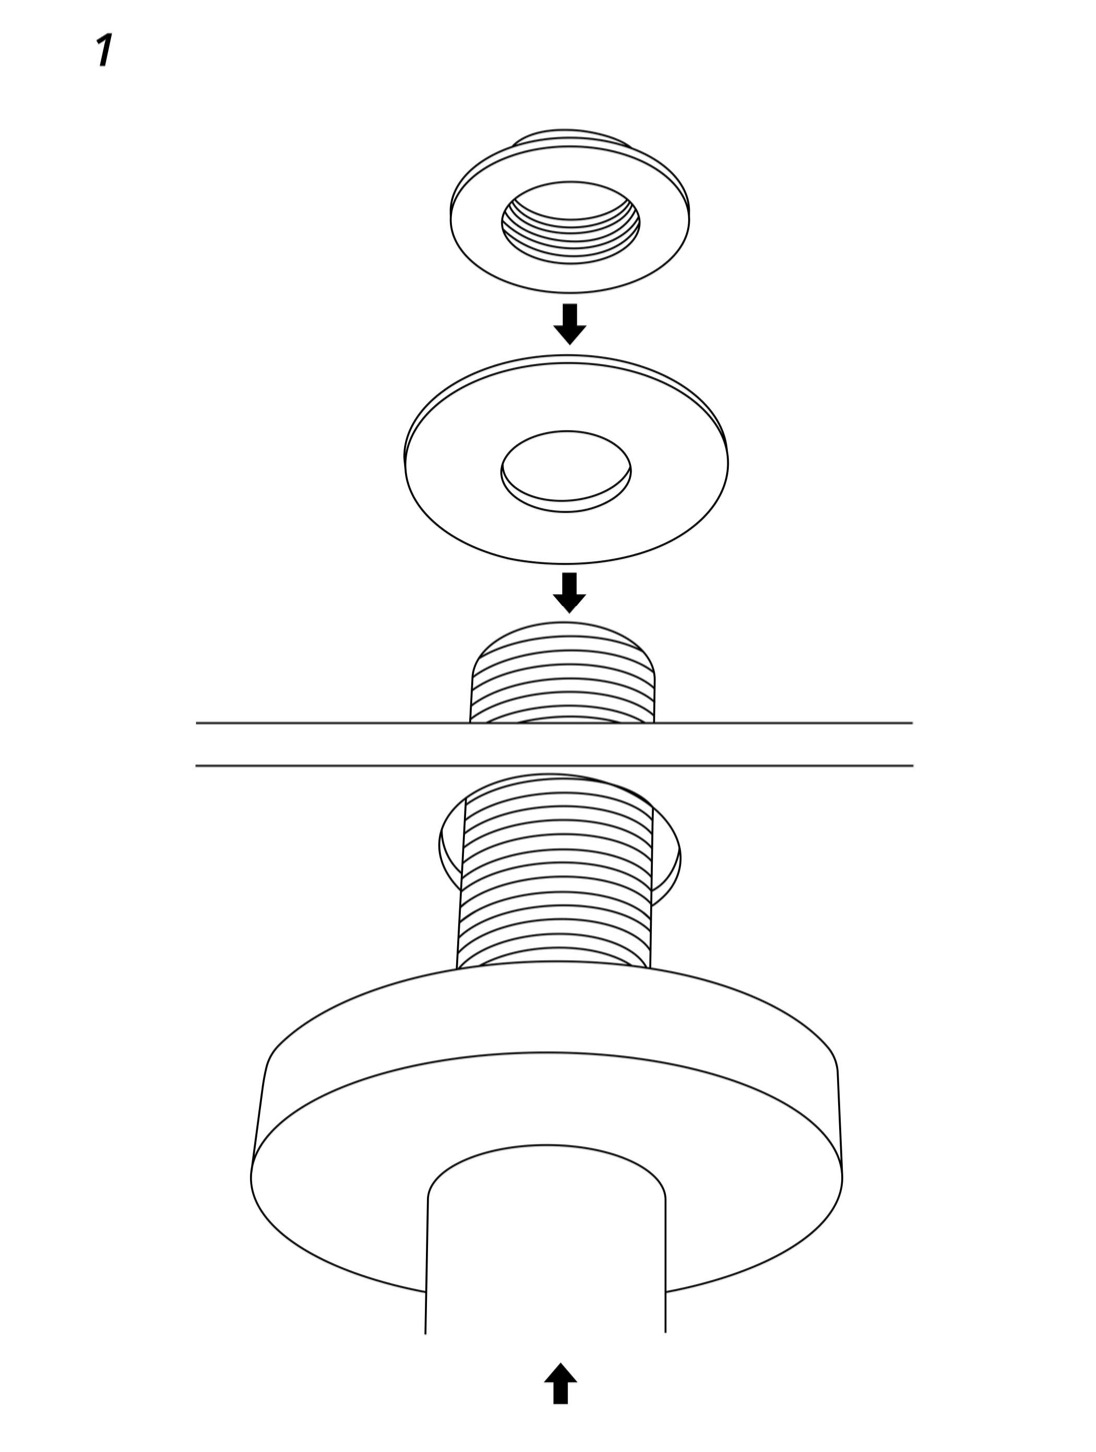
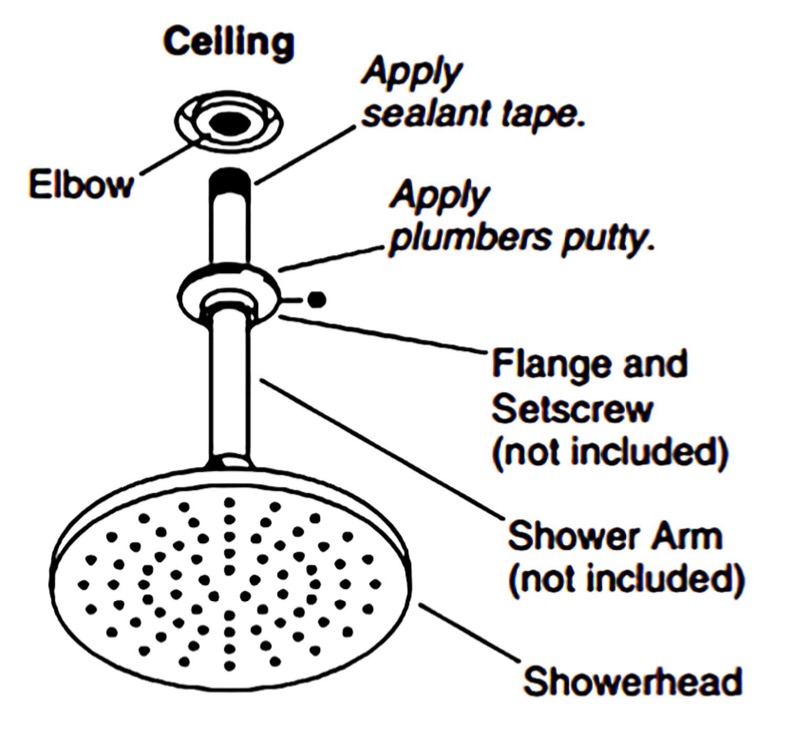
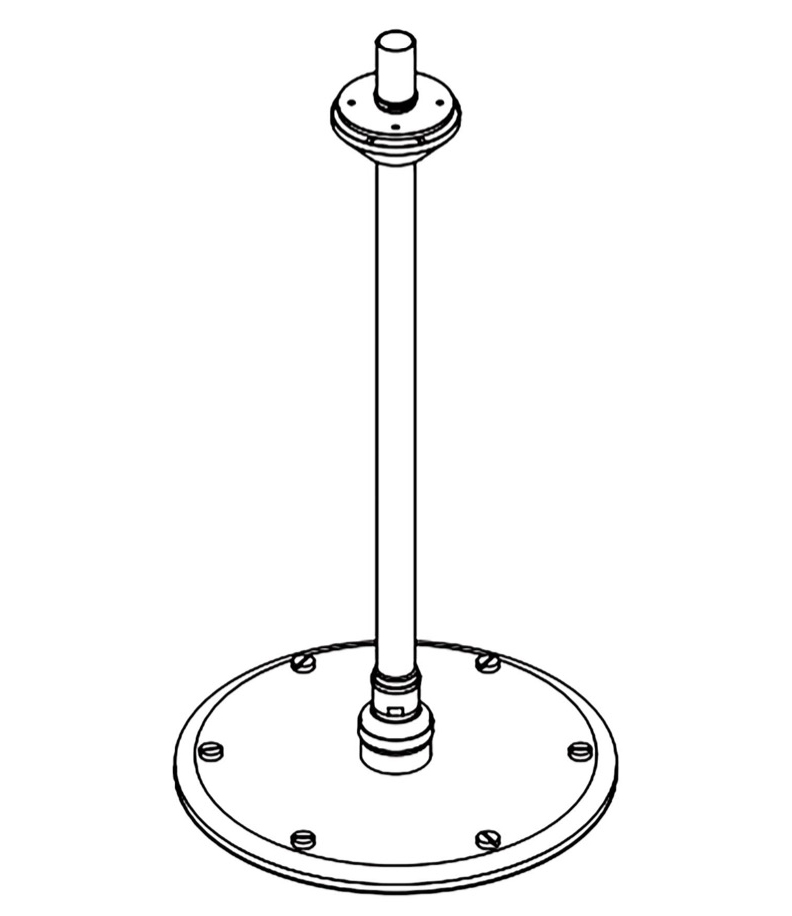
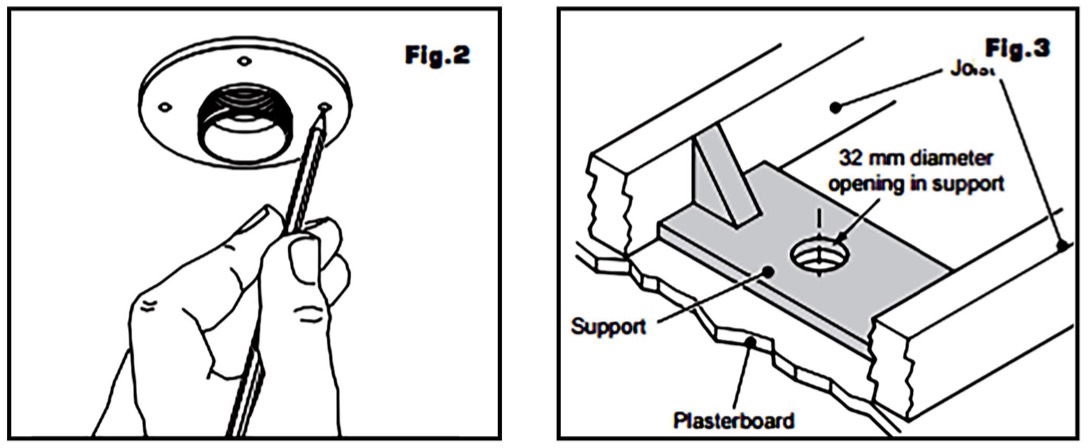
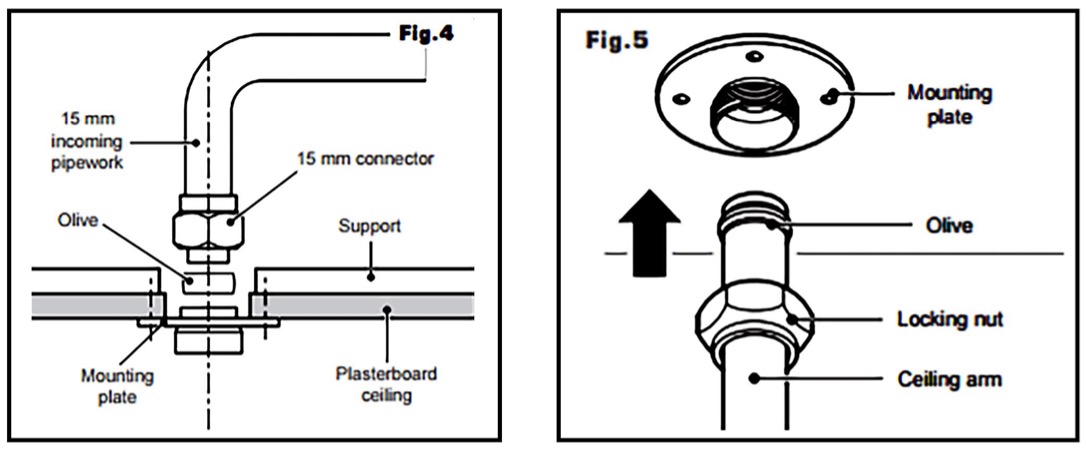
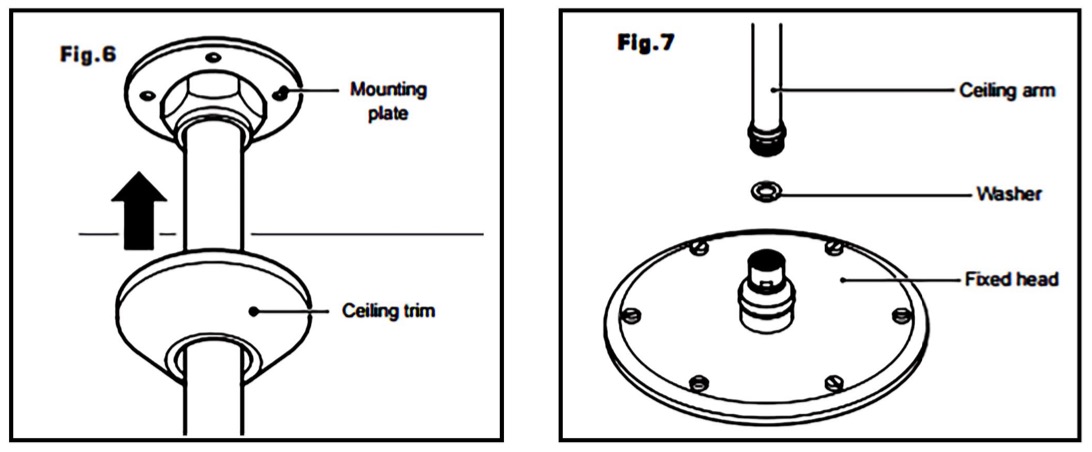
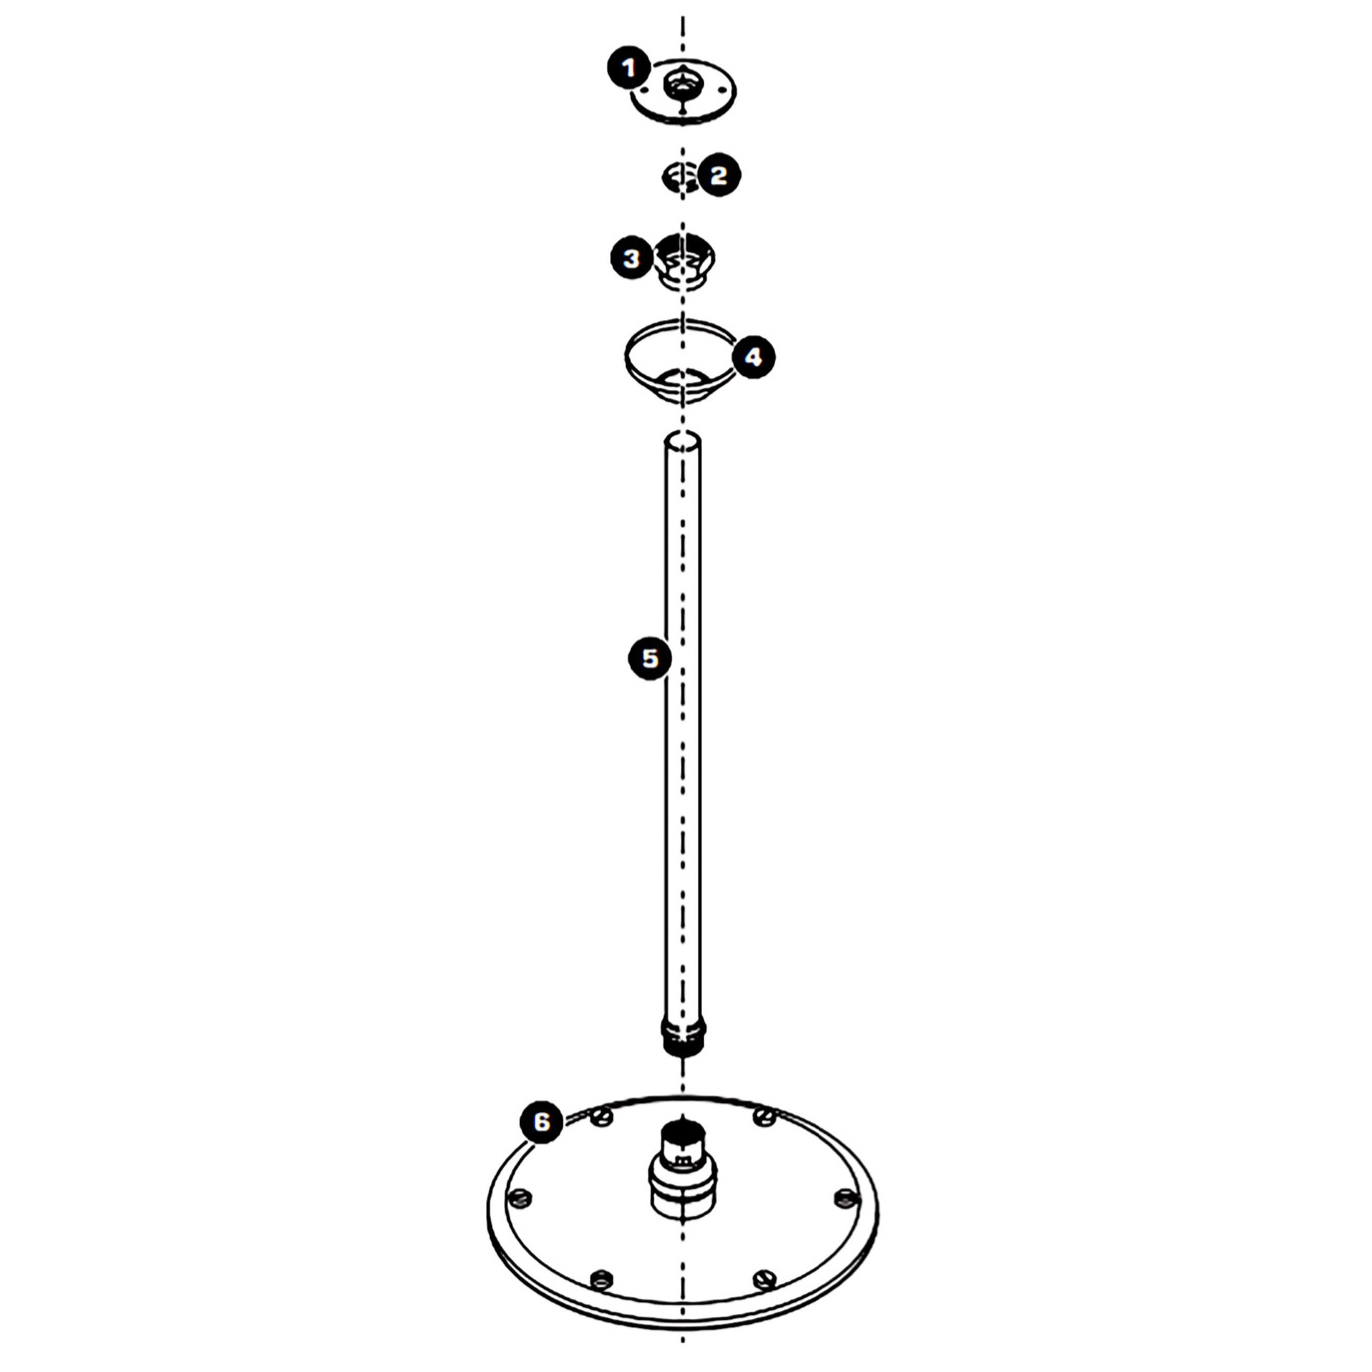
1. Ceiling arm mounting plate
2. Olive
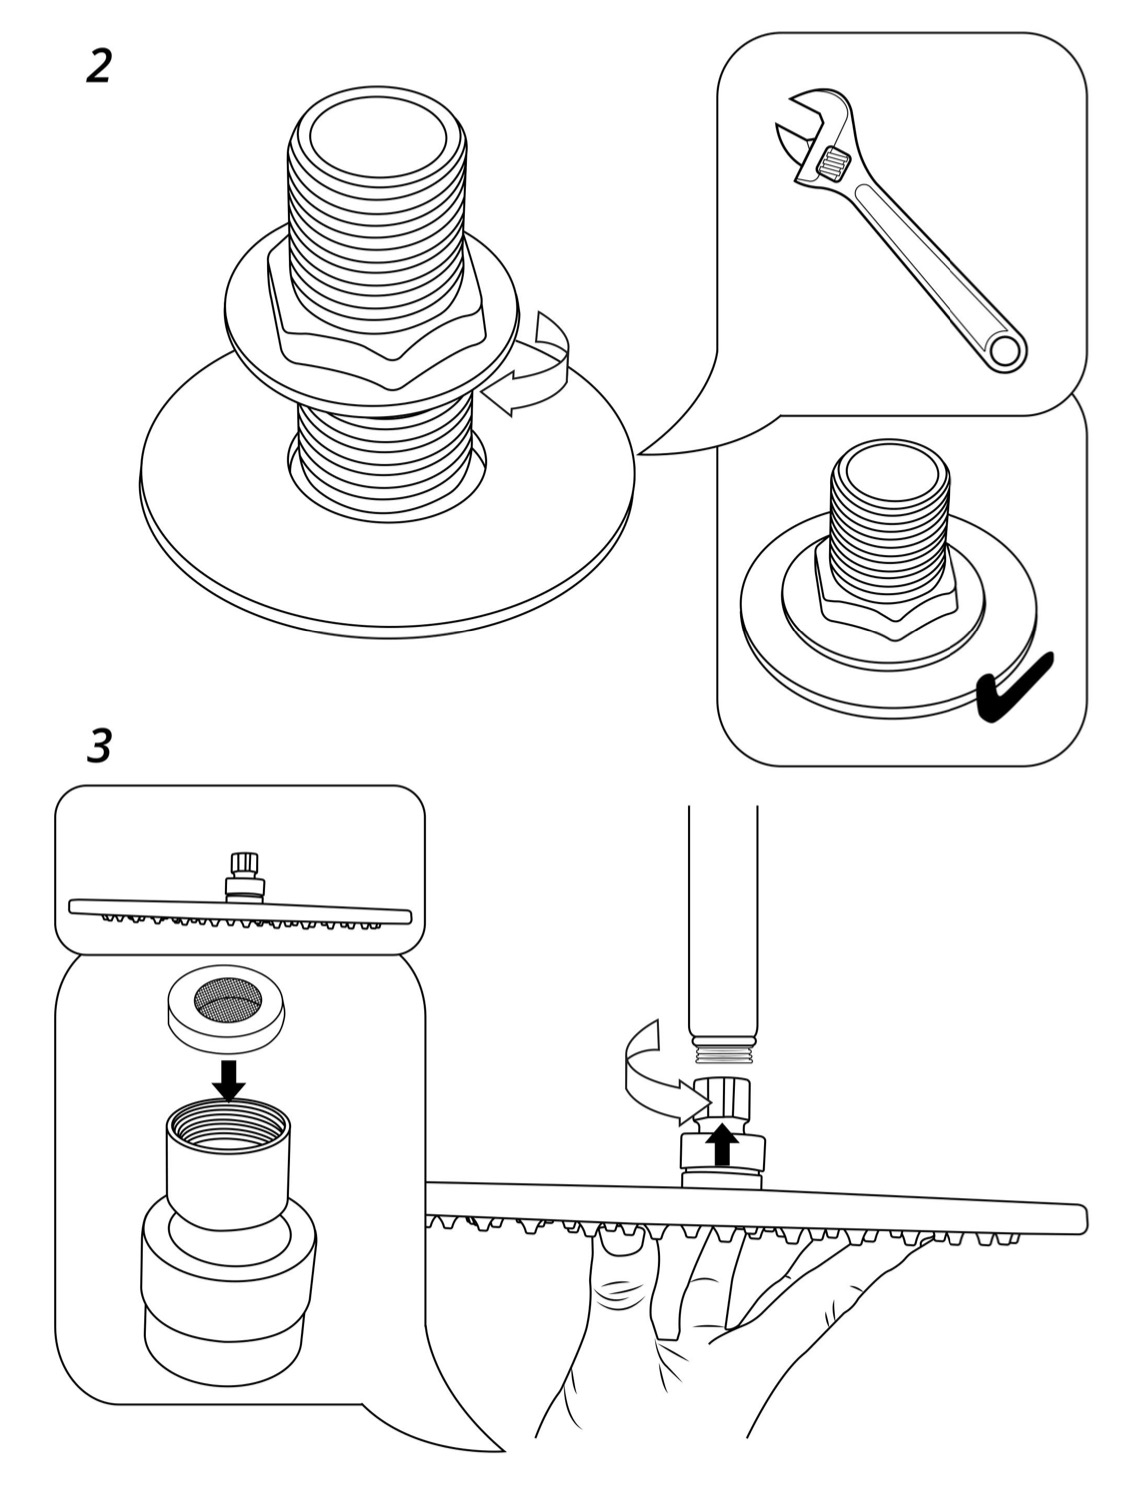
3. Locking nut
4. Ceiling trim
5. Ceiling arm
6. Emily fixed showerhead
7. Fixing screws and wall plugs (not shown)
Mixer Installation
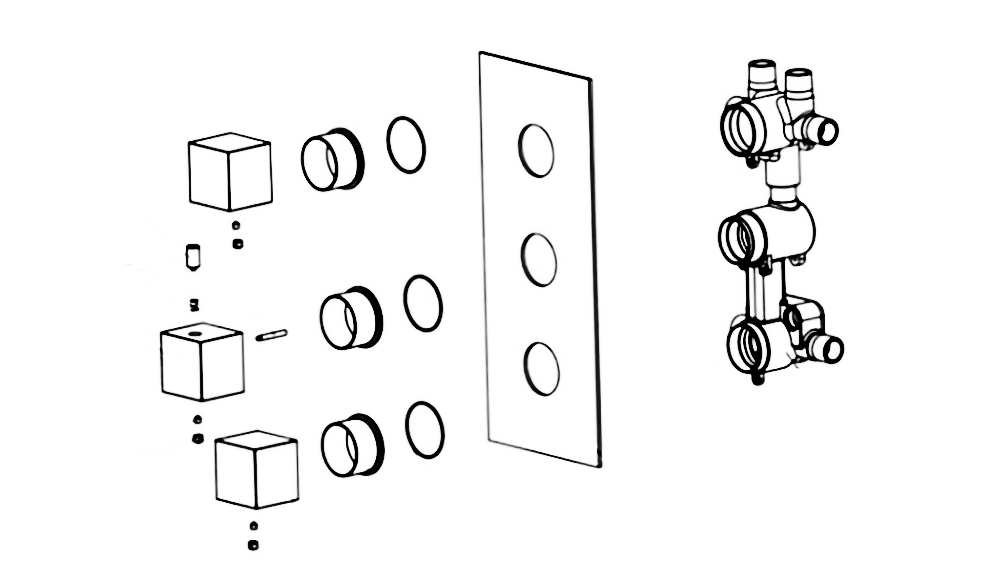
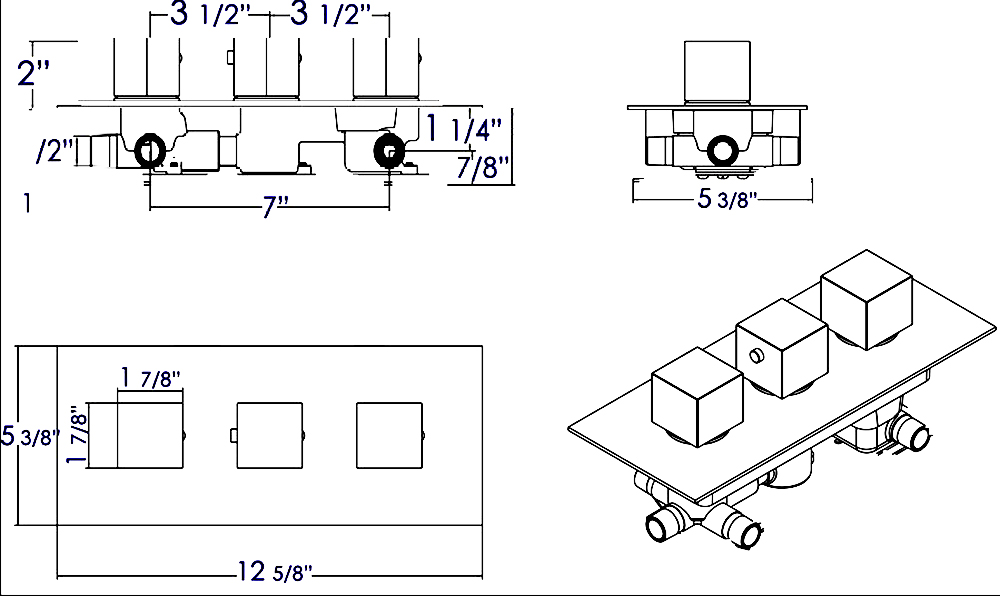
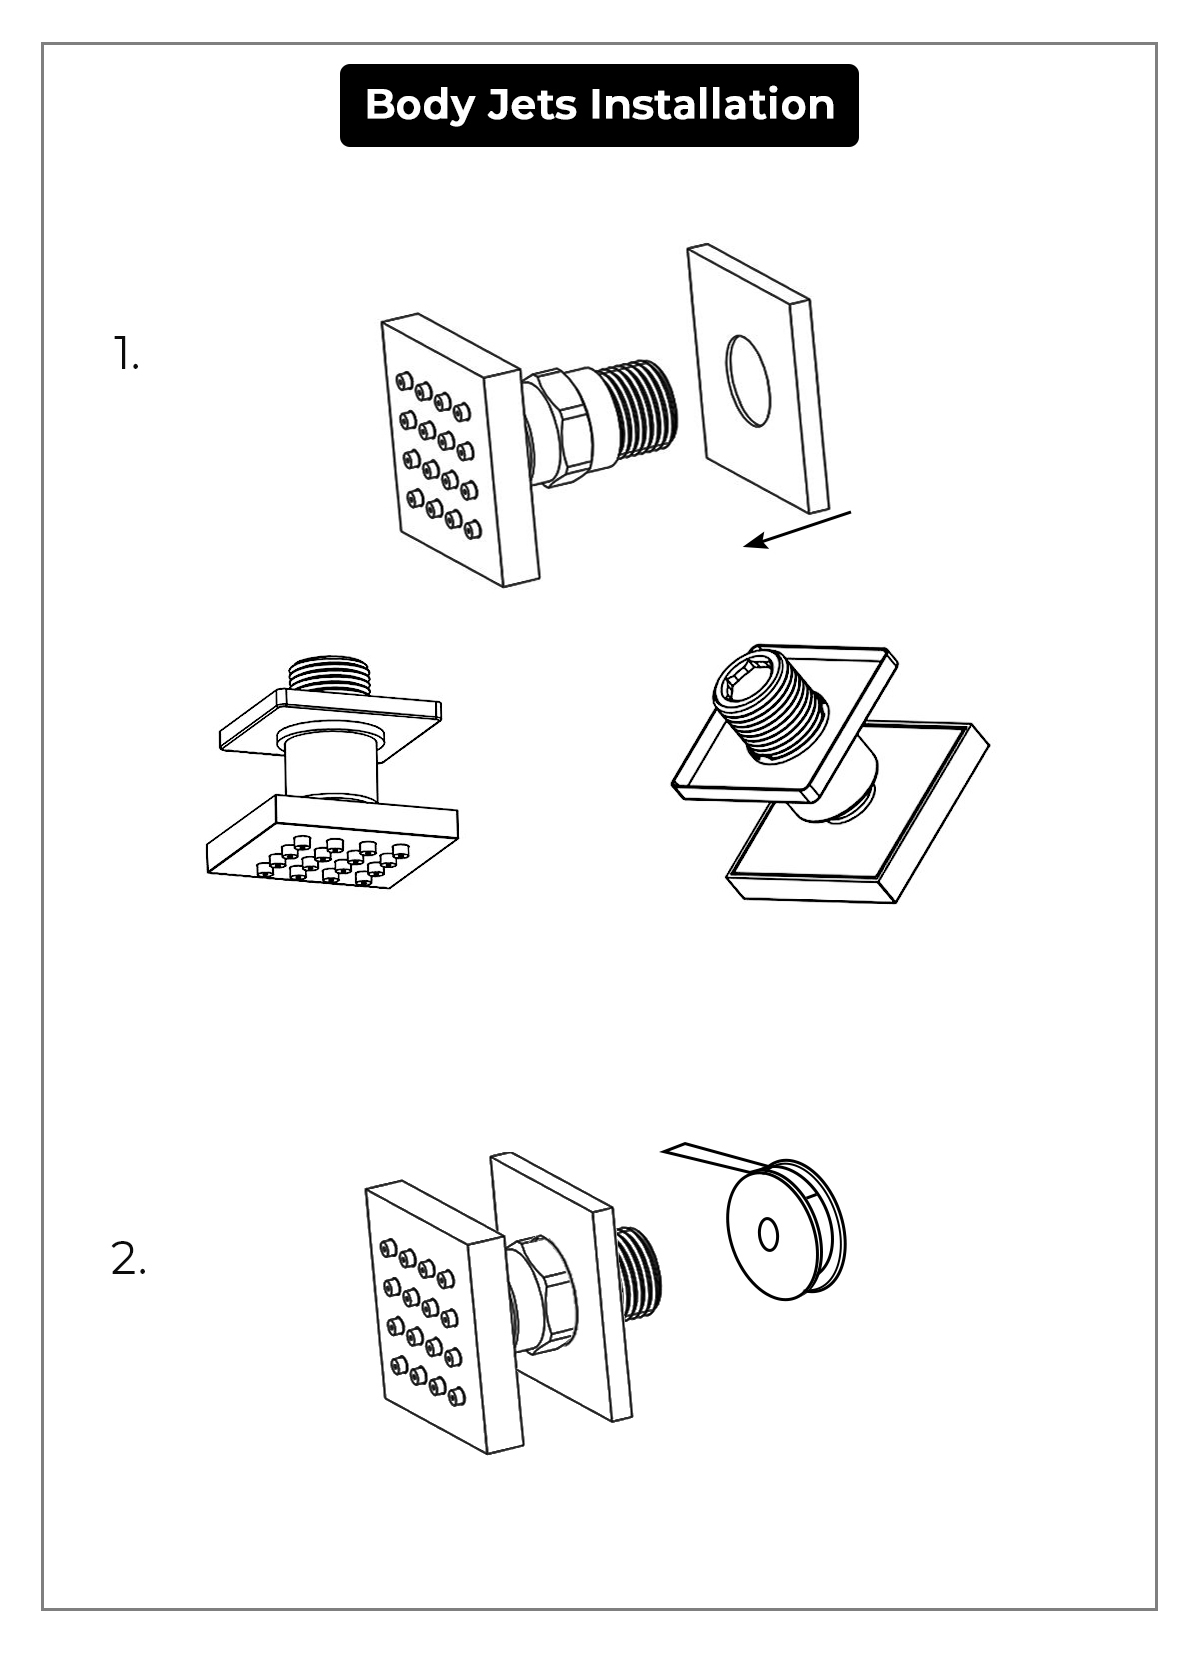
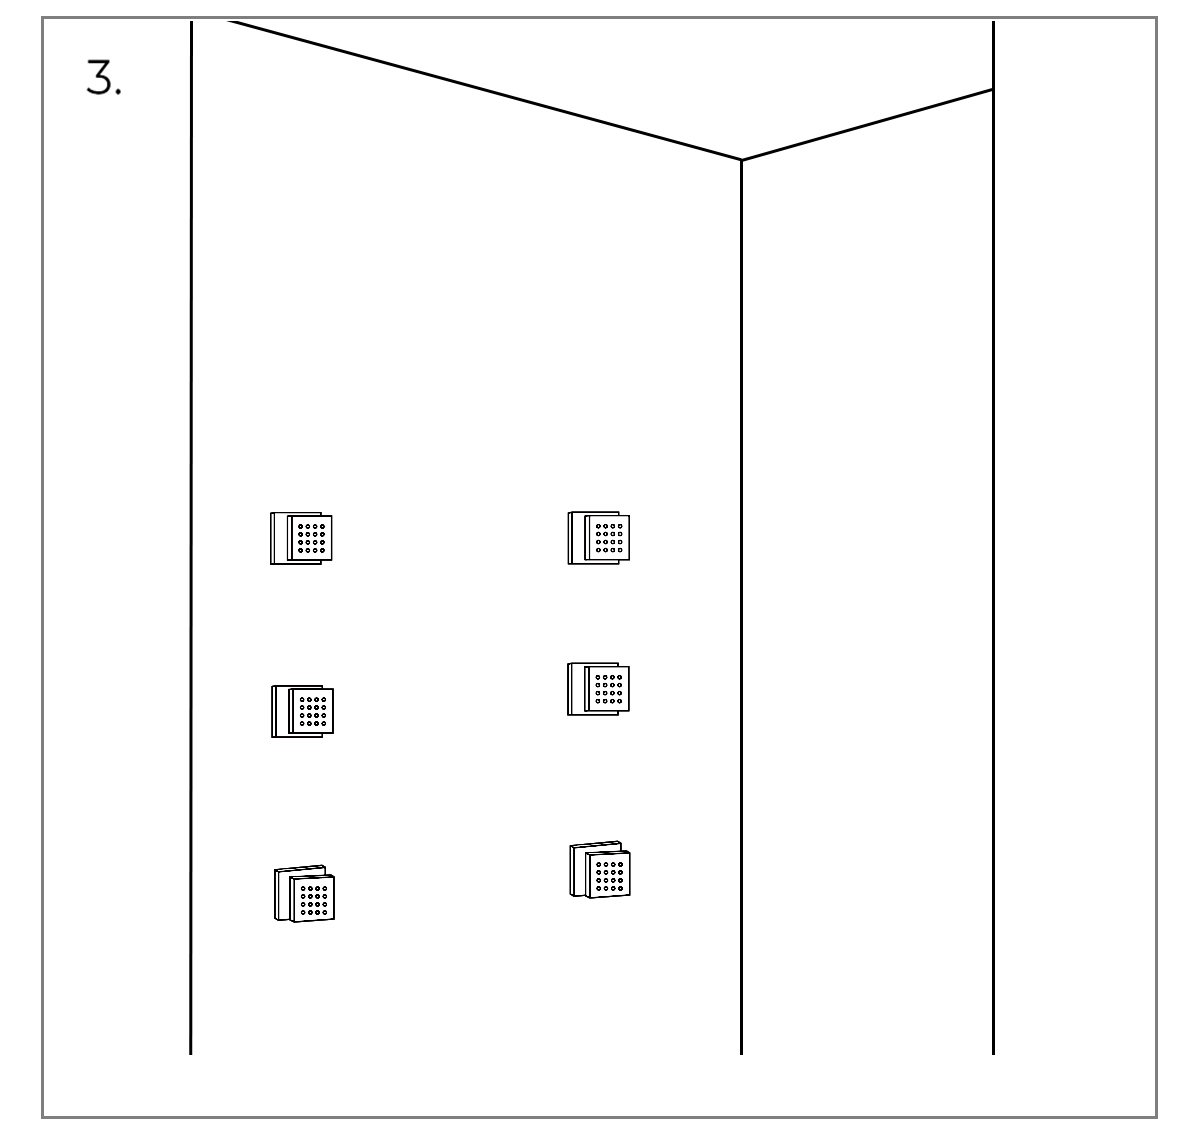
Body Jets Installation
1. Set the decorative cover on the body jet.
2. Roll the raw material belt in the thread screws.
3. Use a wrench to tighten 6 body jets on the water outlet holes in a clockwise direction.
Hand-Held Shower Installation
Supply Elbow Installation
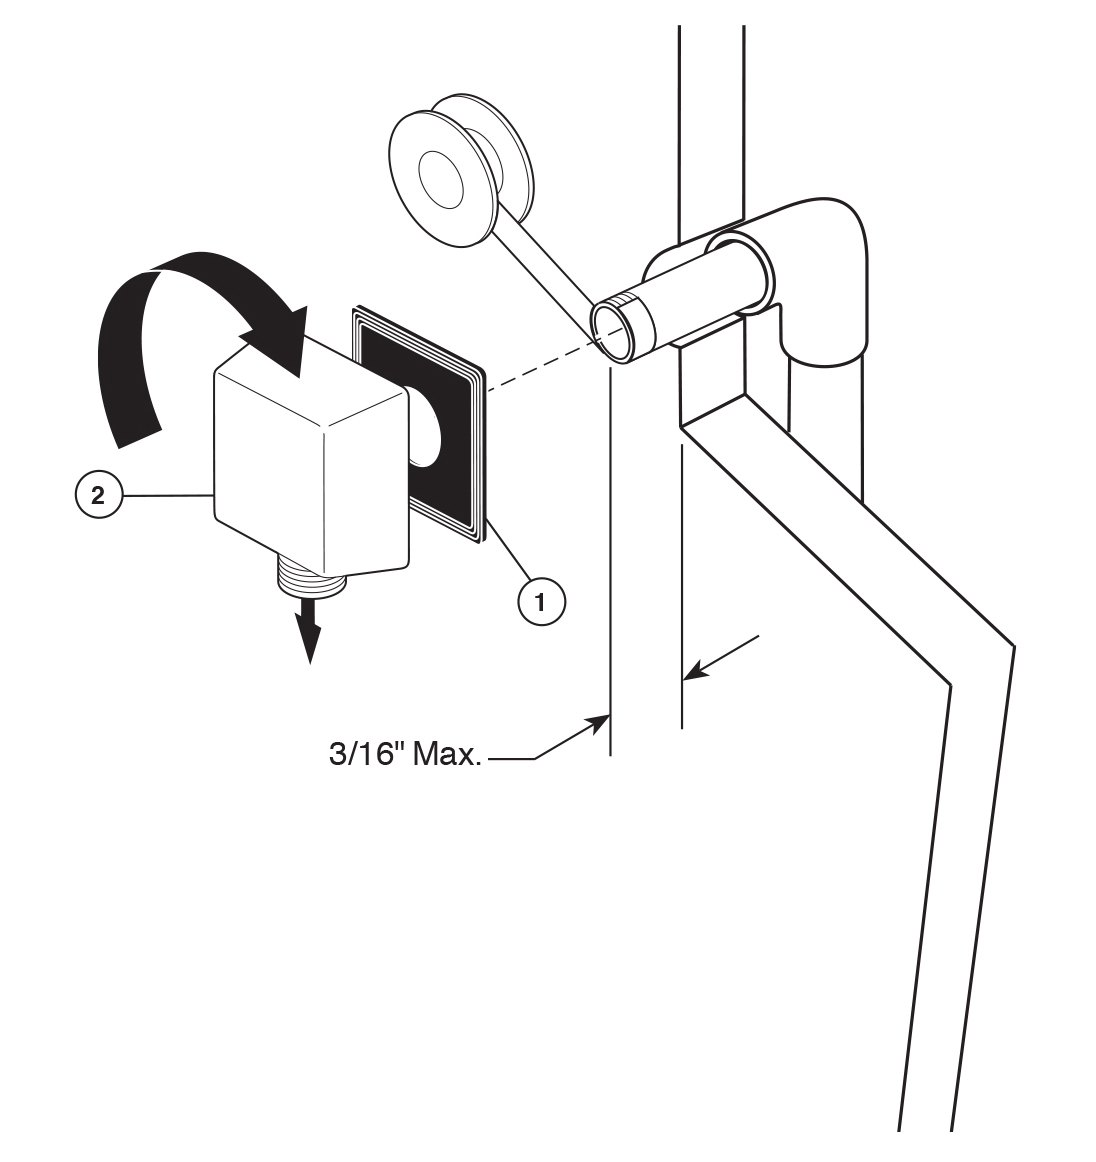
Apply plumber tape to threaded ends of 1/2" (13 mm) iron pipe nipple (not supplied) and thread into shower riser elbow so that nipple extends past the finished wall no more than 3/16" (4.8 mm) and no less than 1/16" (1.6 mm). Place the supplied installation gasket (1) behind the elbow (2). Screw the supply elbow onto the nipple making sure that the supply elbow outlet is in a downward-facing position. The minimum diameter for hole is 1" (25 mm) with a maximum of 1½” (38 mm).
Caution: To avoid damage to the supply elbow or hose finish during installation, wrap with a cloth or tape and use only a smooth-jawed wrench. DO NOT OVERTIGHTEN CONNECTIONS.
Placement Of The Slide Bar
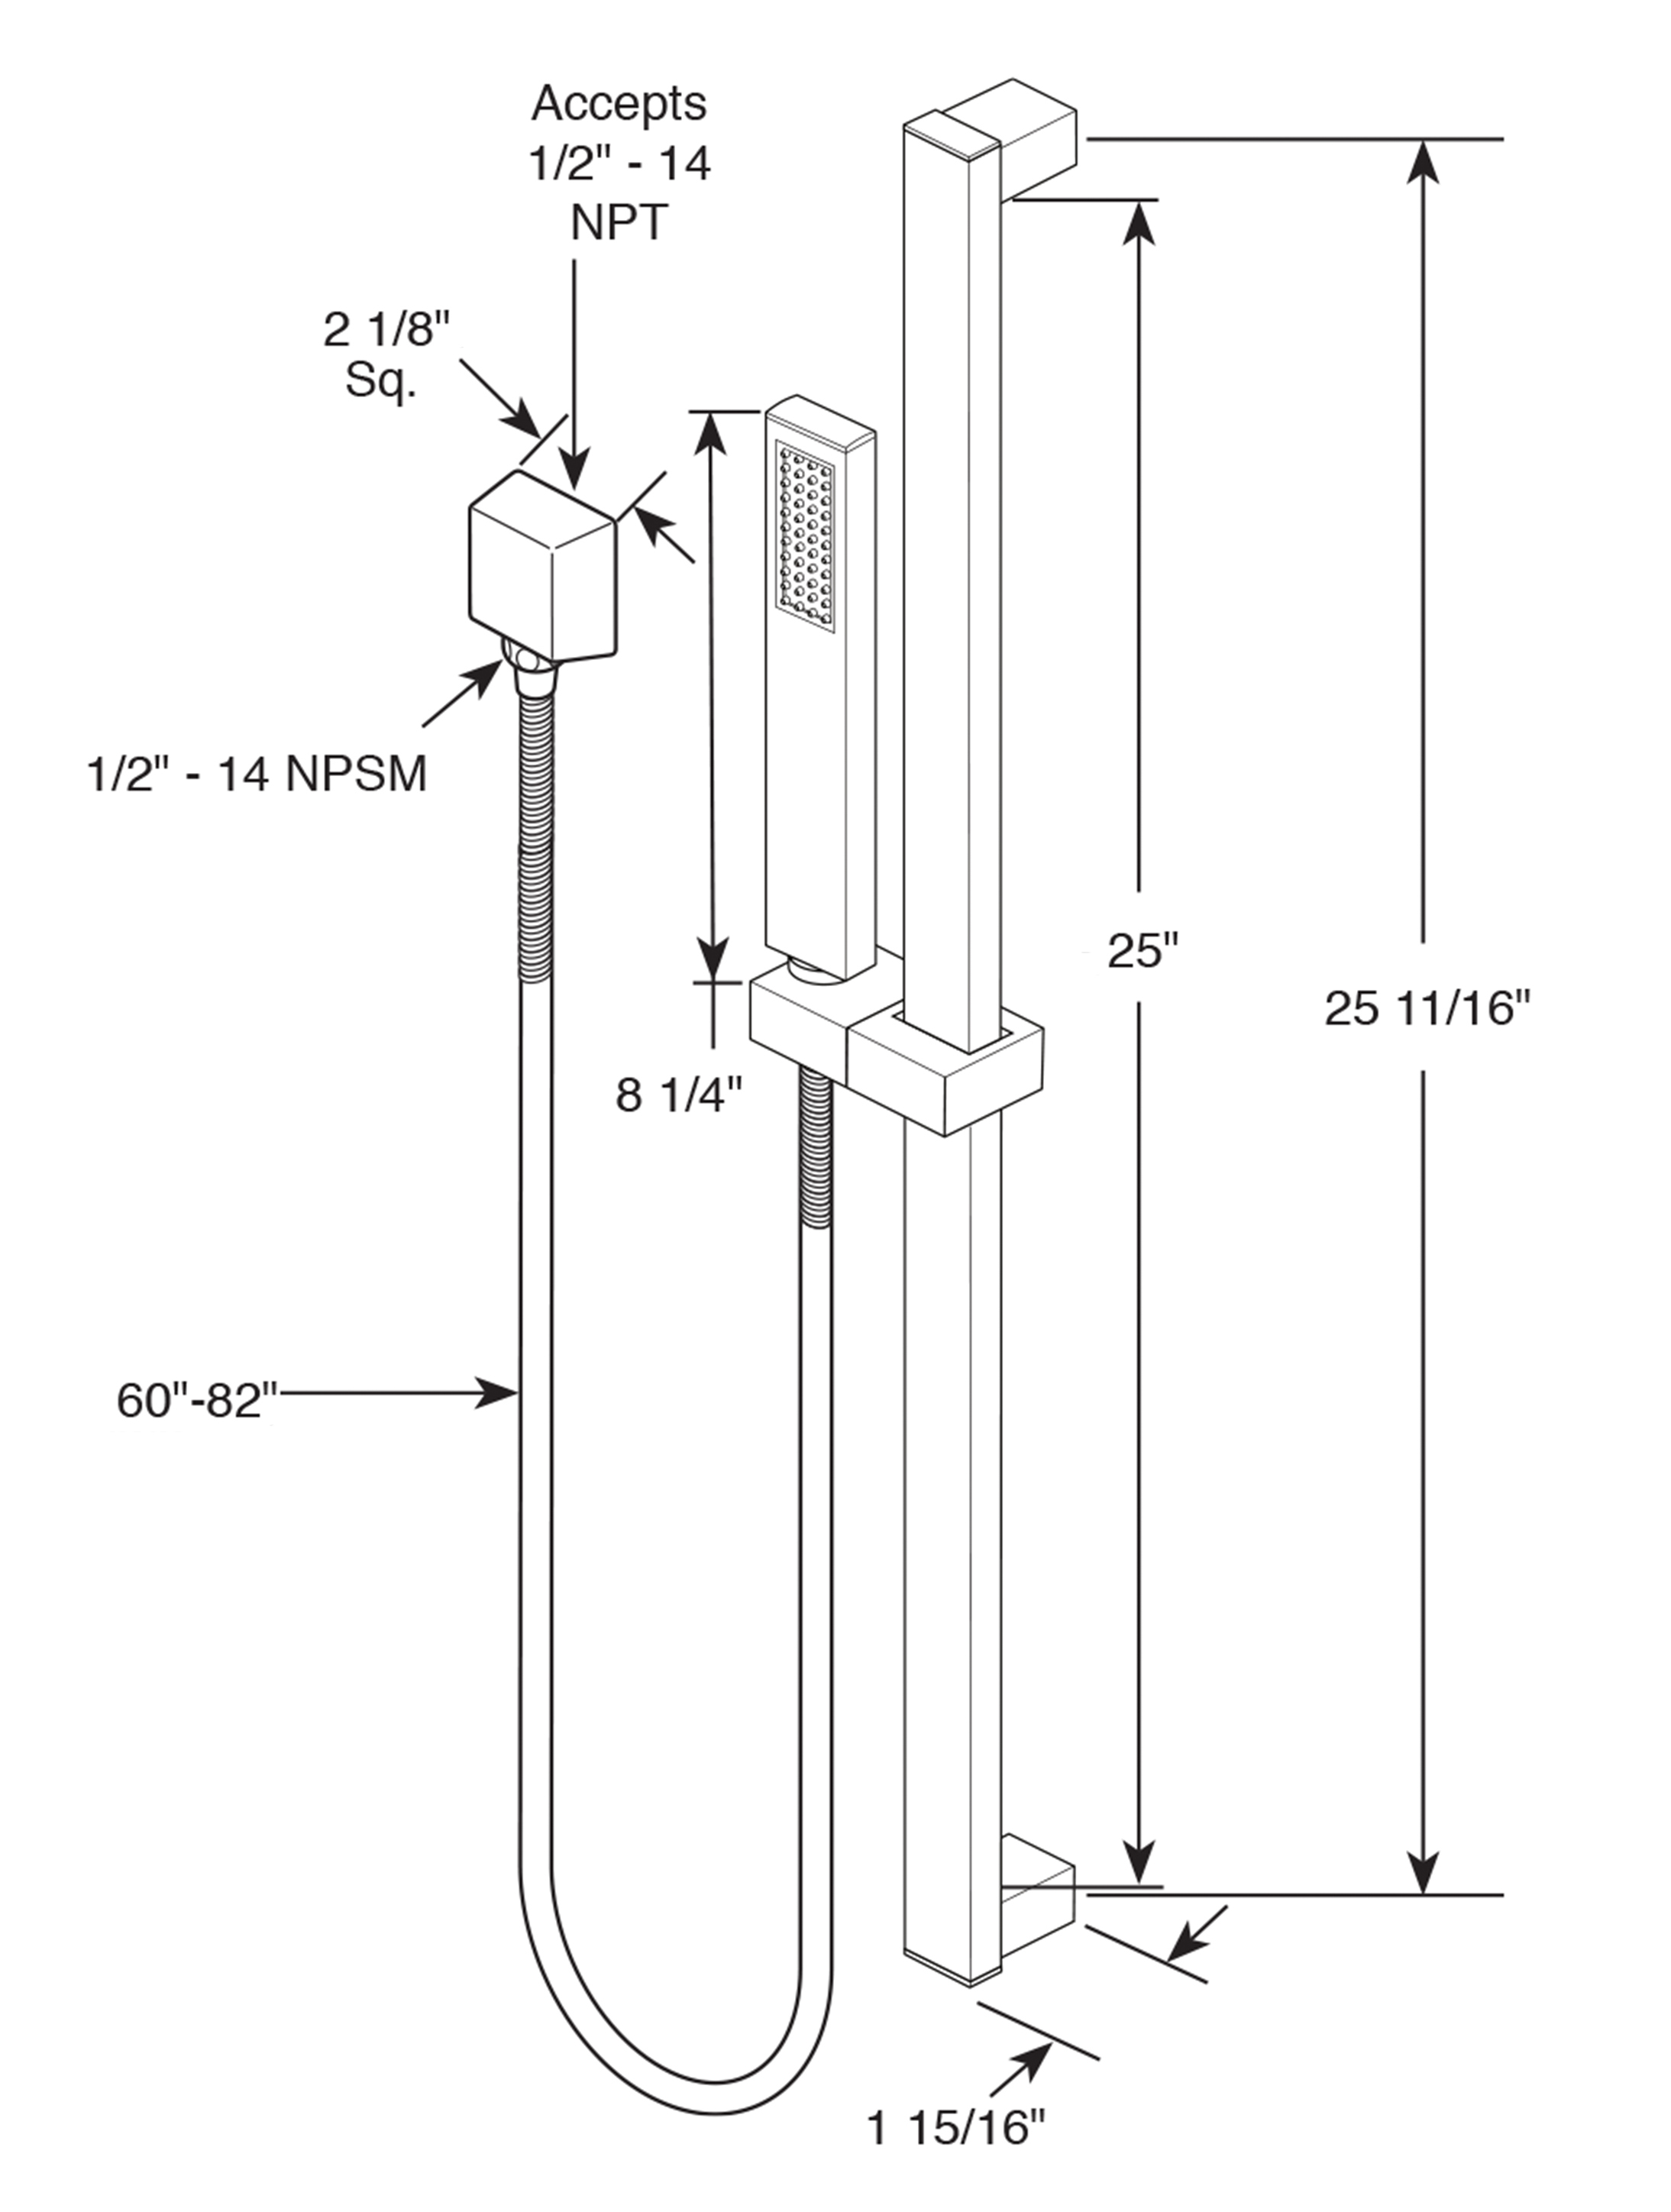
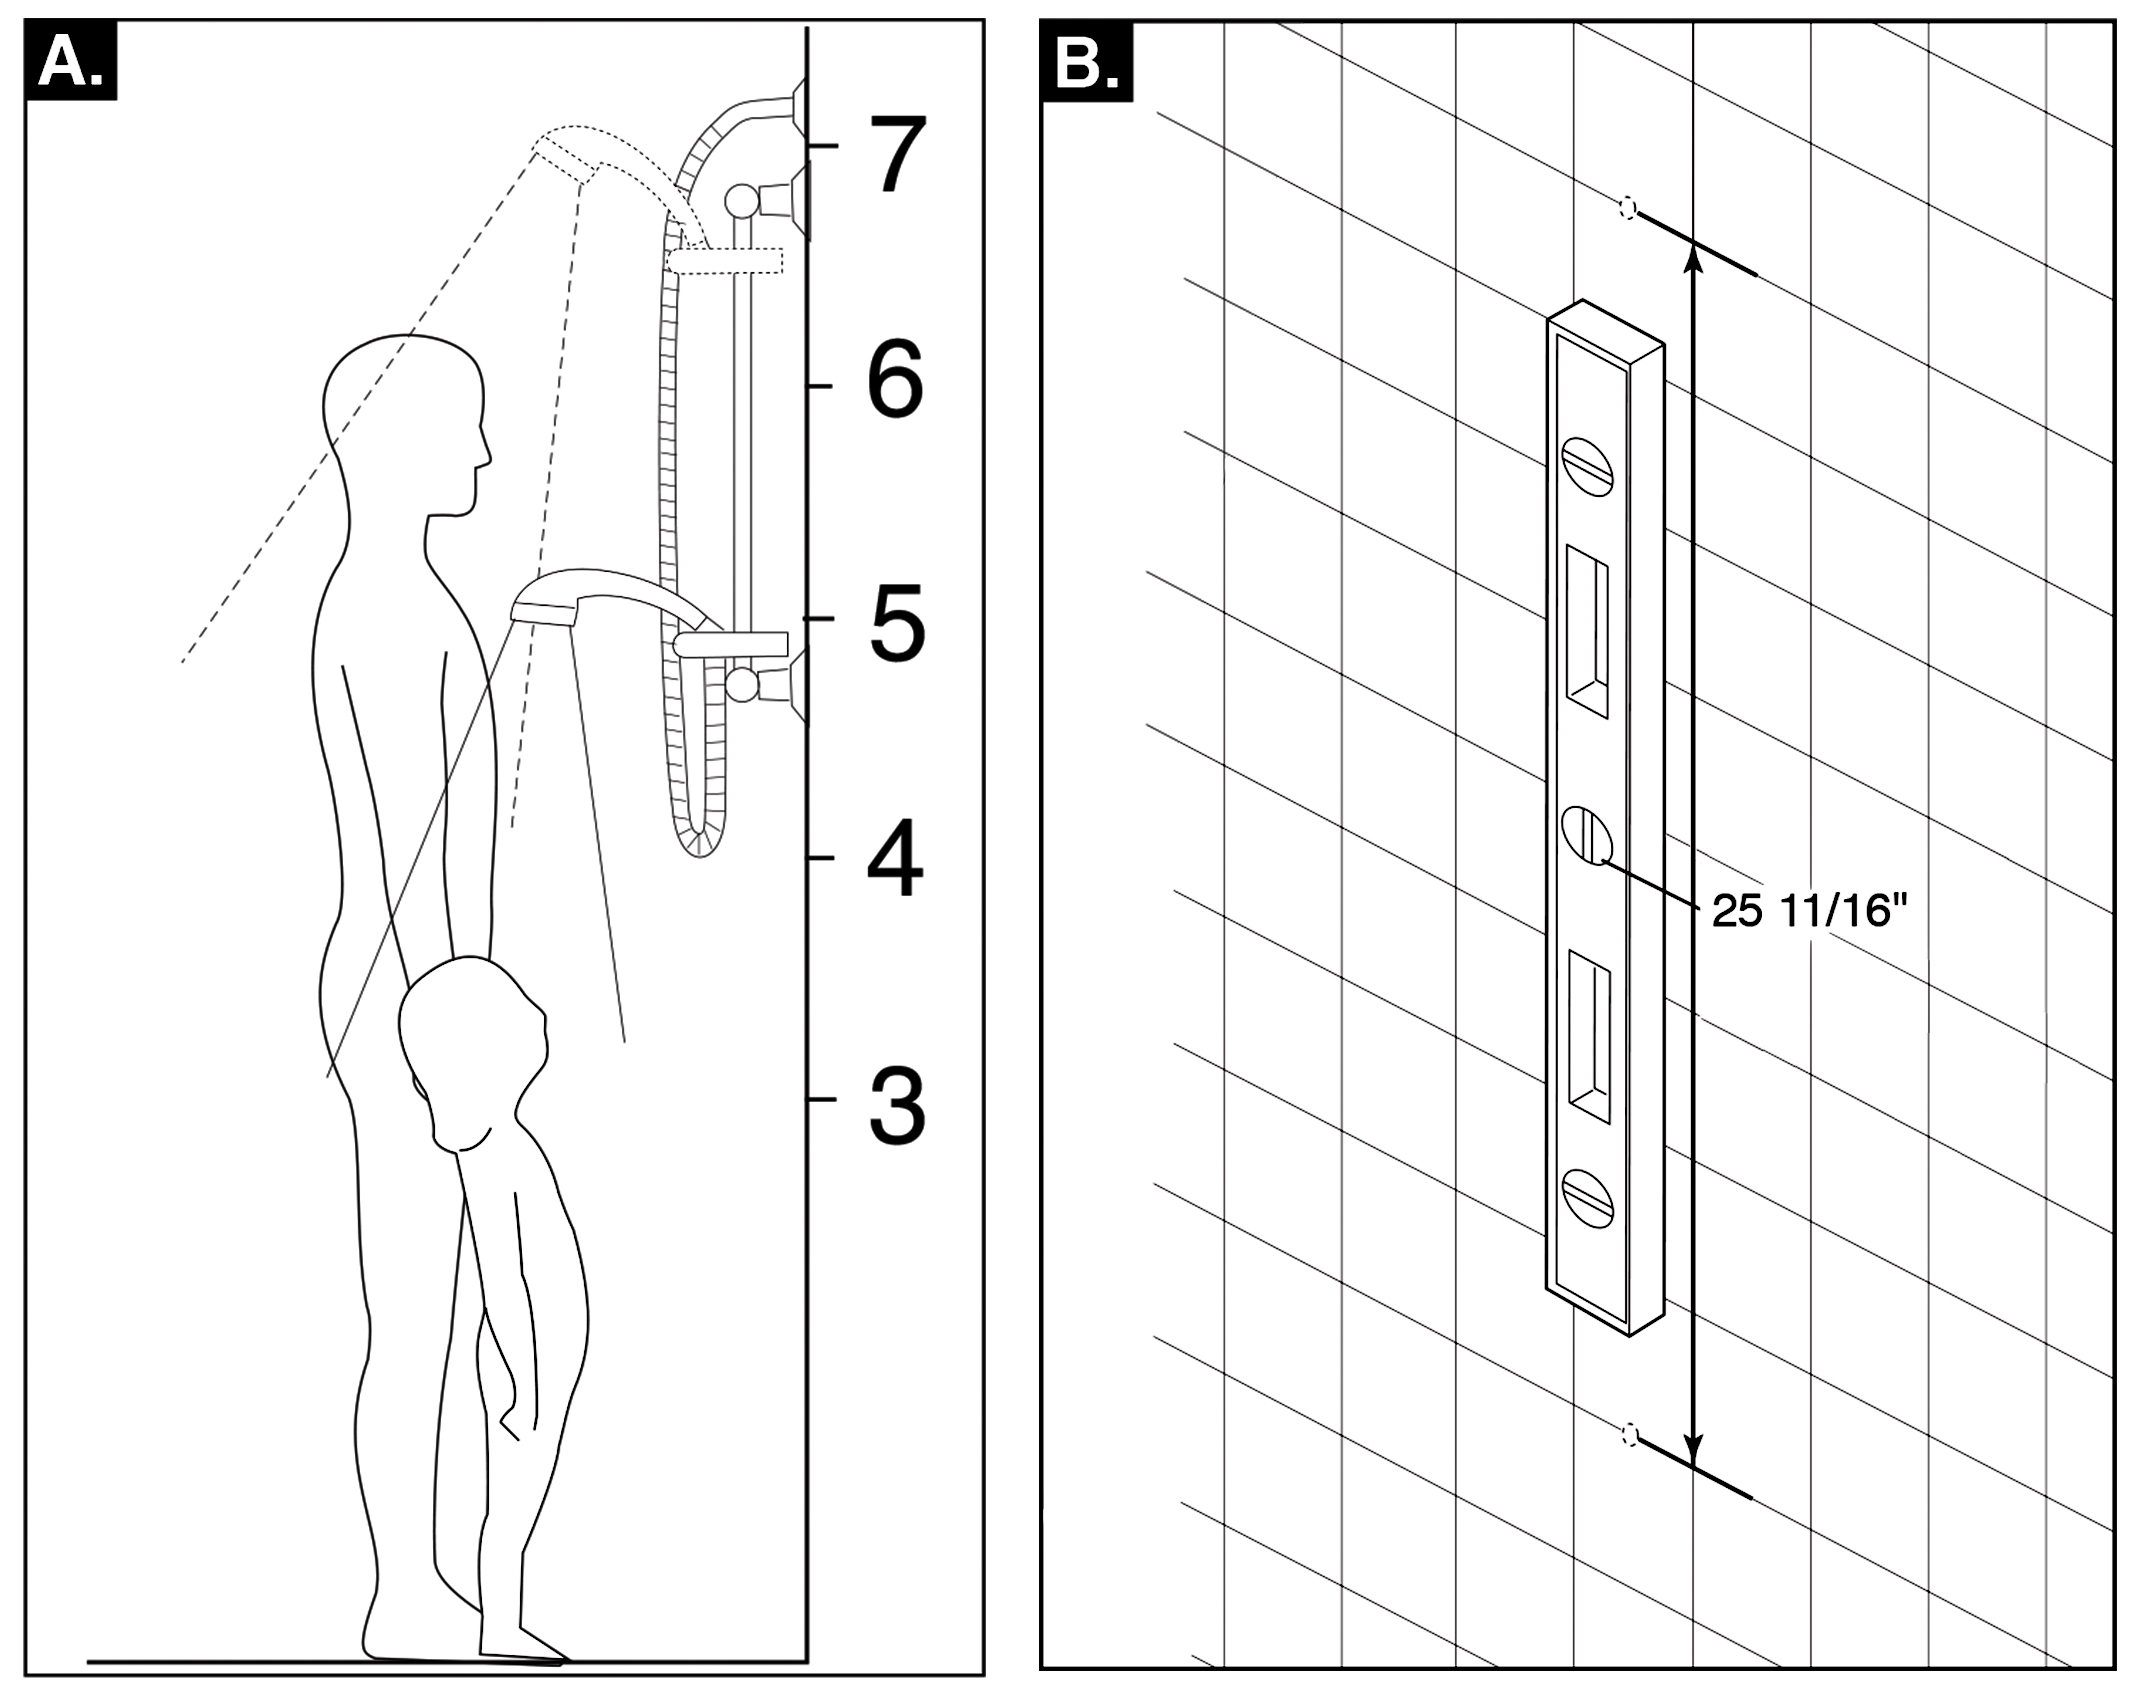
A. Select a convenient height to place the shower rail based on your personal needs. Be sure to leave enough slack for the hose of the hand shower to operate freely when the hand shower is placed in the extreme up or down positions.
Note: If possible it is recommended that the slide bar brackets be secured into the wall studs. For ceramic tile installation, drill holes in grout if possible.
B. Mark the place for drilling the hole for the lower post. Mark using a level, in a vertical line from the lower hole, the placement of the upper post hole. Distance approximately 25 11/16" (653 mm).
Wall Bar Installation
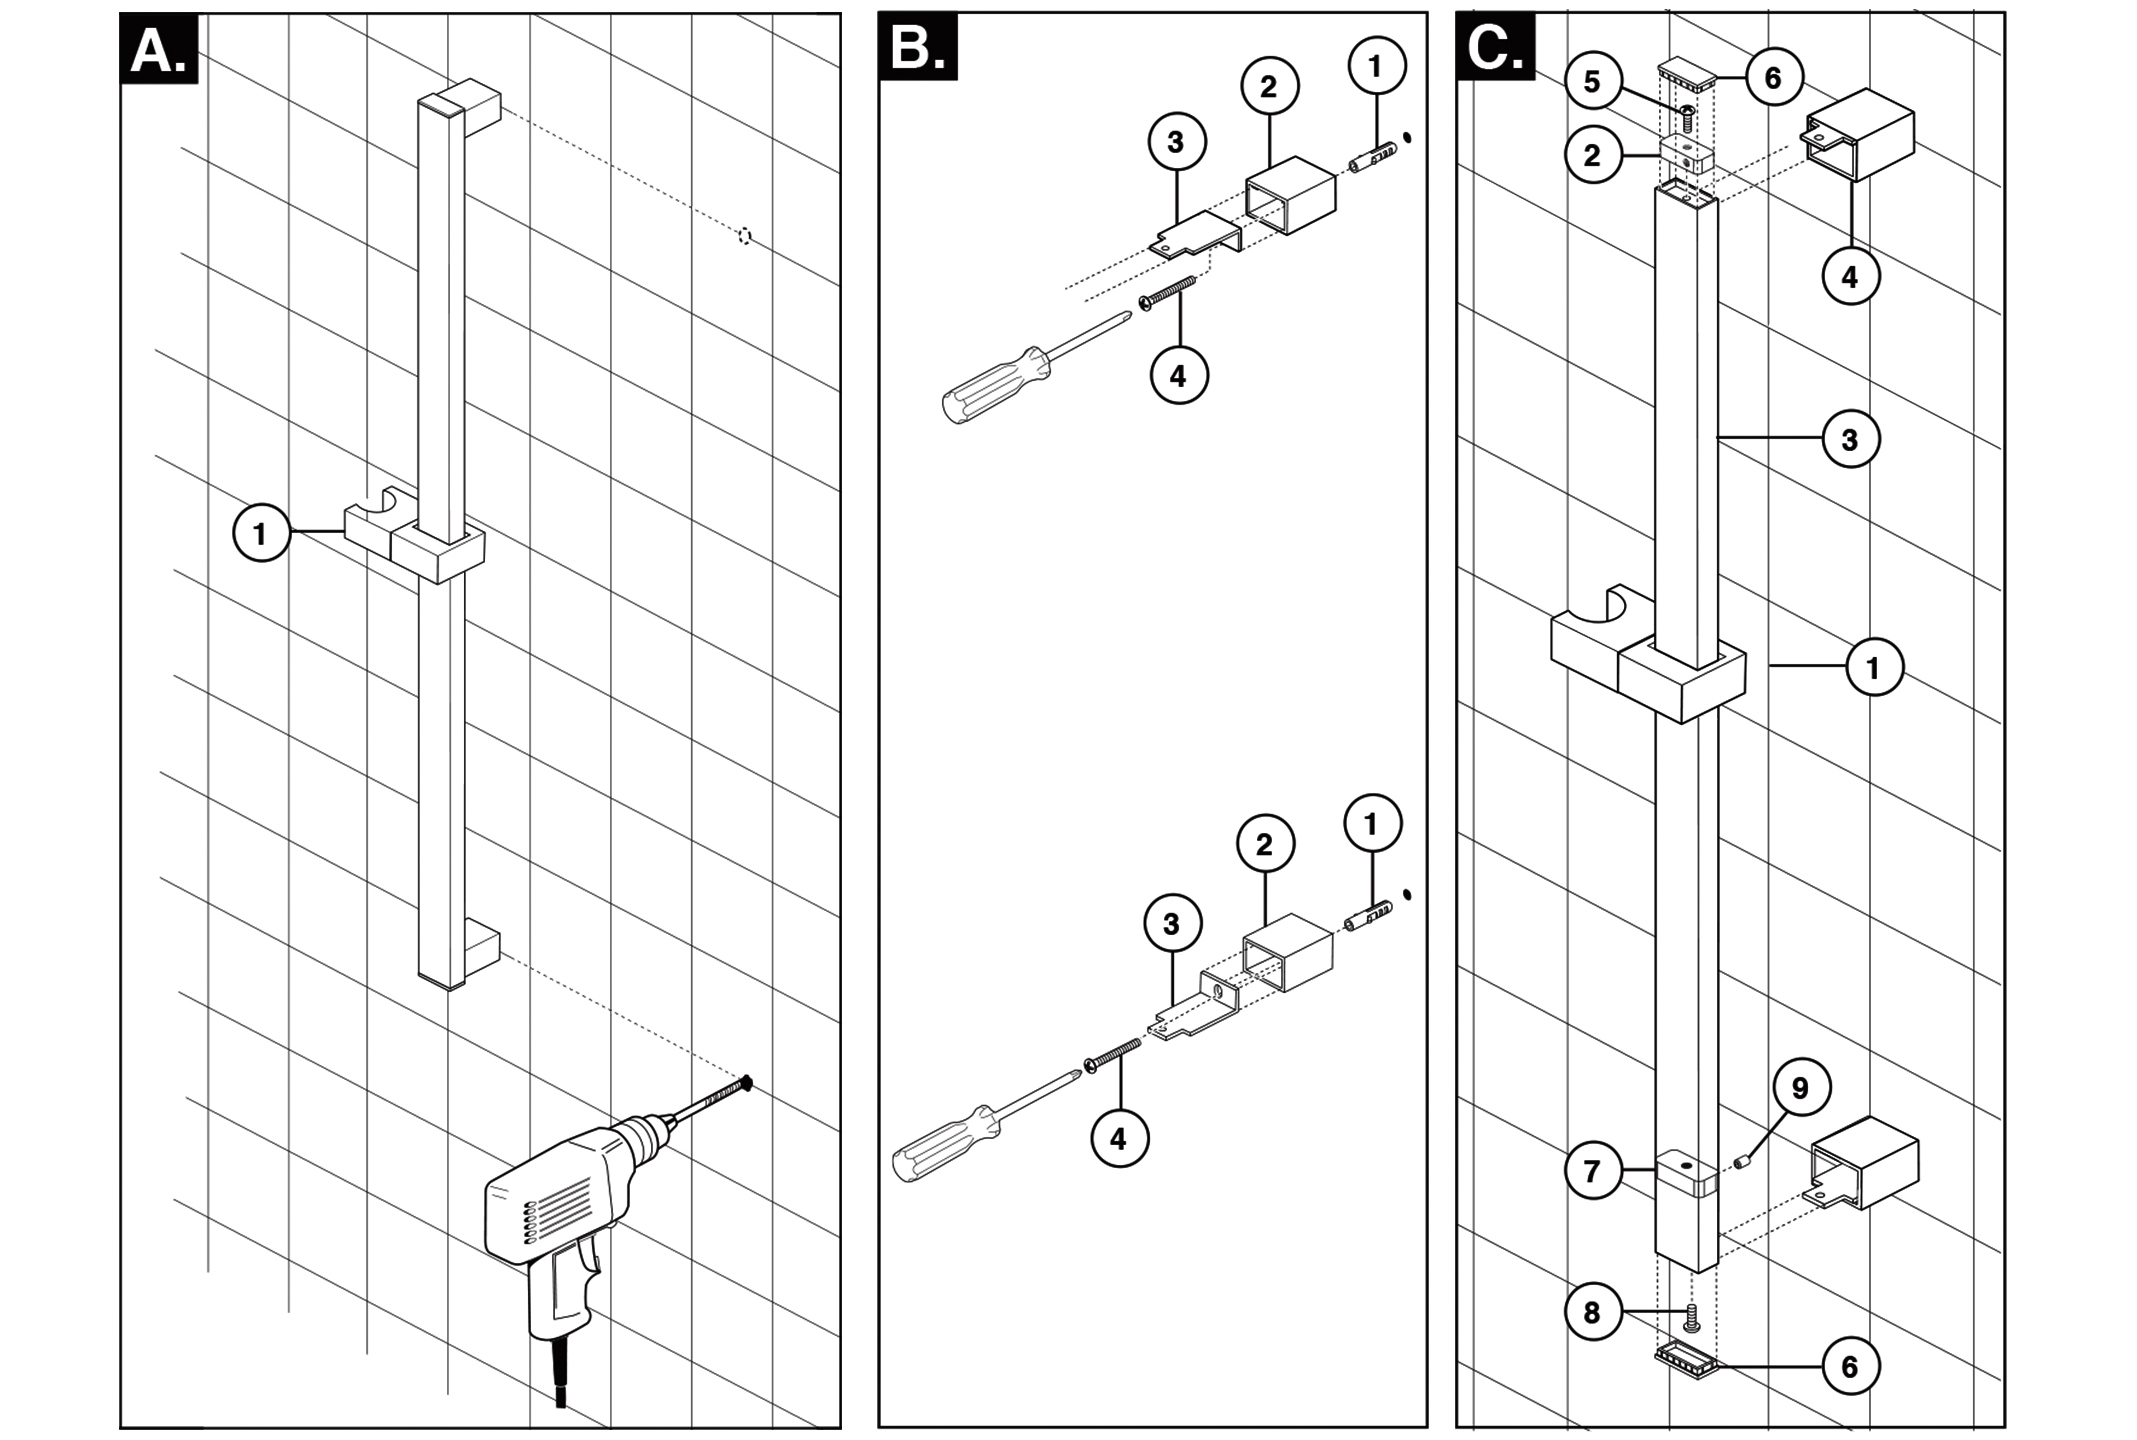
A. Note: Hole size will be determined by your use of just the screw or anchor and screw for installation. Drill hole for mounting of the bottom post. Start with a smaller drill bit size, 1/8" is recommended, and drill hole. If you hit a wall stud, go to the next step. If you do not hit a wall stud, change to a drill bit size suitable for the anchors, 1/4" is recommended, and re-drill hole.
Anchors are for use on drywall or tile. For fiberglass, acrylic and flat plastic surfaces, use toggle bolts (not included).
Before drilling the top mounting hole, it is recommended that you place the assembled slide bar and post assembly (1) on its side next to the hole locations you have marked. Make sure posts are pressed fully onto the bar. Align the centre of the bottom post with bottom hole that was just drilled and make sure centre of top post aligns with the mark for top hole. If not, re-mark the top hole location. If it aligns, drill a top hole in location as marked.
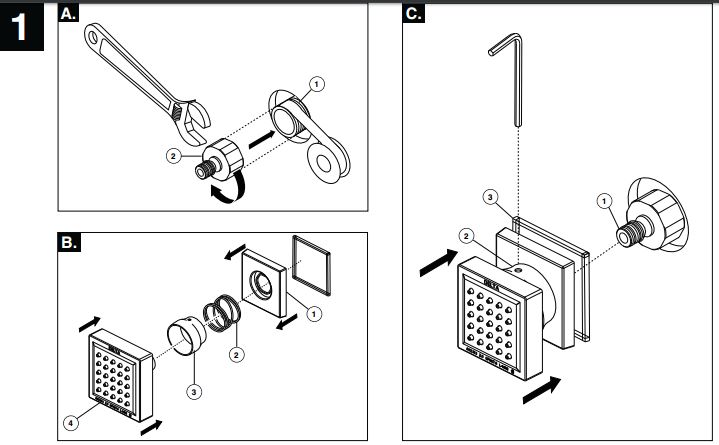
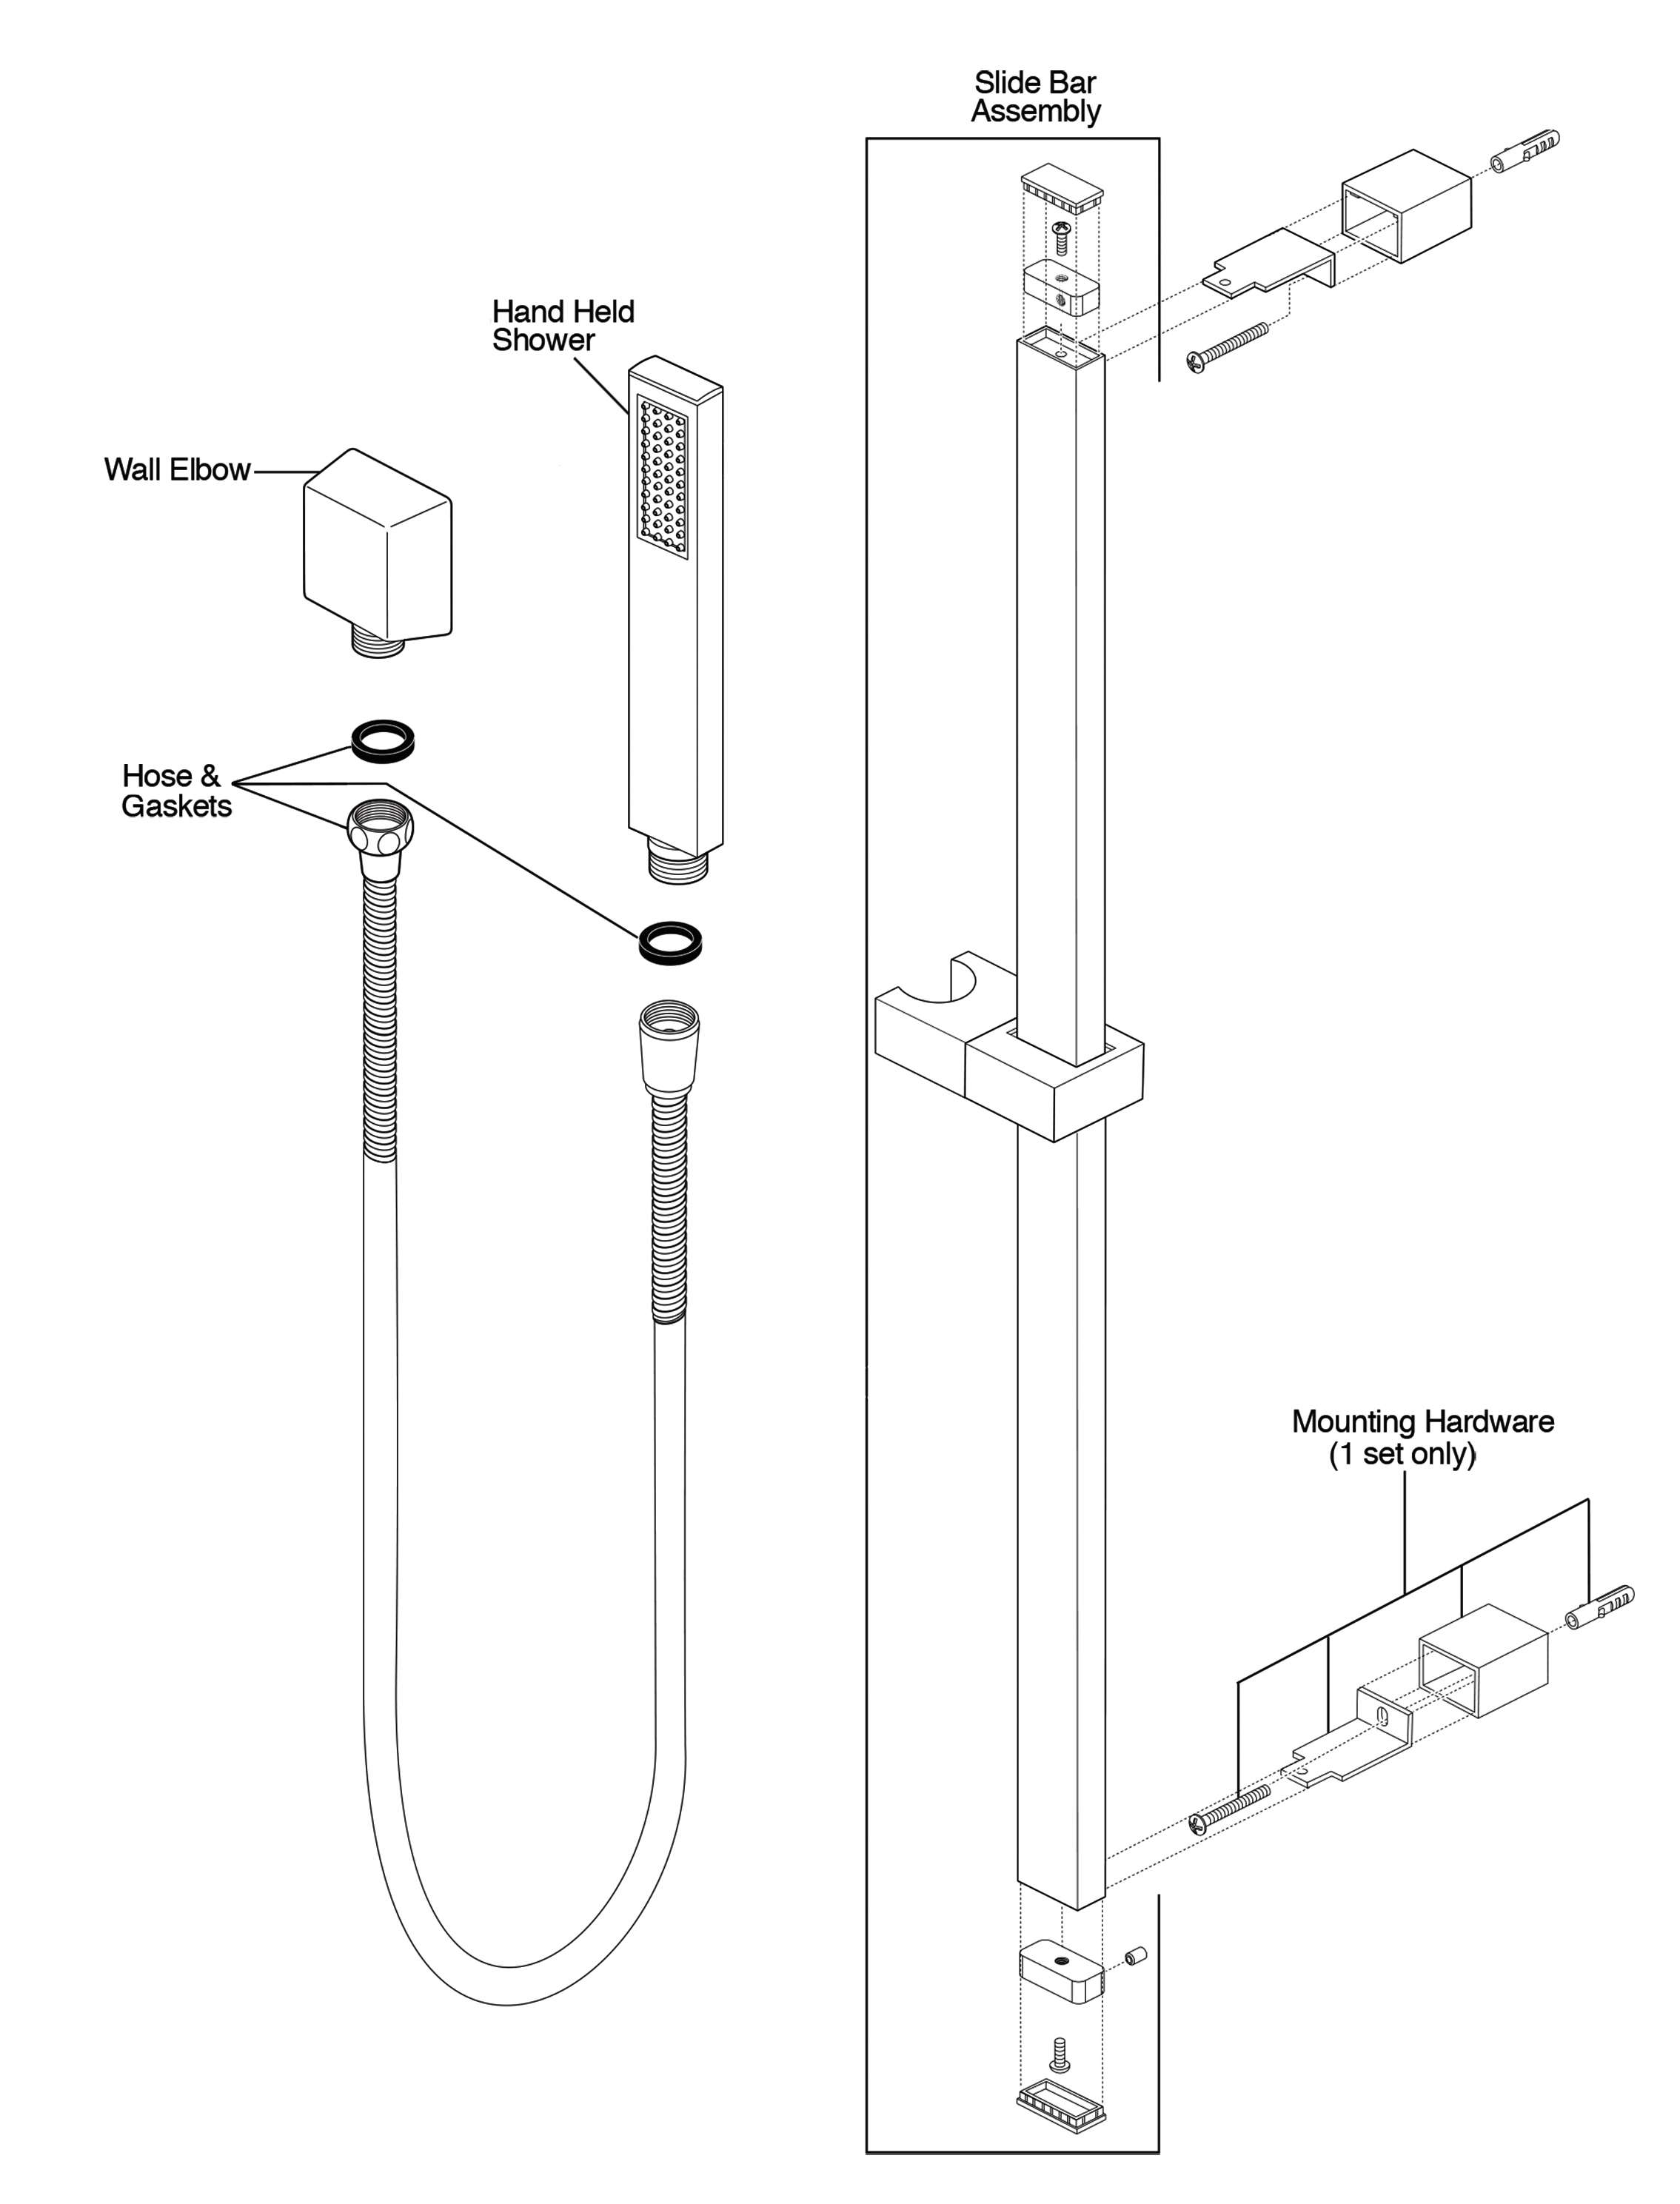
B. Insert anchors (1) into drilled holes. Slide covers (2) over brackets (3), and insert screws (4) into bracket/cover assembly. Secure assembly to wall with screws.
C. Slide the slide mechanism (1) and elbow (2) onto the wall bar (3). Slide wall bar over bracket tabs (4) and secure the wall bar unit with screws (5) provided. Install caps (6) into ends of wallbar. Lower elbow (7) & screw (8) was pre-installed prior to shipping, tighten screw (9) if you find it is sliding inside the bar.
Installation Of The Shower Set
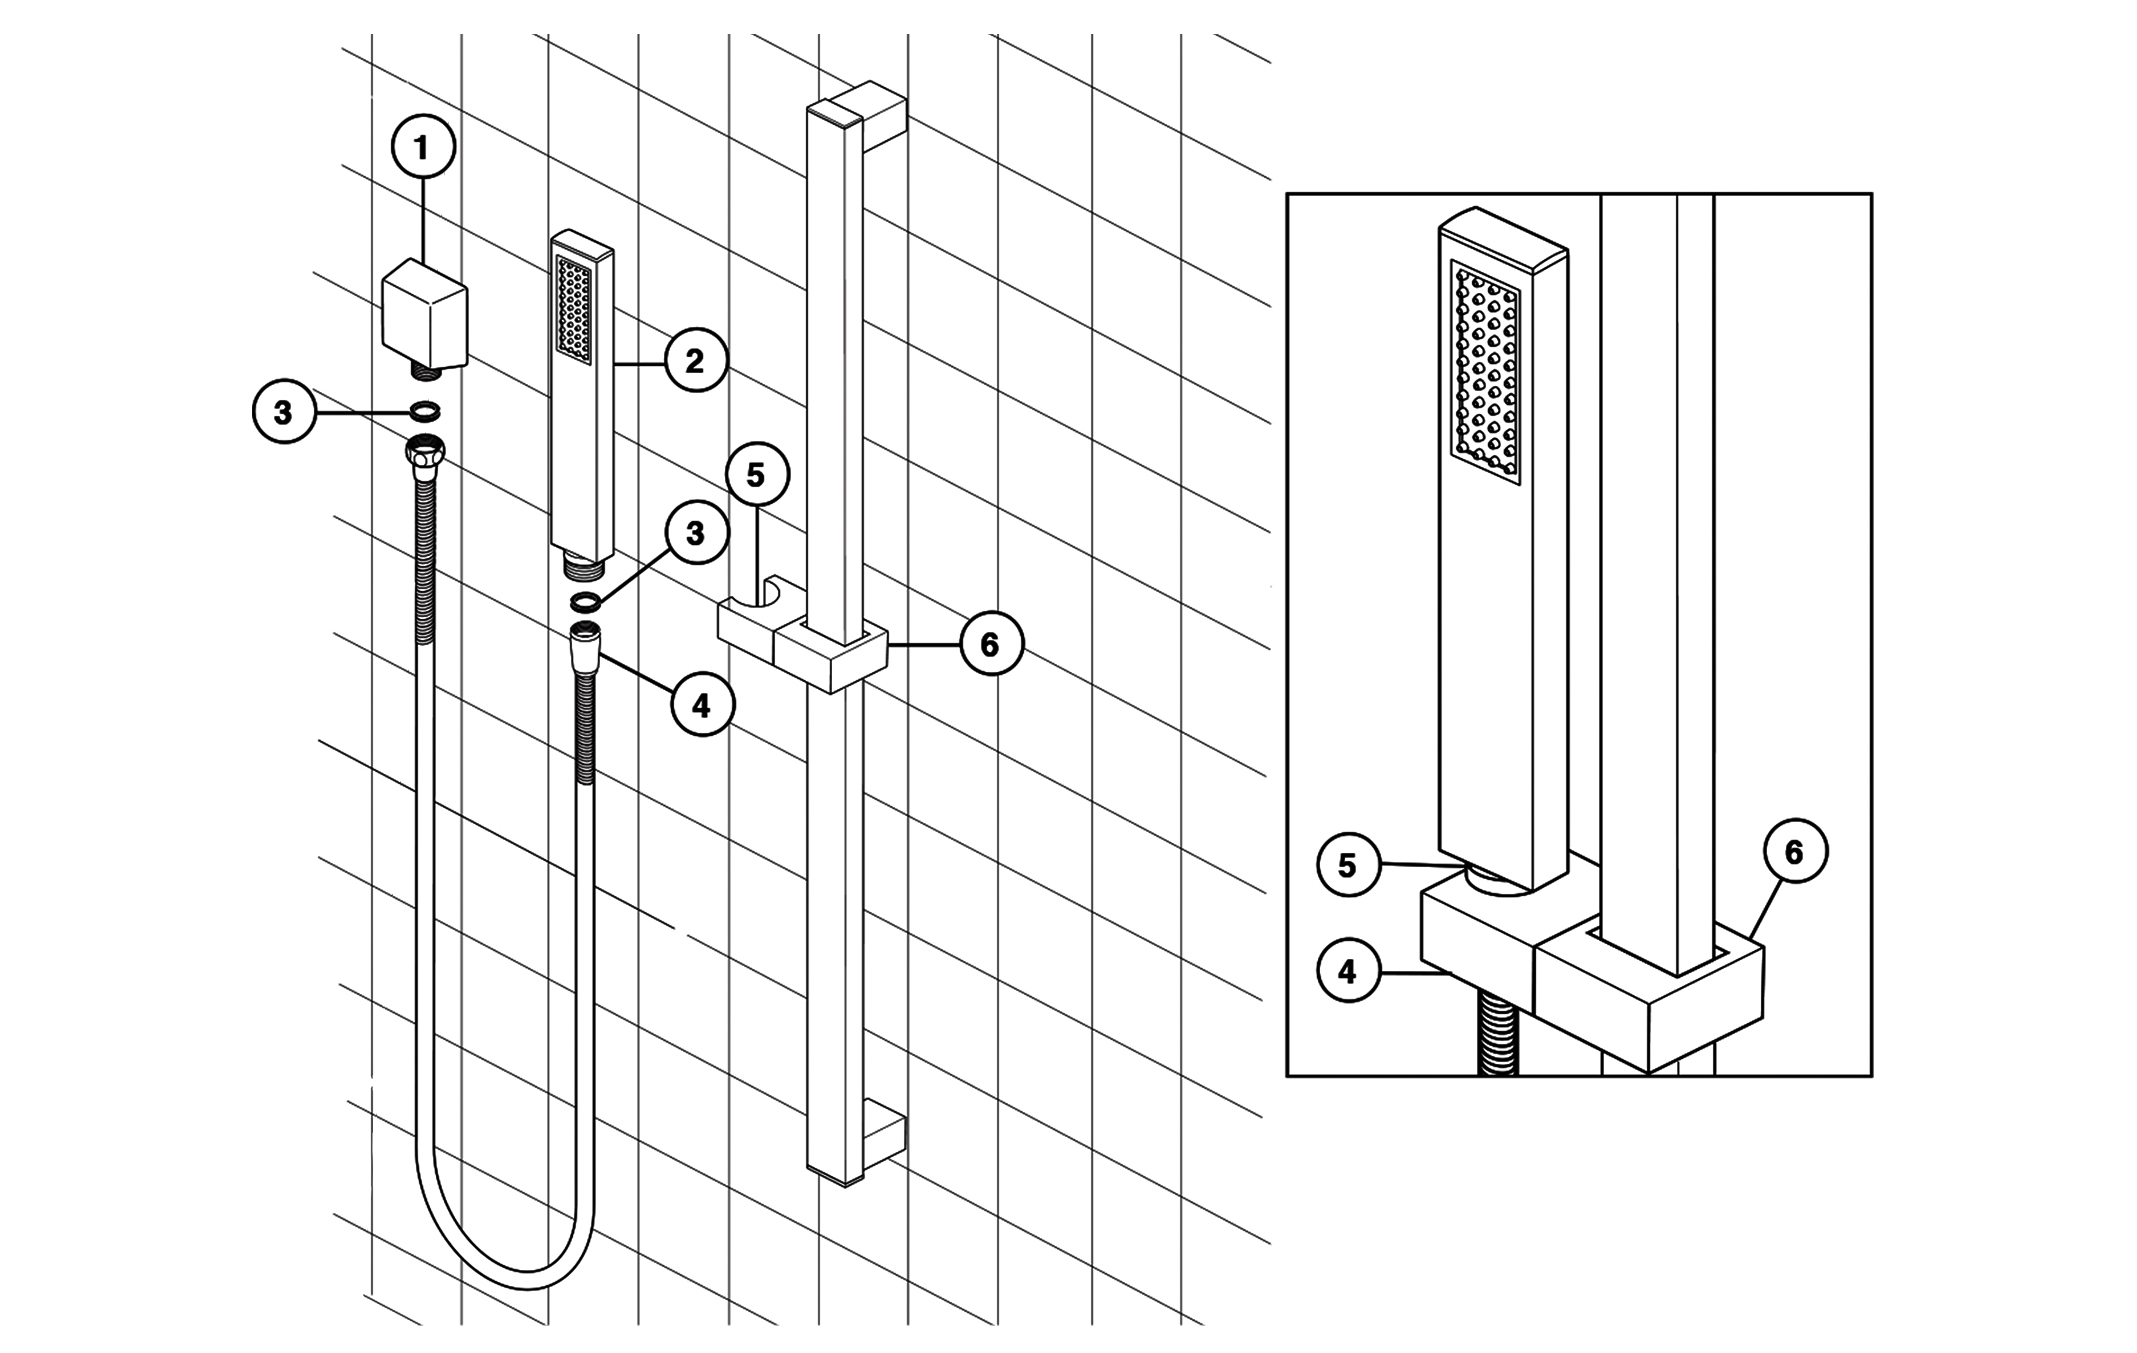
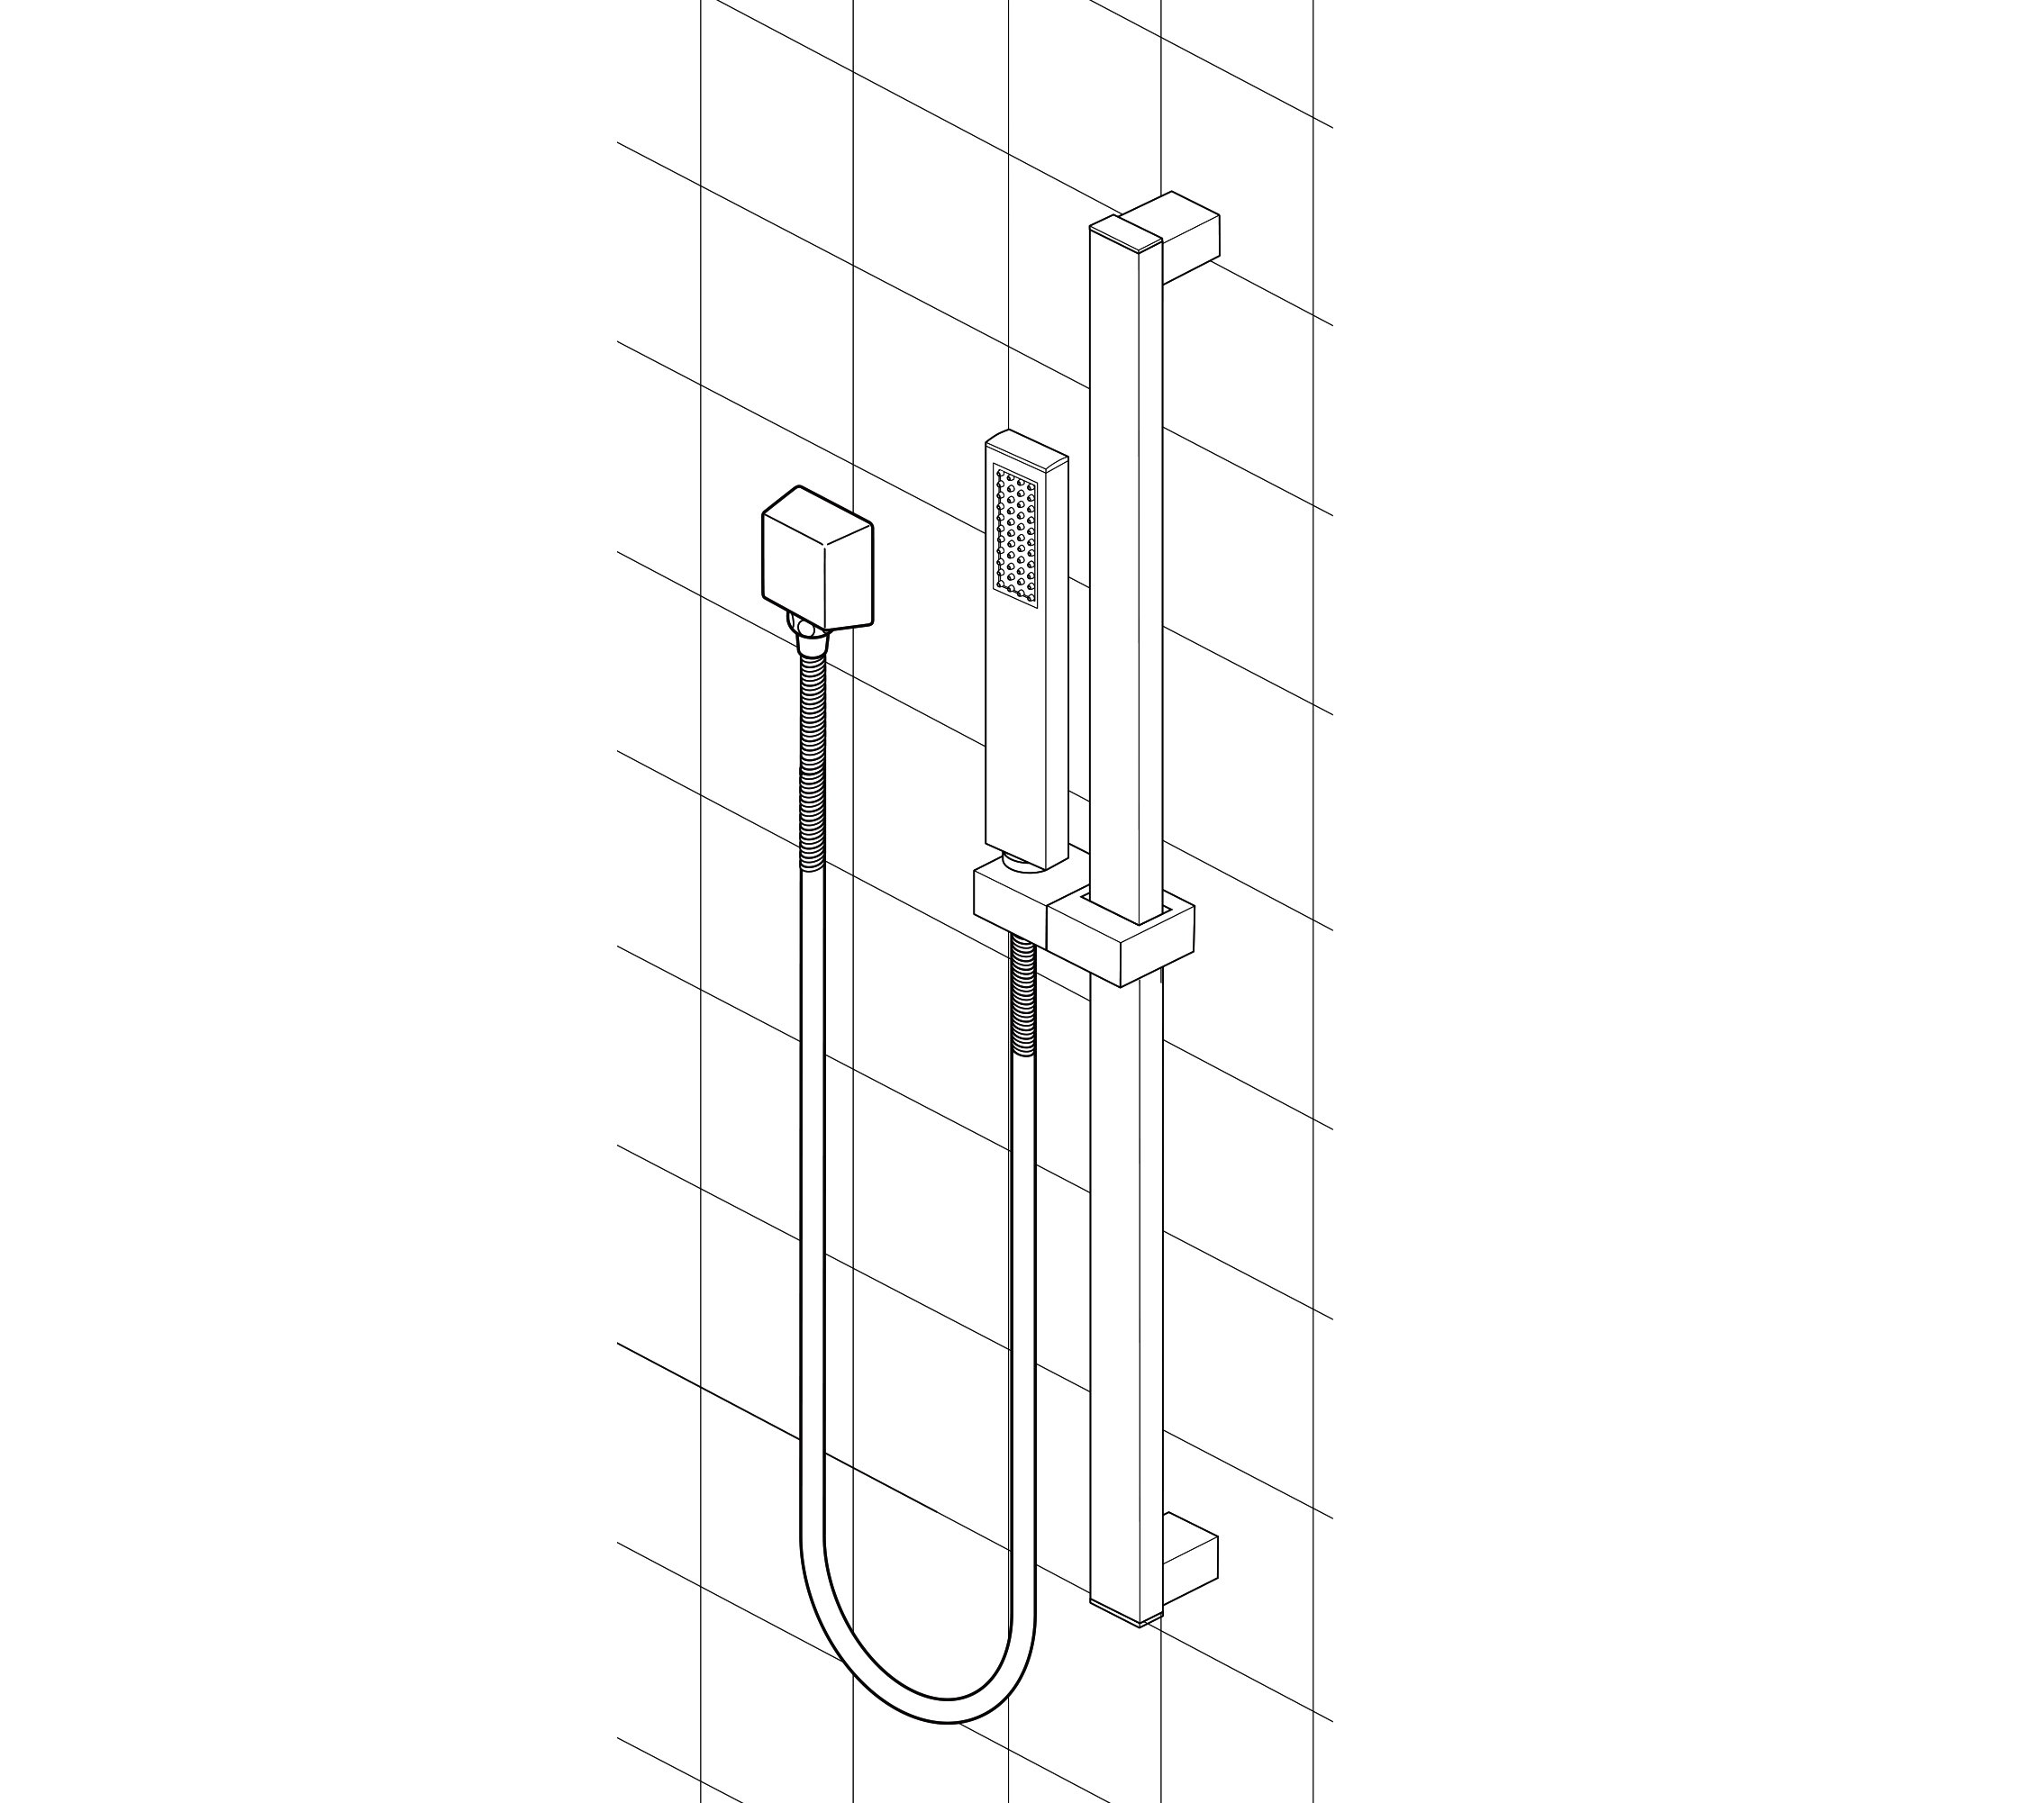
Connect the shower hose to the wall outlet (1) and the hand held piece (2), ensuring that the internal gaskets (3) are present in the shower hose nuts. Normal 1/2" rubber gaskets can be used.
Place the conical nut of the hose (4) that is connected to the hand held piece, in the slide bar holder (5) and turn it to the desired position.
To slide the mechanism up or down, push in on the button (6) of the mechanism and slide it on the bar.
Cleaning and Care
Care should be given to the cleaning of this product. Although its finish is extremely durable, it can be damaged by harsh abrasives or polish. To clean, simply wipe gently with a damp cloth and blot dry with a soft towel.
|
|