Fontana Luna Thermostatic System with Body Jet Shower Set
This Fontana Luigi multifunction thermostatic shower system with body jet provides a luxurious showering experience and is the perfect complement to any modern bathroom. The modern design handheld a shower, and an easy-to-use mixer valve, both made from high-quality solid brass. The warm, drenching water coverage is the result of a denser water pattern and larger droplets that retain their heat longer to soothe and revitalize. This thermostatic shower system have the modern design of smooth details and sharp edges. Be sure, when it comes to new bathroom shower sets, Fontana Showers is offering shape, finish, and styles you're looking for.
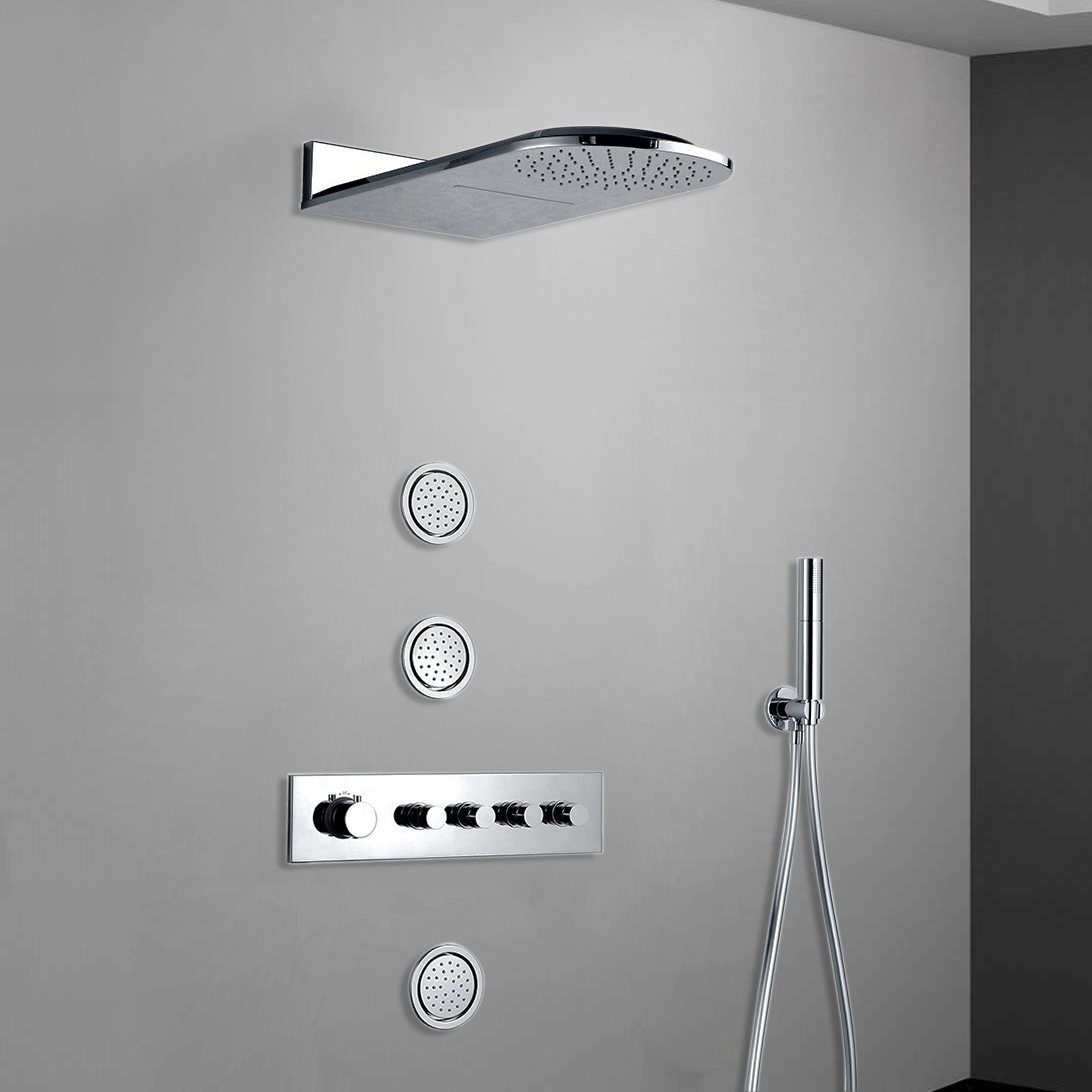
Fontana Luigi Thermostatic System with Body Jet Shower Set Features:
|
Brand Name: FontanaShowers
Product Code: FS9587
Surface Finish: Chrome
Surface Treatment: Polished
Number of Handles: Five handle
Style: Contemporary
Valve Core Material: Ceramic
Material: Brass Main Body And Zinc Alloy Handle
Type: Bath & Shower Faucets
Material Analysis: Cu≥ 59%
Chrome Plating Thickness:Nickel>8um Chrome>0.2um
Water Flow: Bath/shower mixer ≥ 18L/min
Operating Pressure: 0.05 Mpa-0.8 Mpa
Cold Water Temperature:4℃-29℃
Hot water Temperature: 50℃-80℃
Temperature Range: 20℃-50℃
|
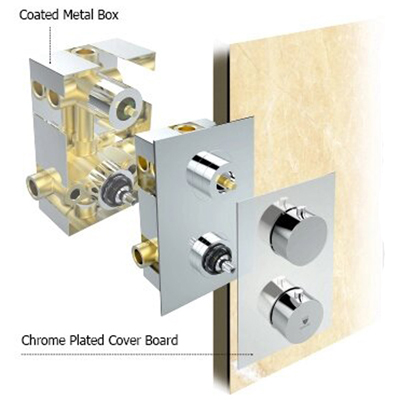
|
FontanaShowers® Product Warranty Information 
- Before you begin, please read the installation instructions below. Observe all local building and safety codes.
- Unpack and inspect the product for any shipping damages. If you find damages, do not install.
- Please note all showers must be installed by a professional and certified plumber otherwise warranty might be voided.
|
Shower Set
|
|
Shower Head Installation Instructions
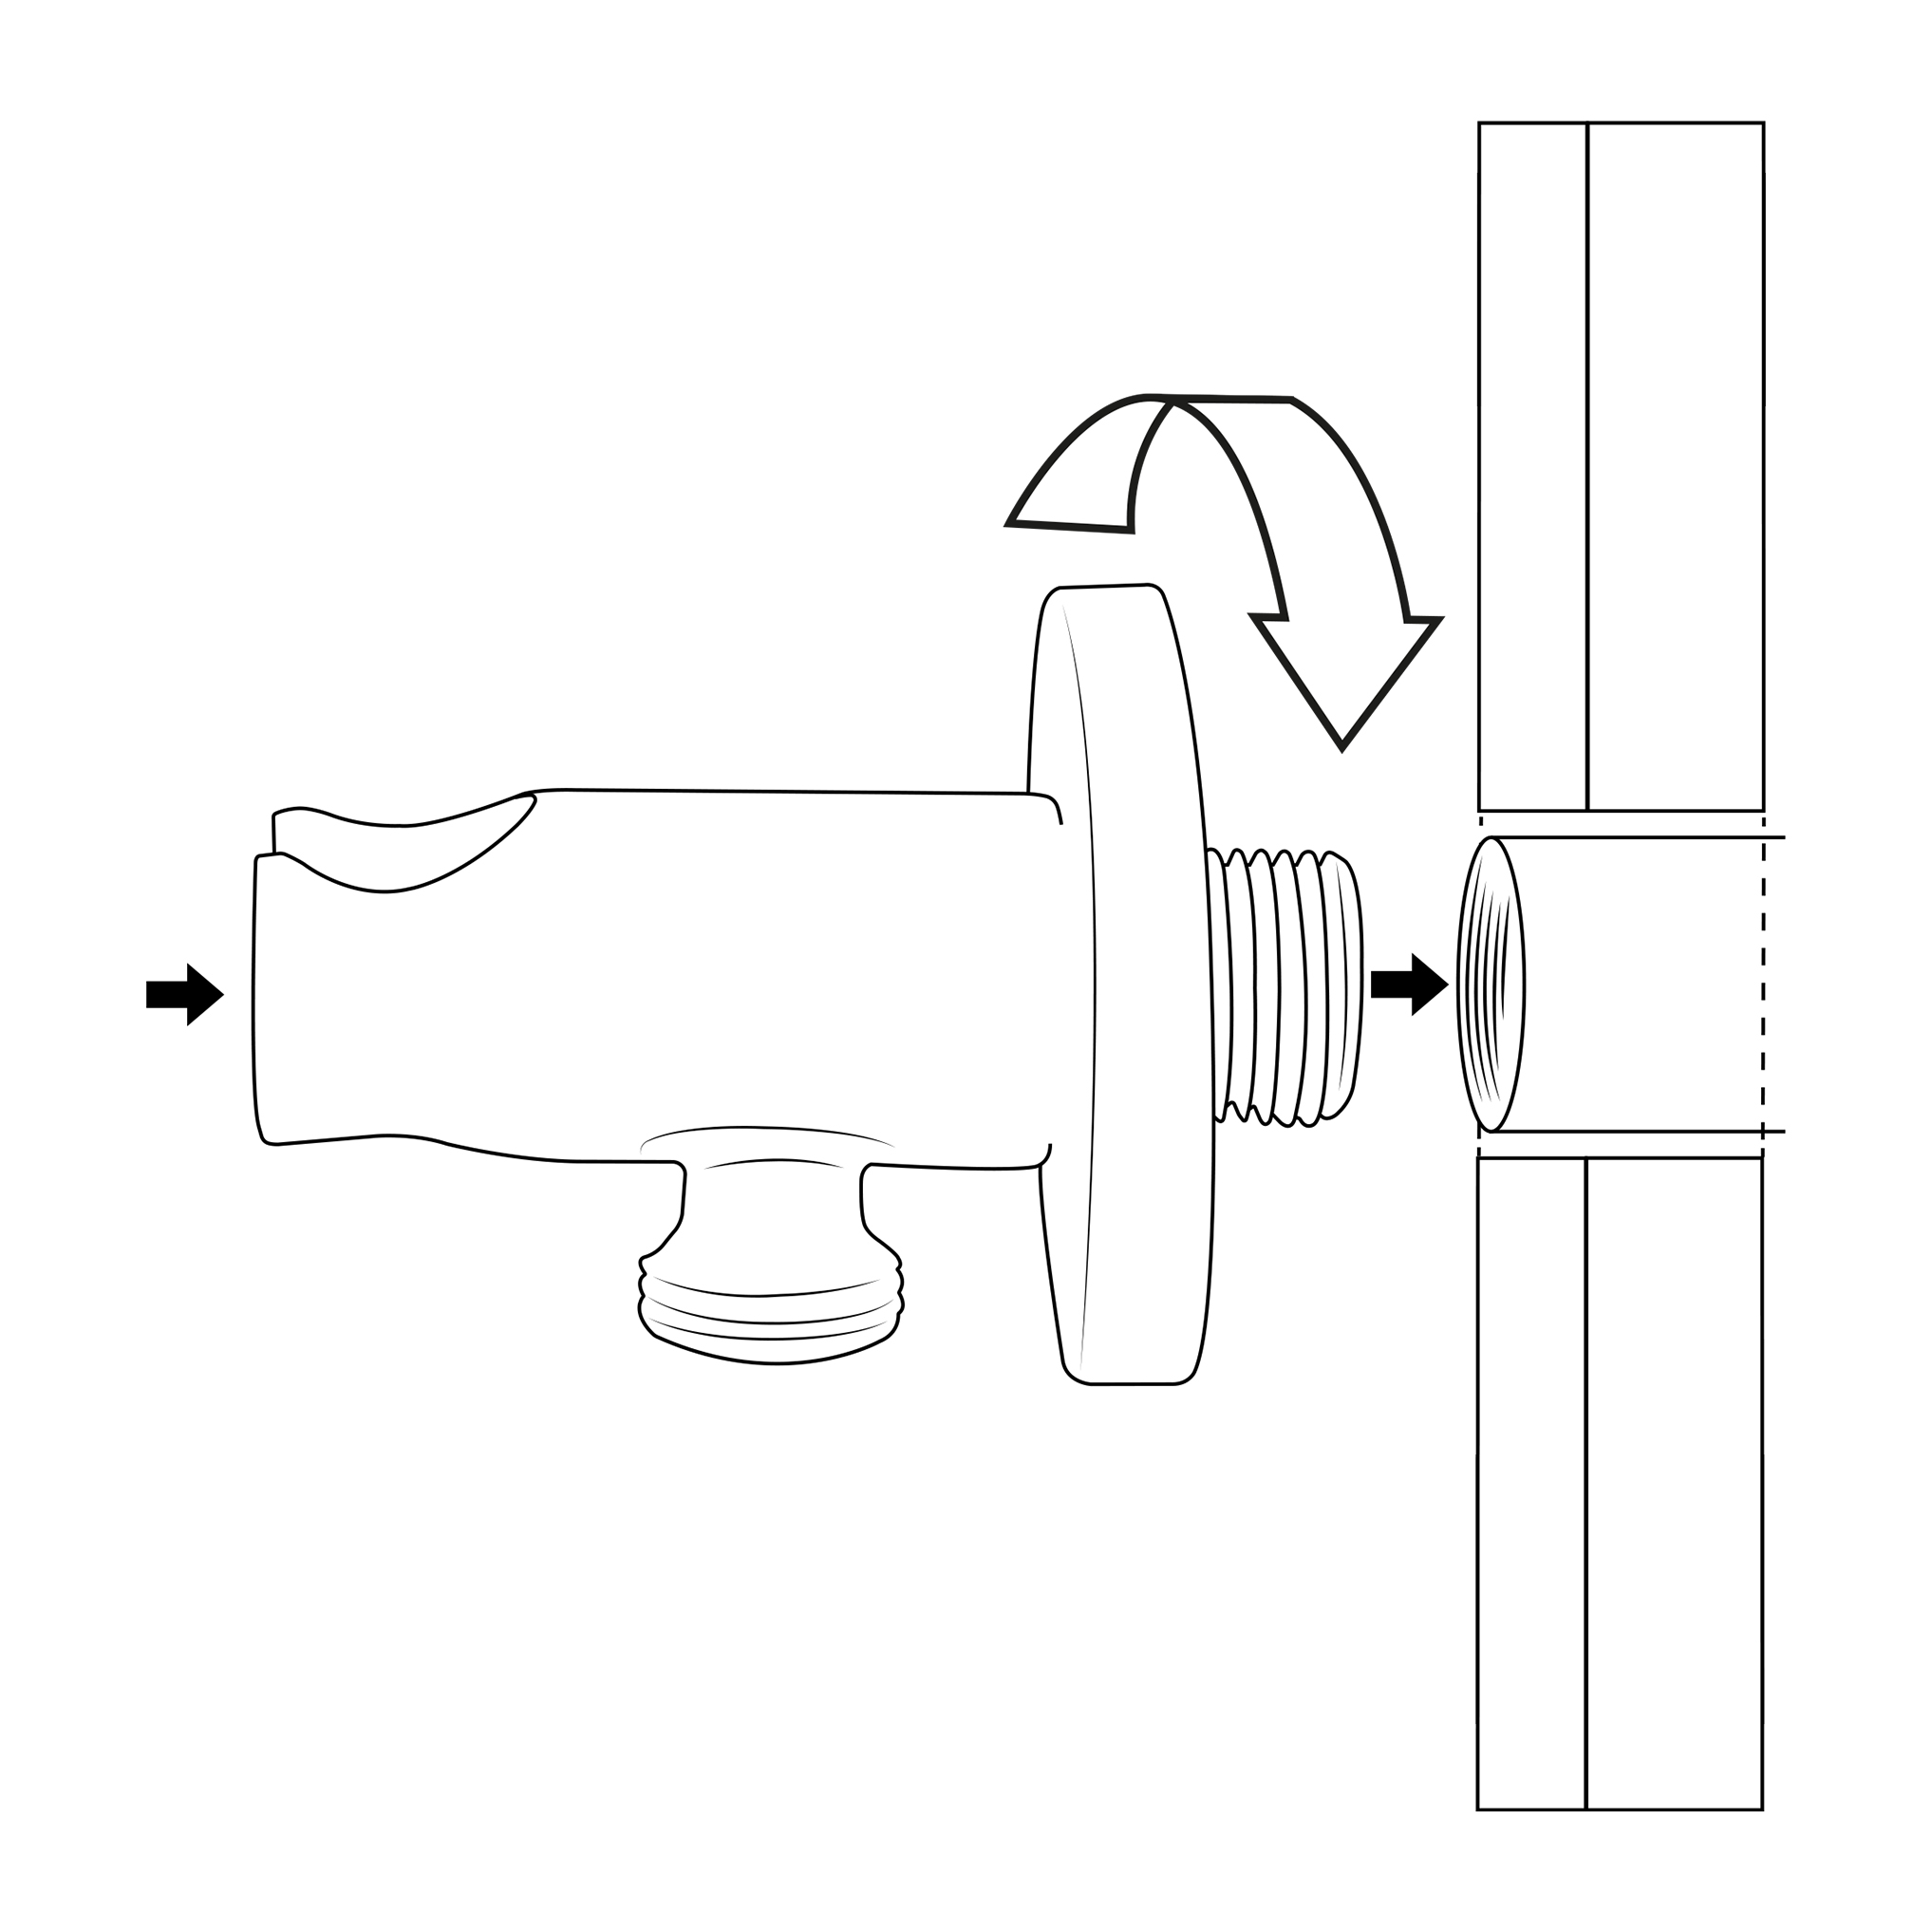
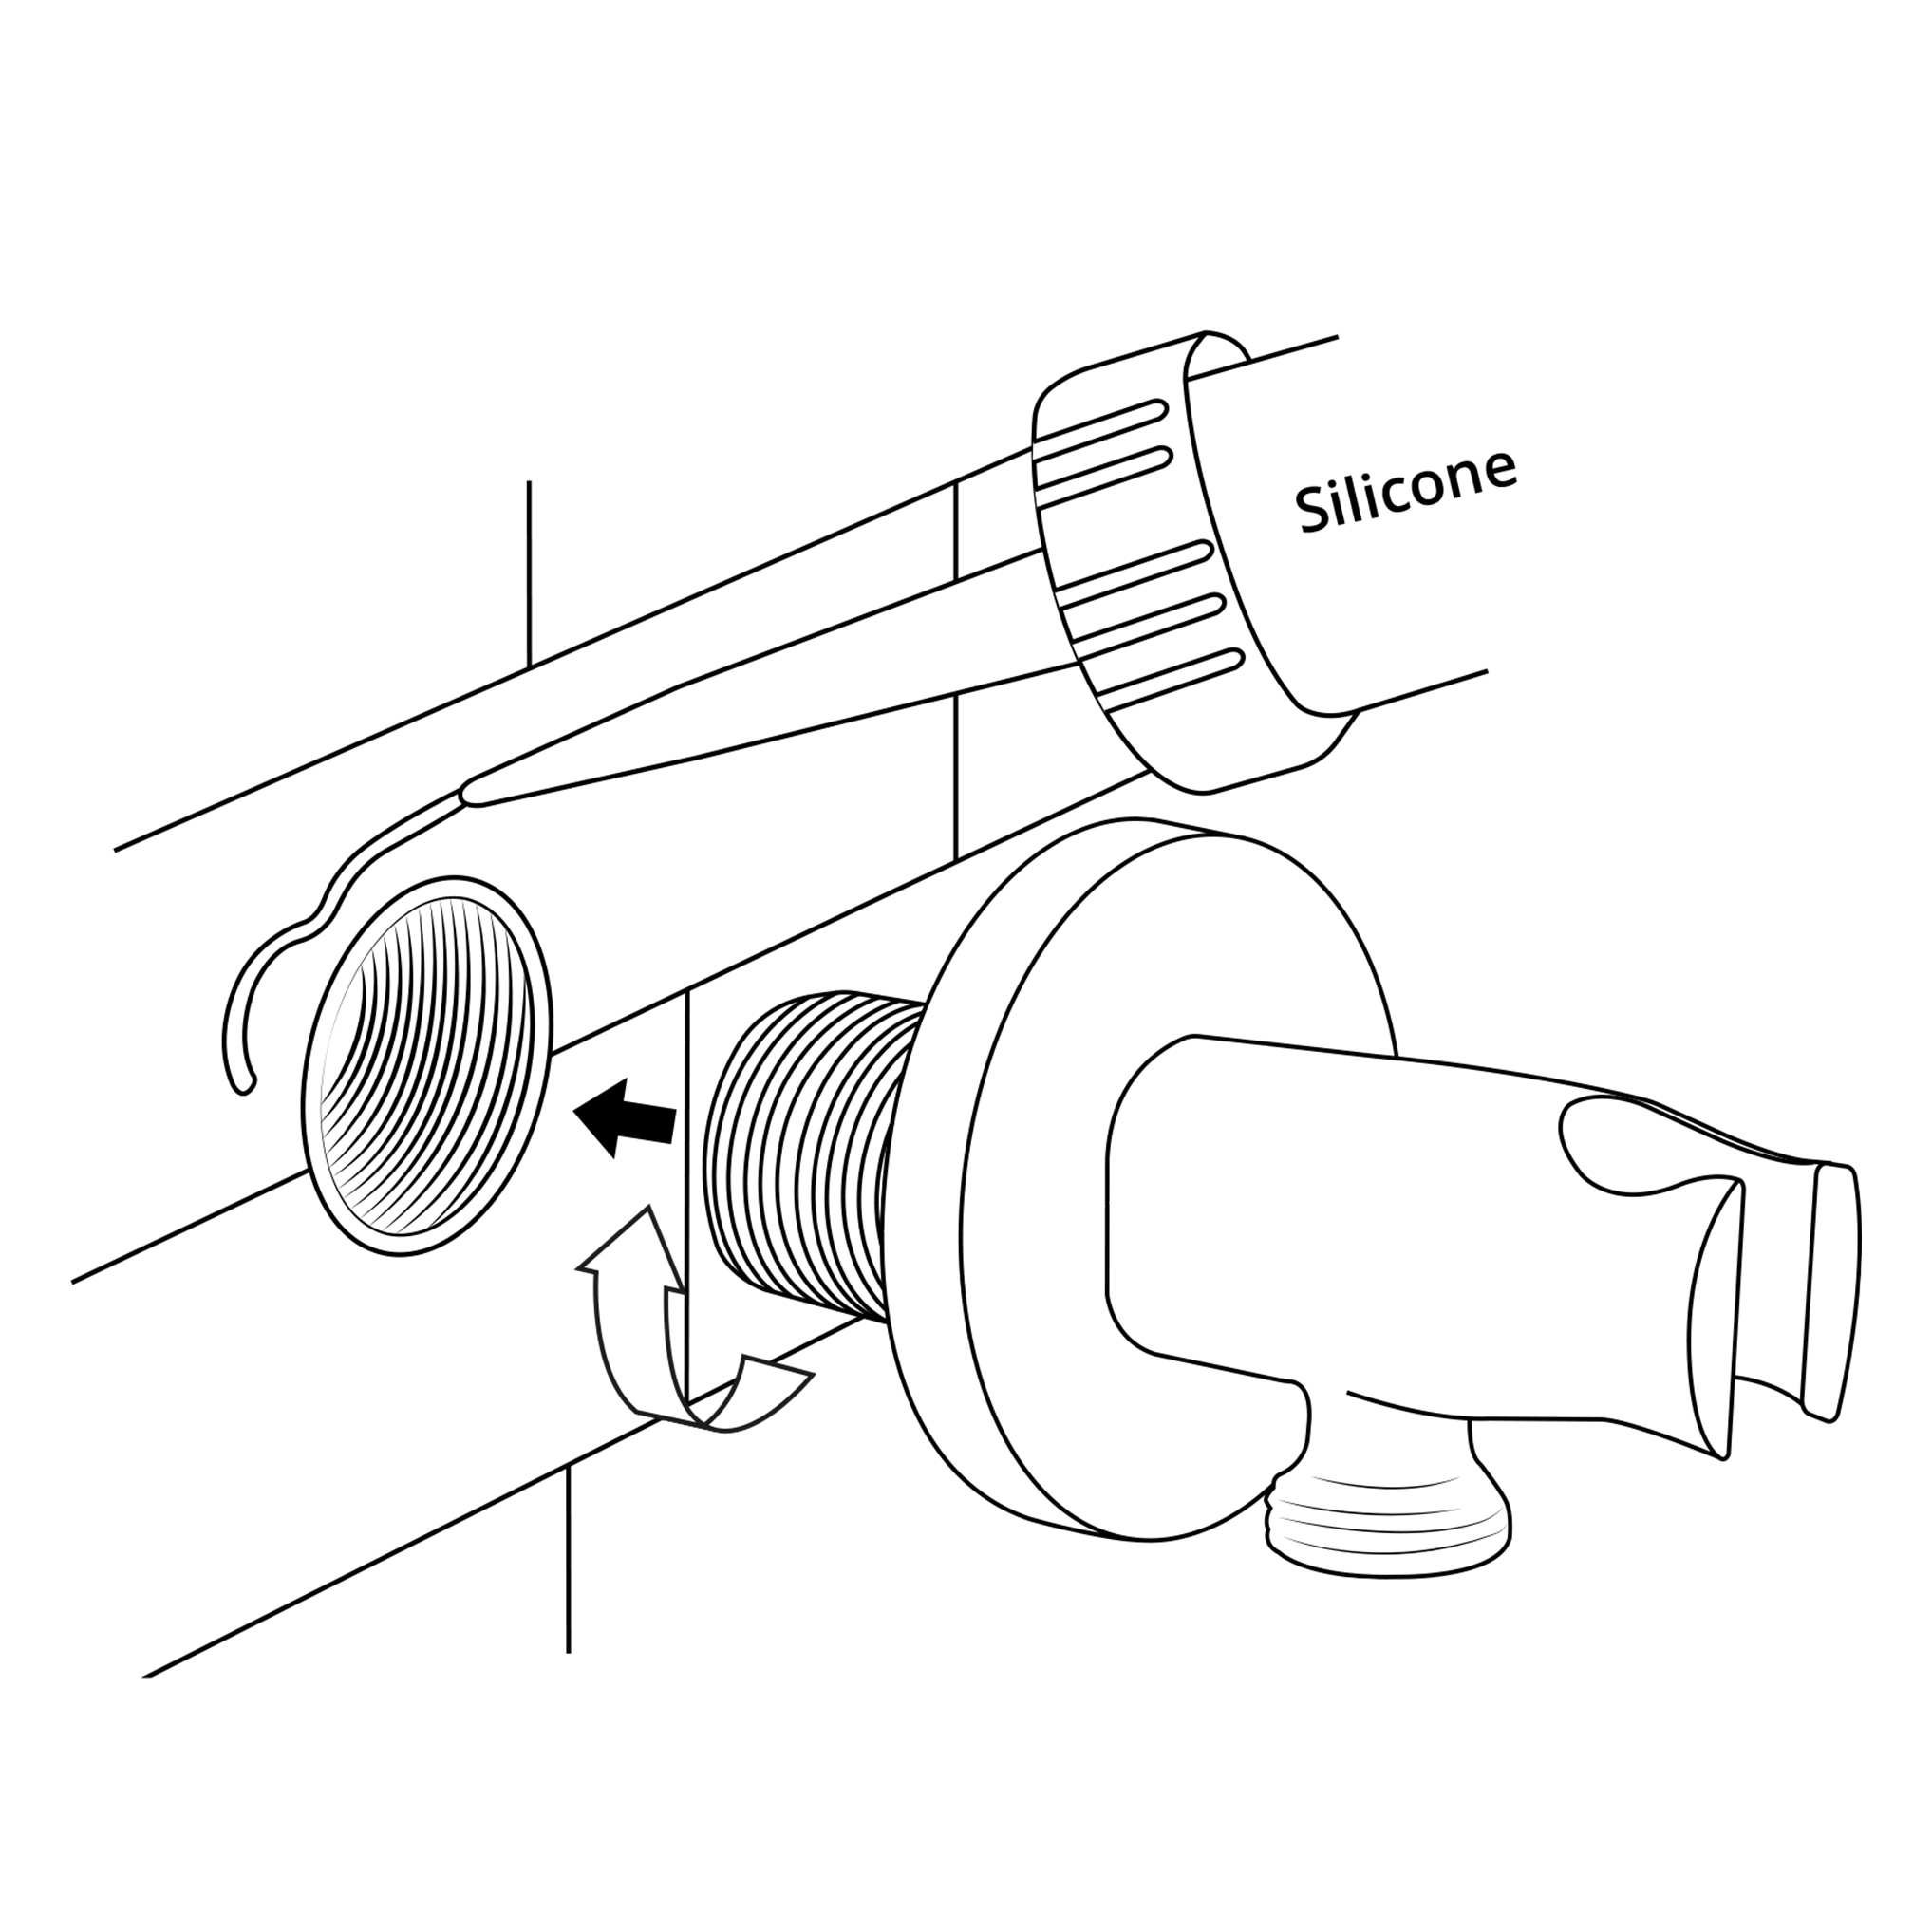
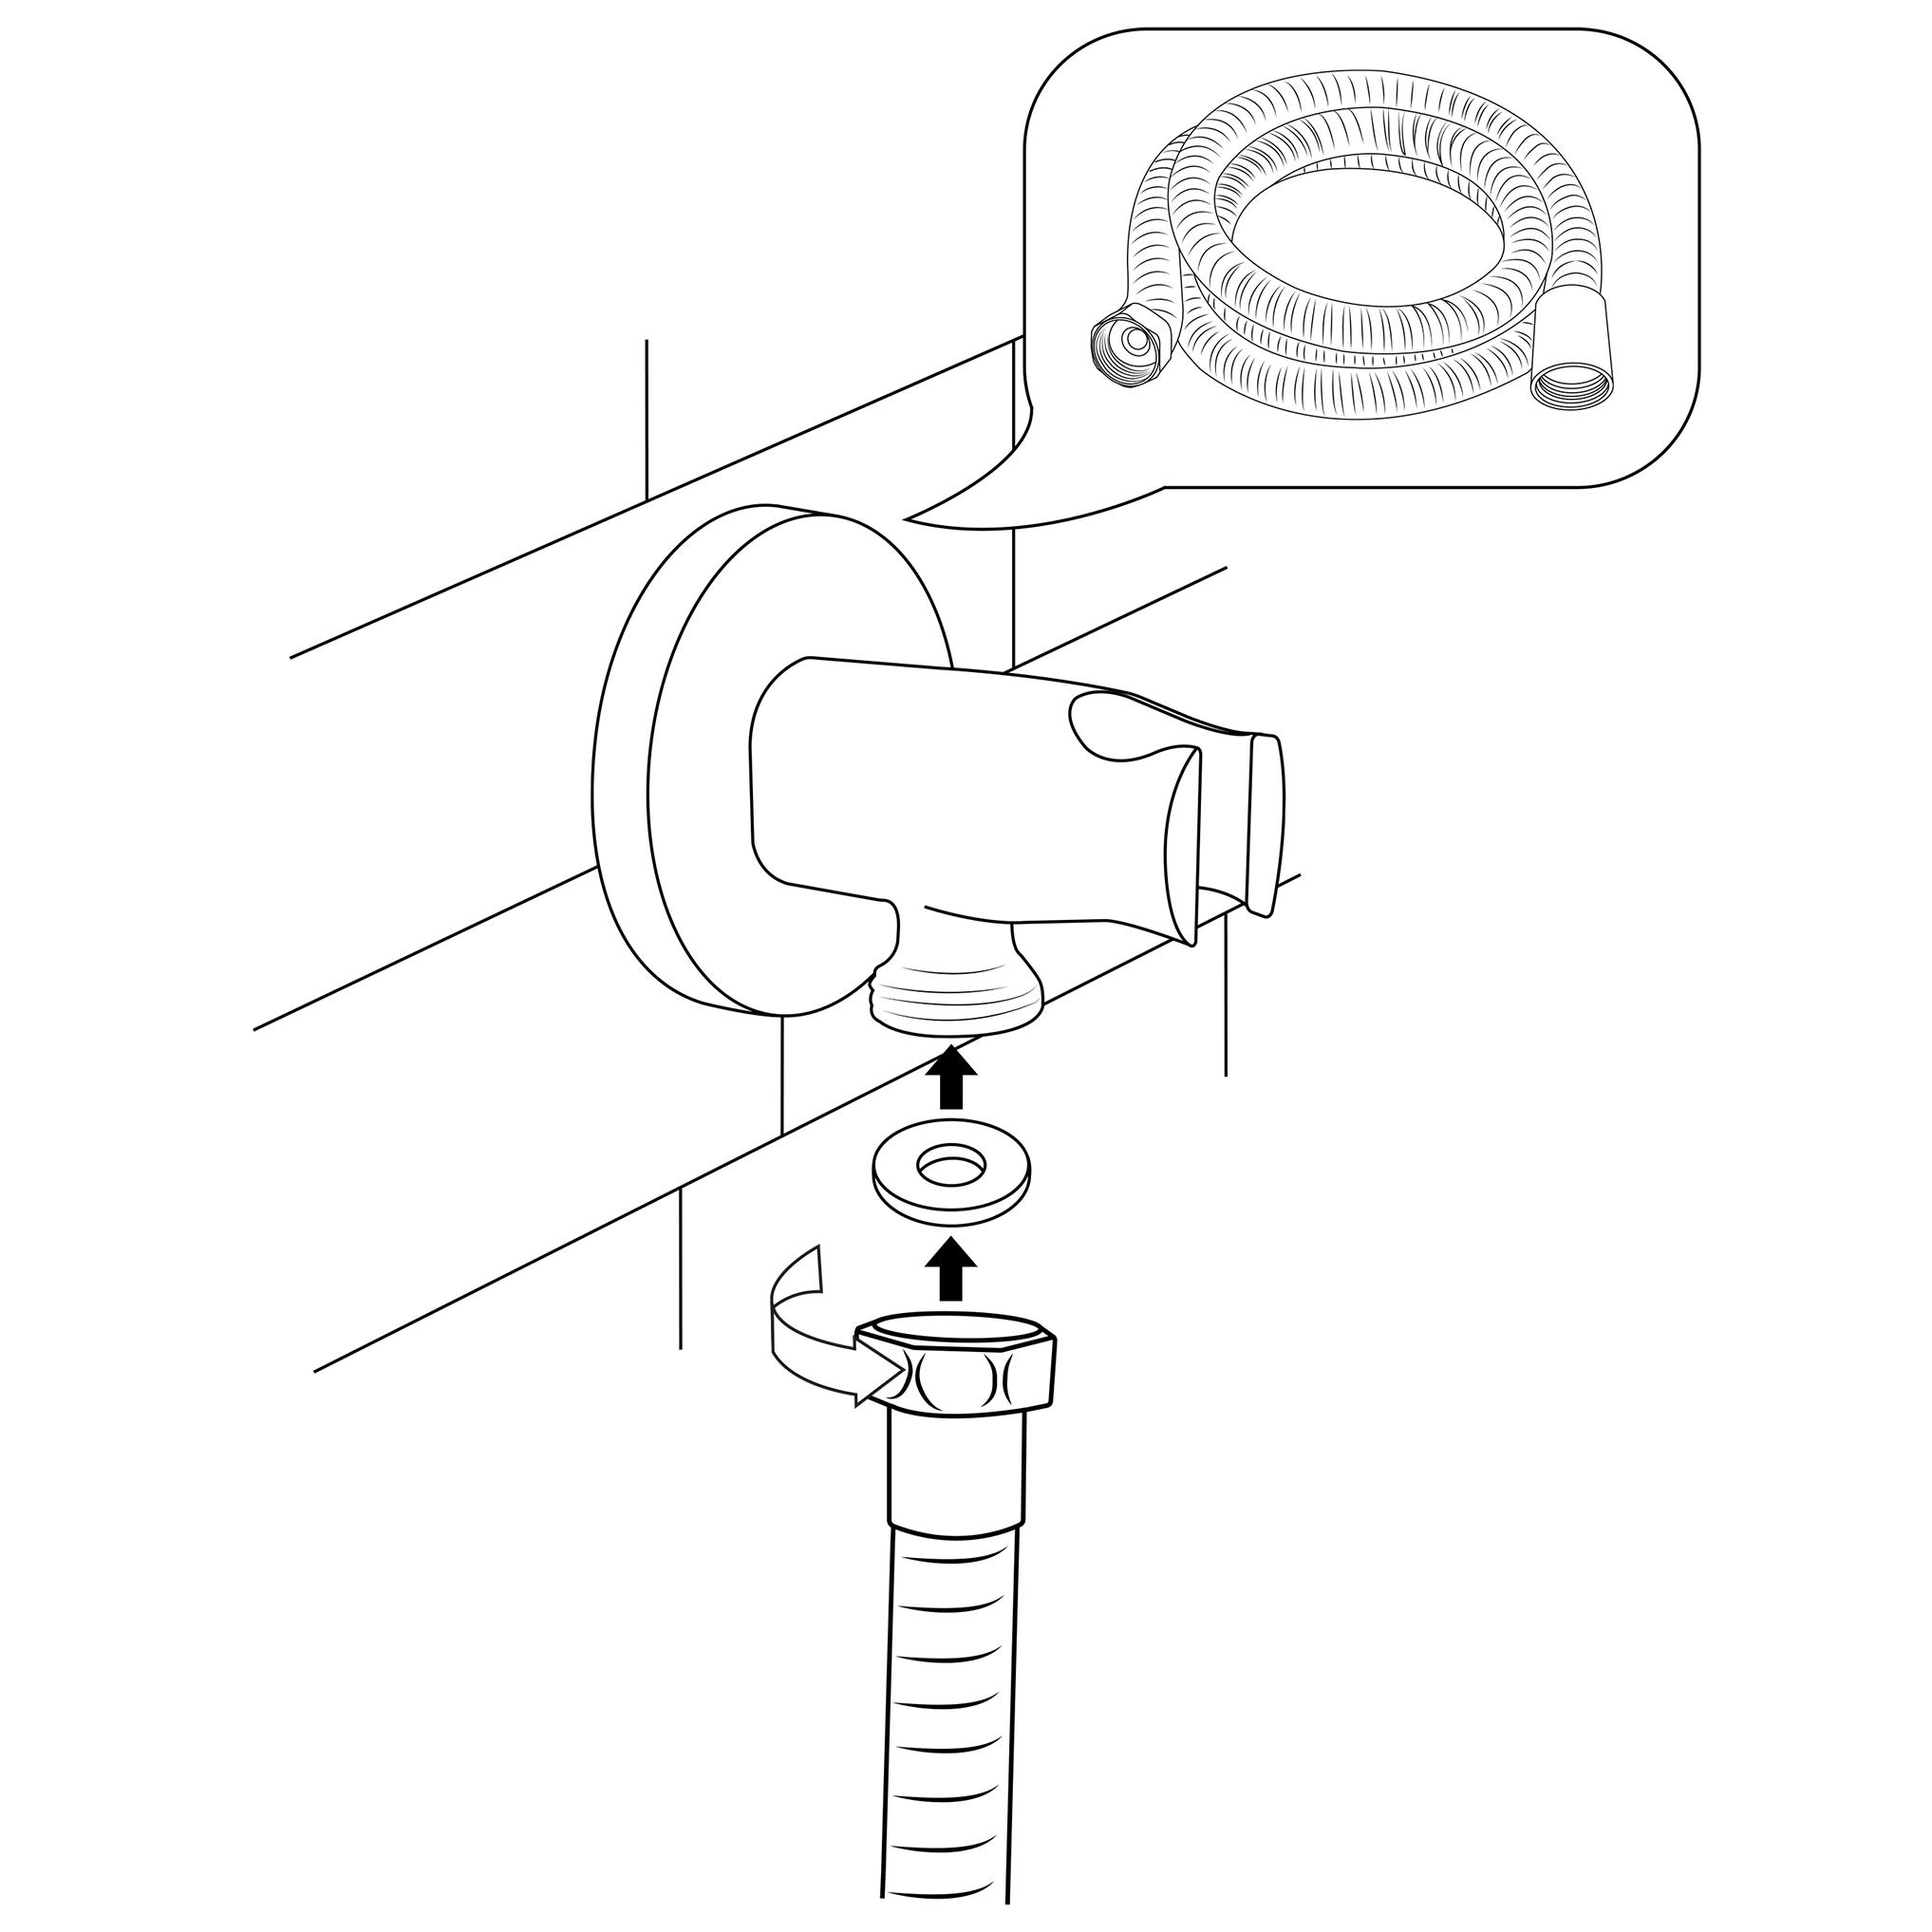
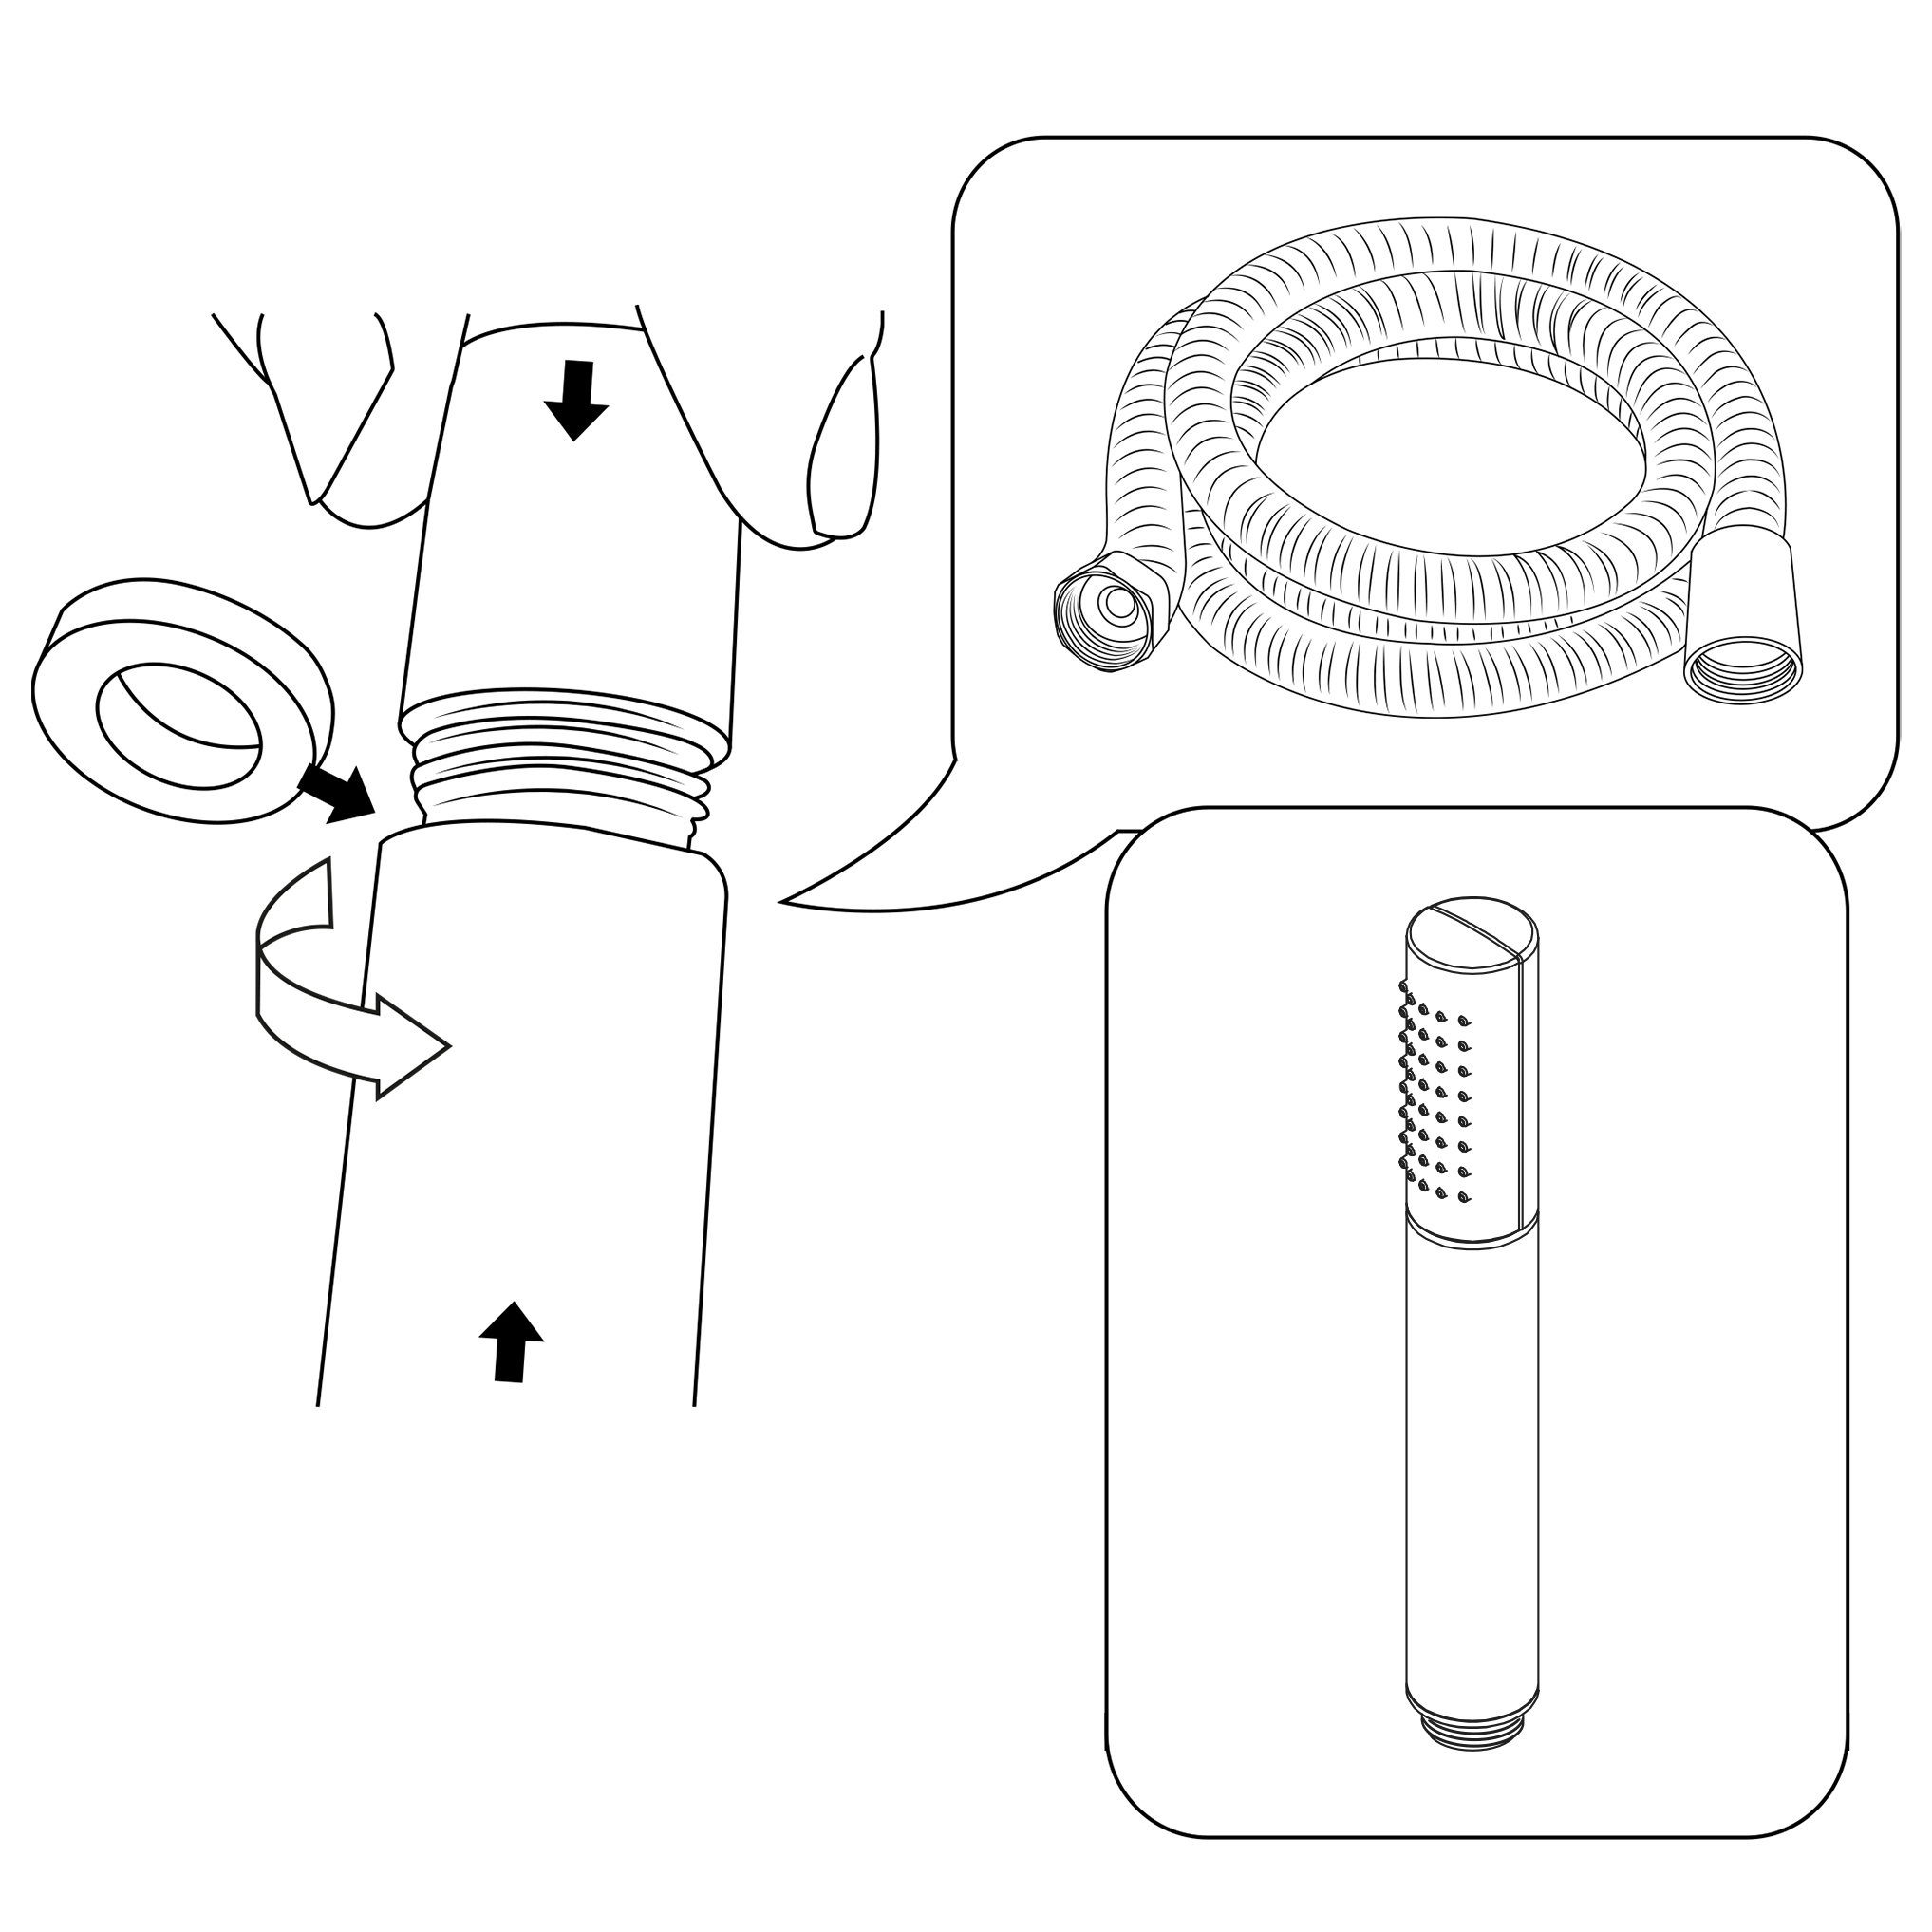
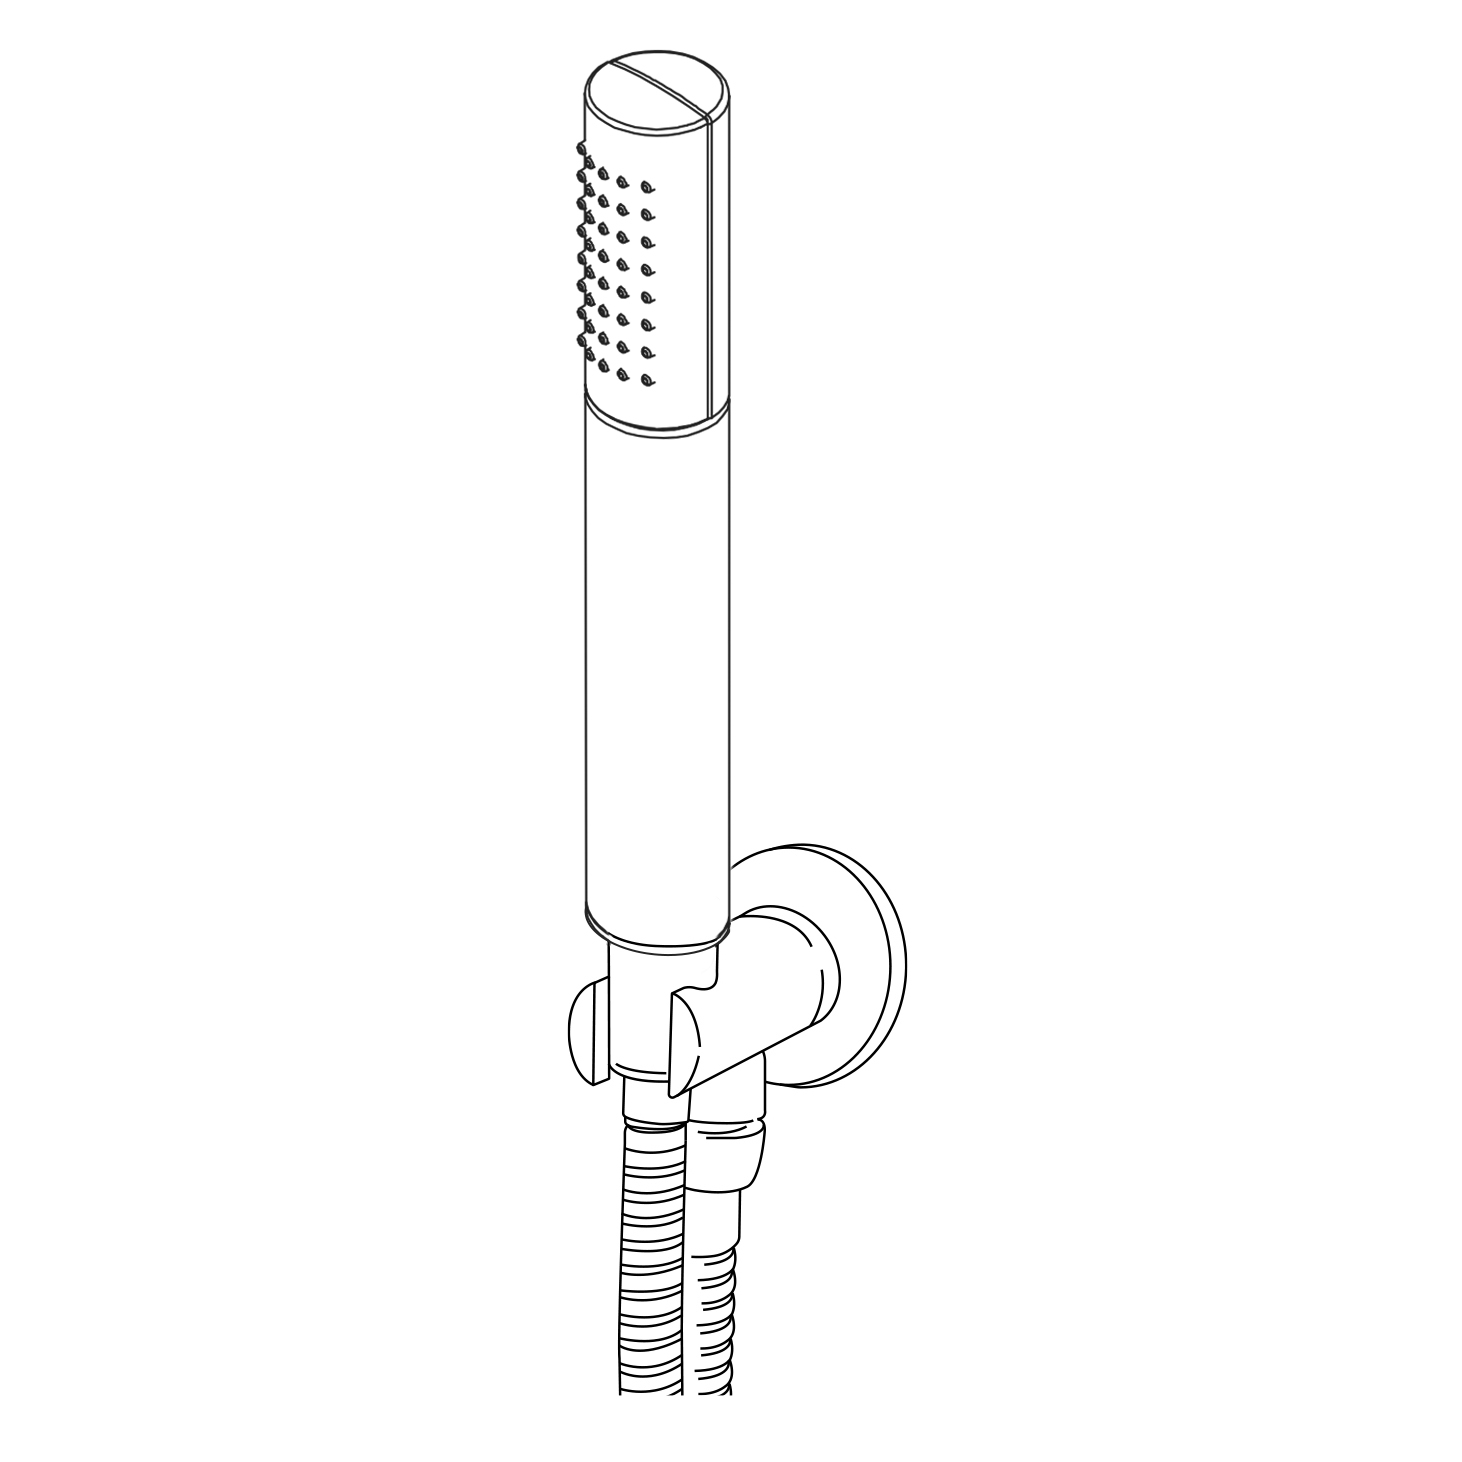
Hand Held Shower Installation Instructions
|
Step 1:
|
|
Step 2:
|
|
|
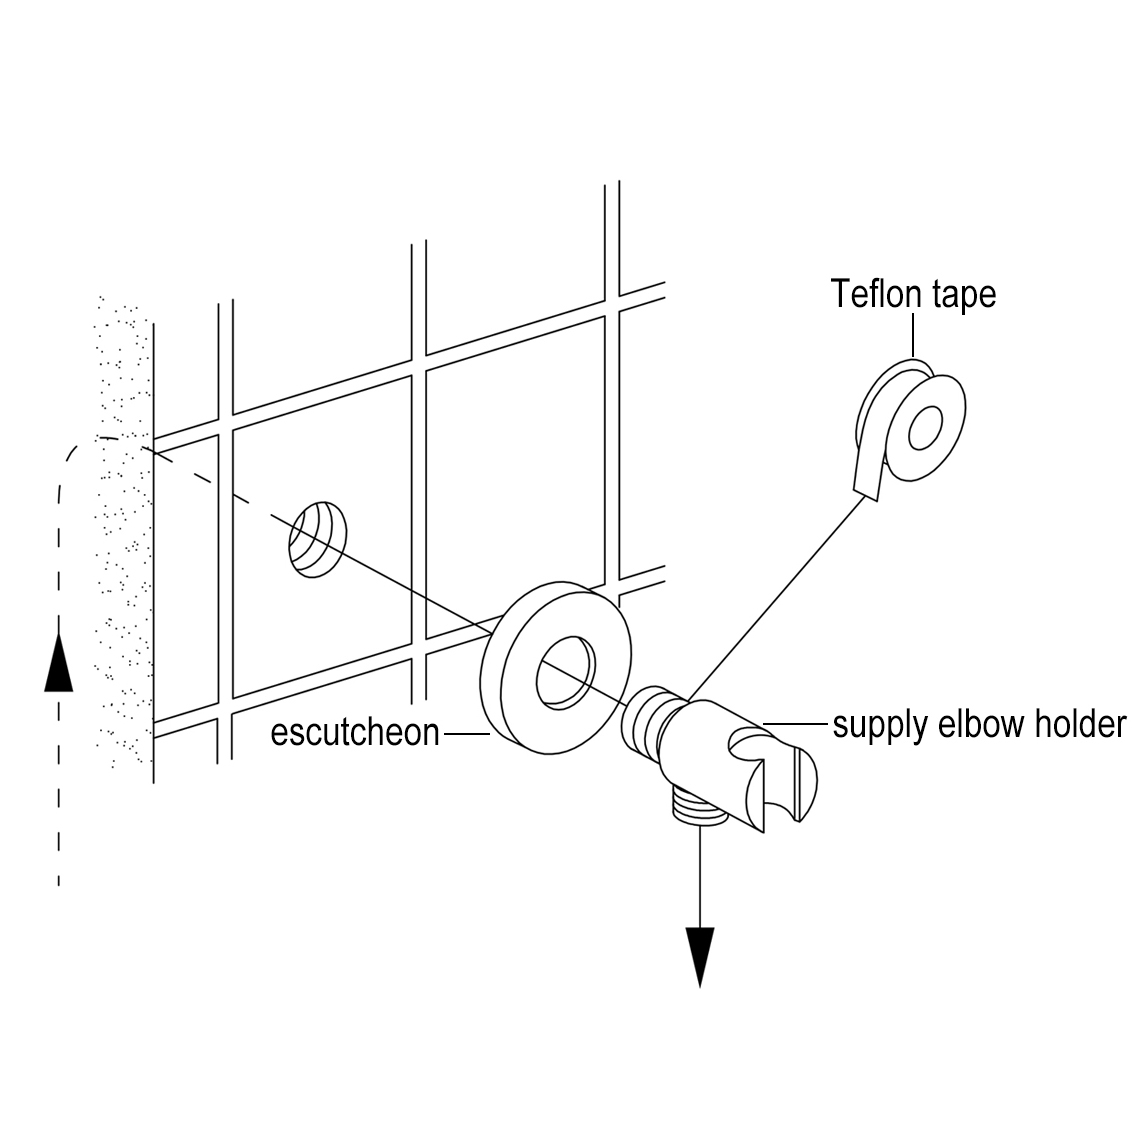
|
Hand Held
Shower
|
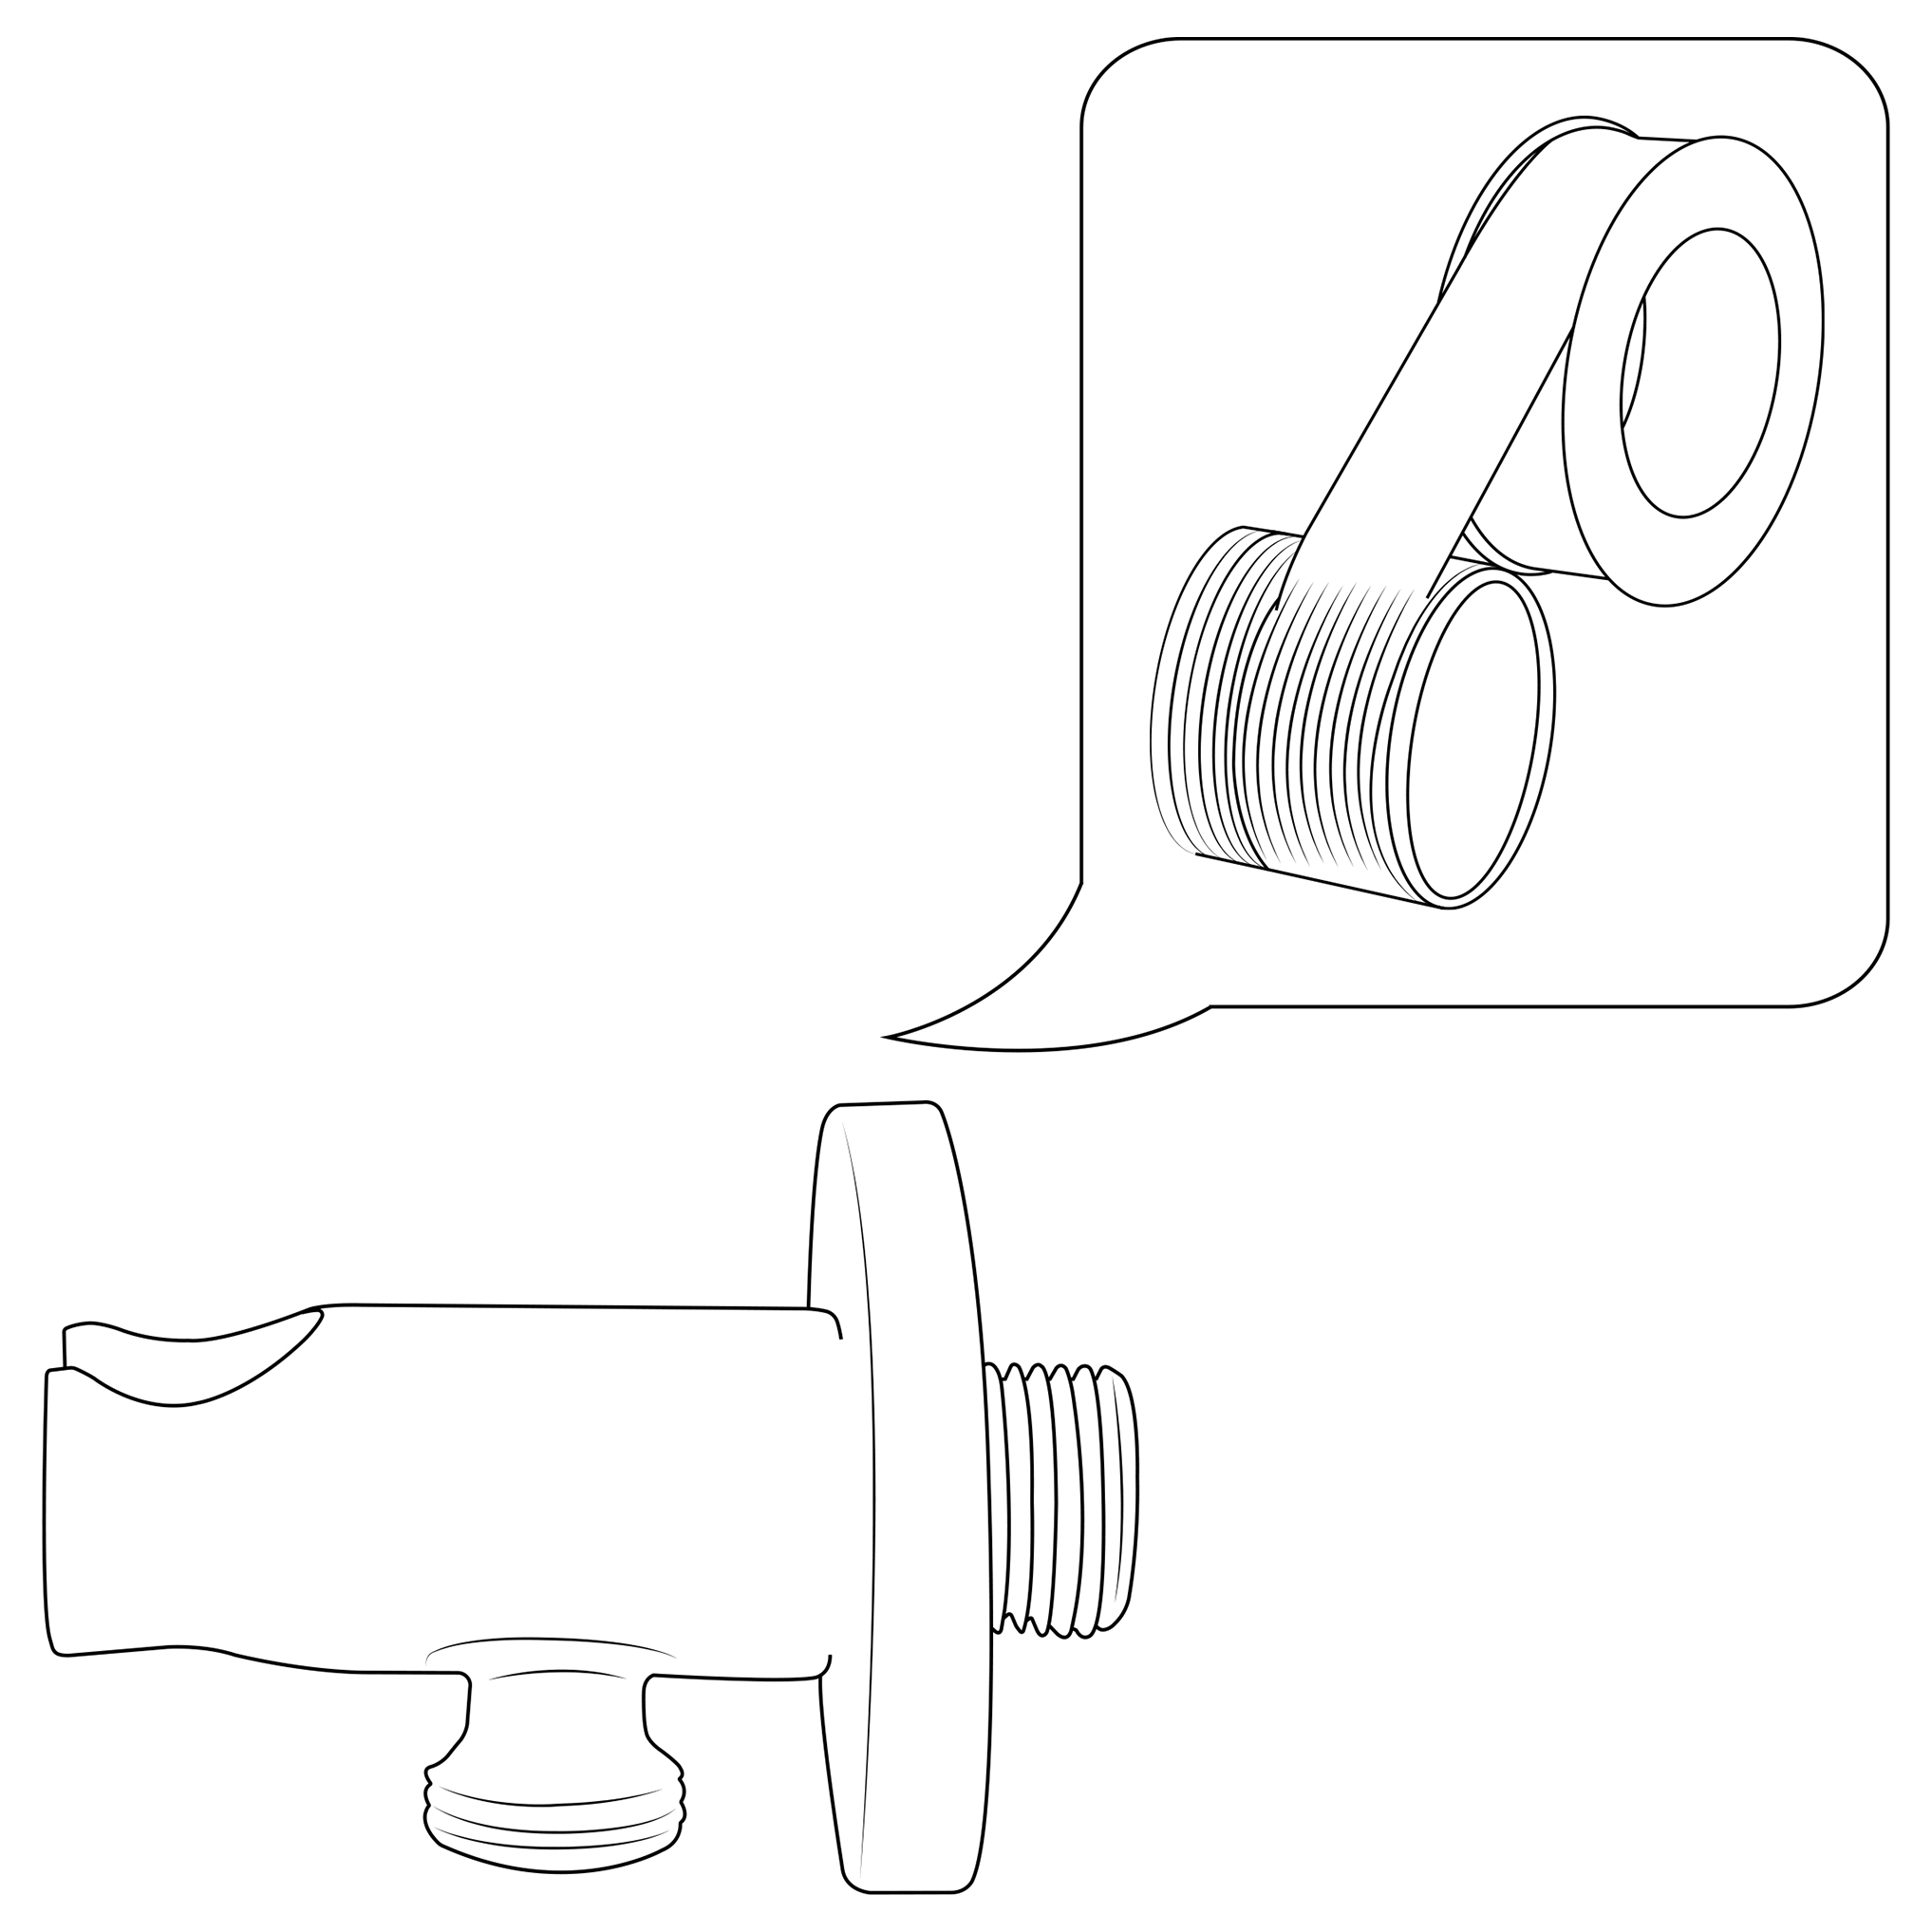
|
Hand
Held
Shower
|
|
|
Handheld Shower
|
|
|
|
|
|
Step 3:
|
|
Step 4:
|
|
|
|
|
|
|
|
|
Hand Shower
|
|
|
|
|
|
Step 5:
|
|
Step 6:
|
|
|
|
|
|
|
|
|
Handheld Shower
|
|
|
|
|
|
Step 7:
|
|
|
|
|
|
|
|
|
|
|
Hand Shower
|
|
|
|
|
Shower Body Jets Installation Instructions

|
Step 1:
|
|
|
Step 2:
|
|

|
Body sprays
|
|
|

|
A. Connector
B. Connector Screws (x2)
C. Bracket Screws (x4)
D. Bracket
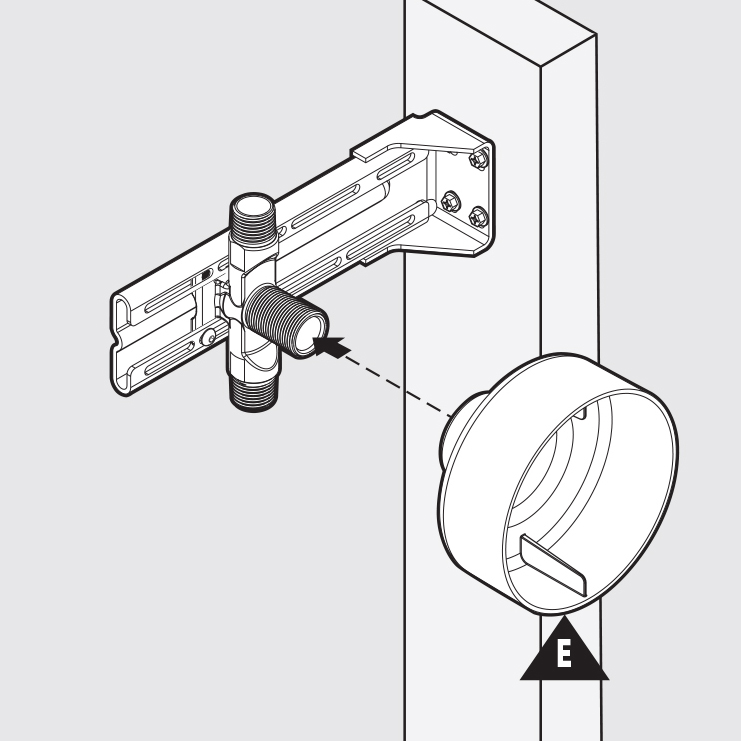
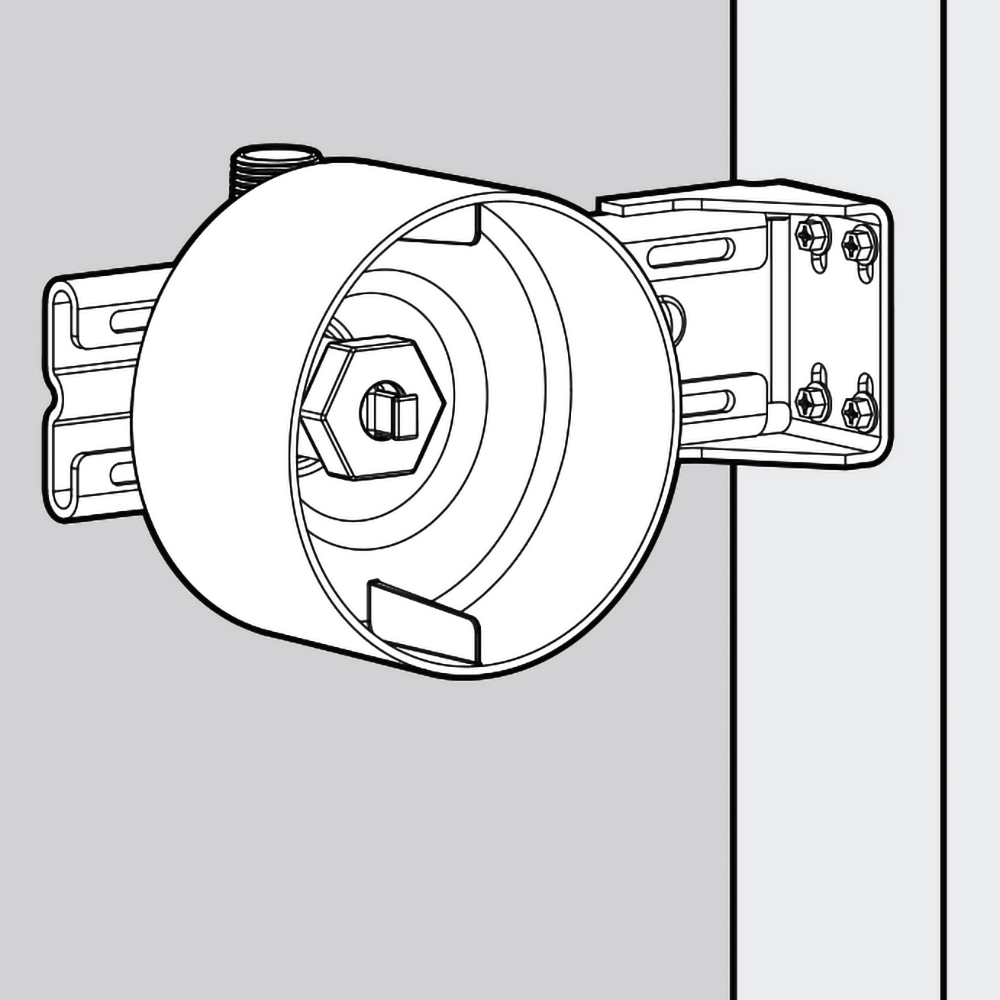
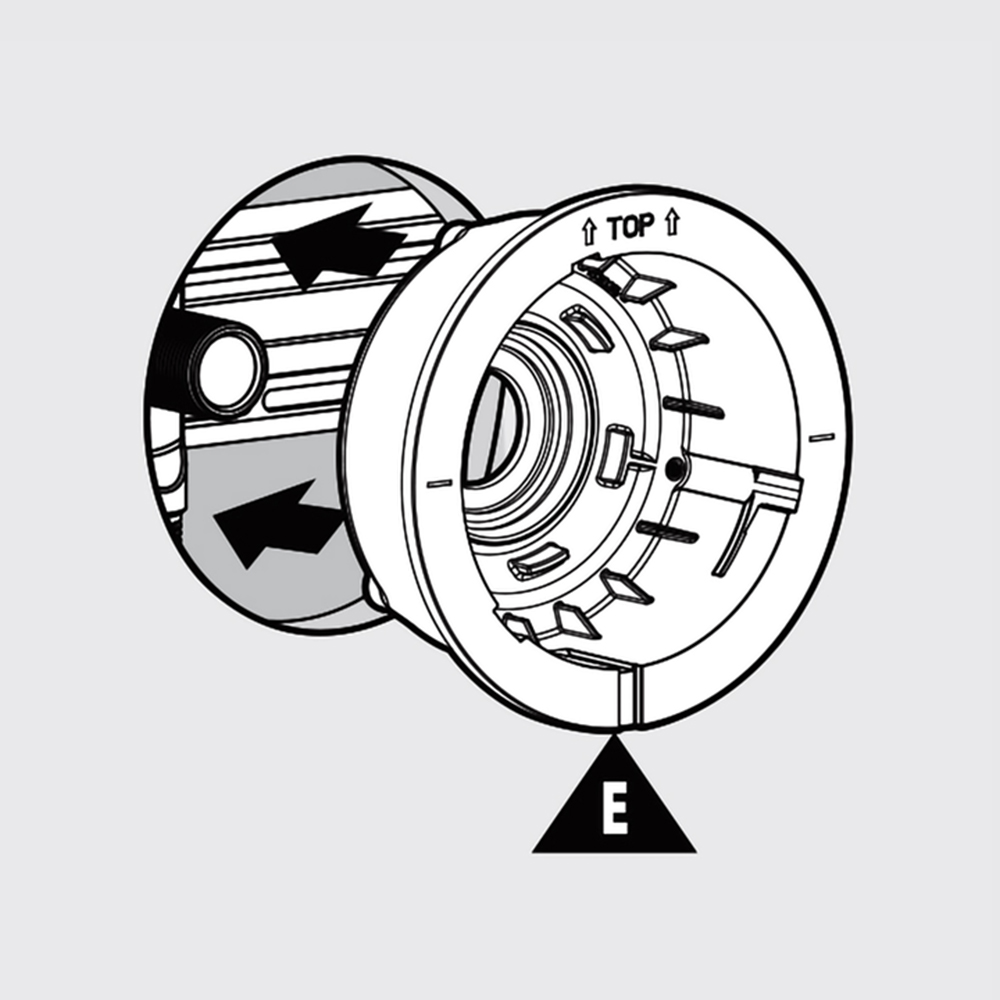
E. Plaster Guard
F. Test Plug
G. Test Plug Nut
H. 1/8" Hex Wrench
|
|
|
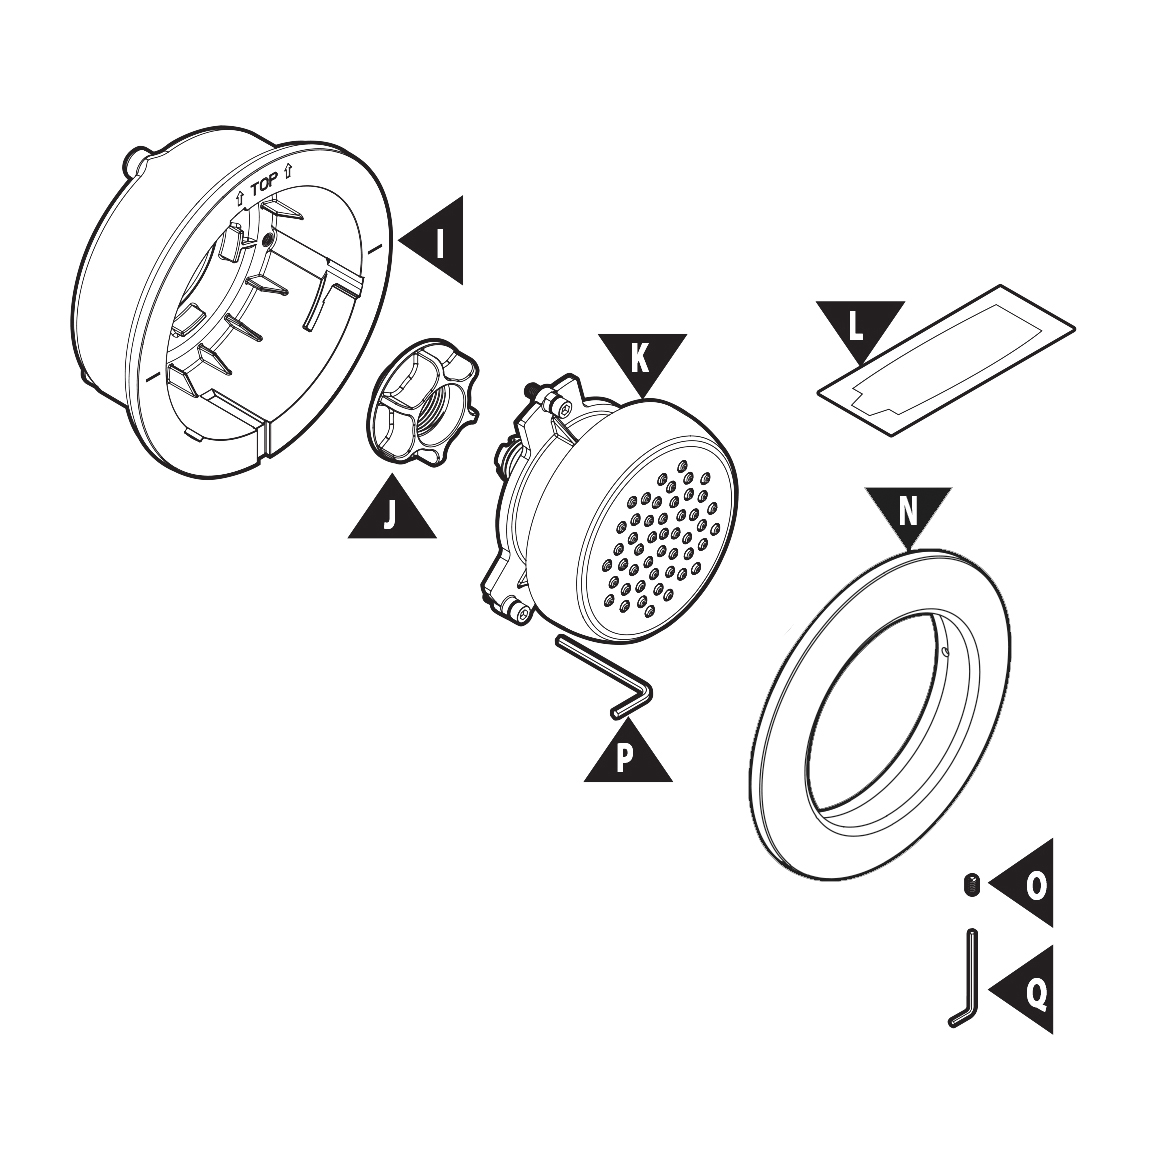
I. Housing
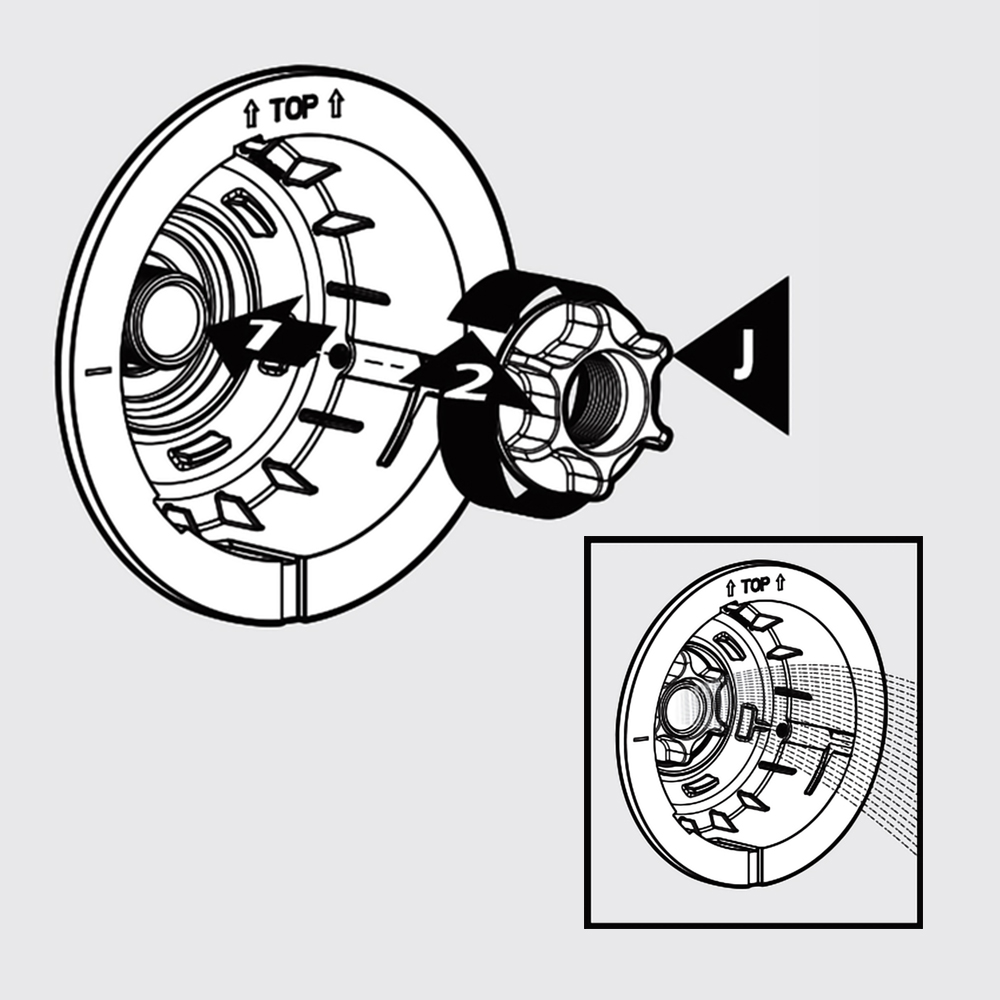
J. Housing Nut
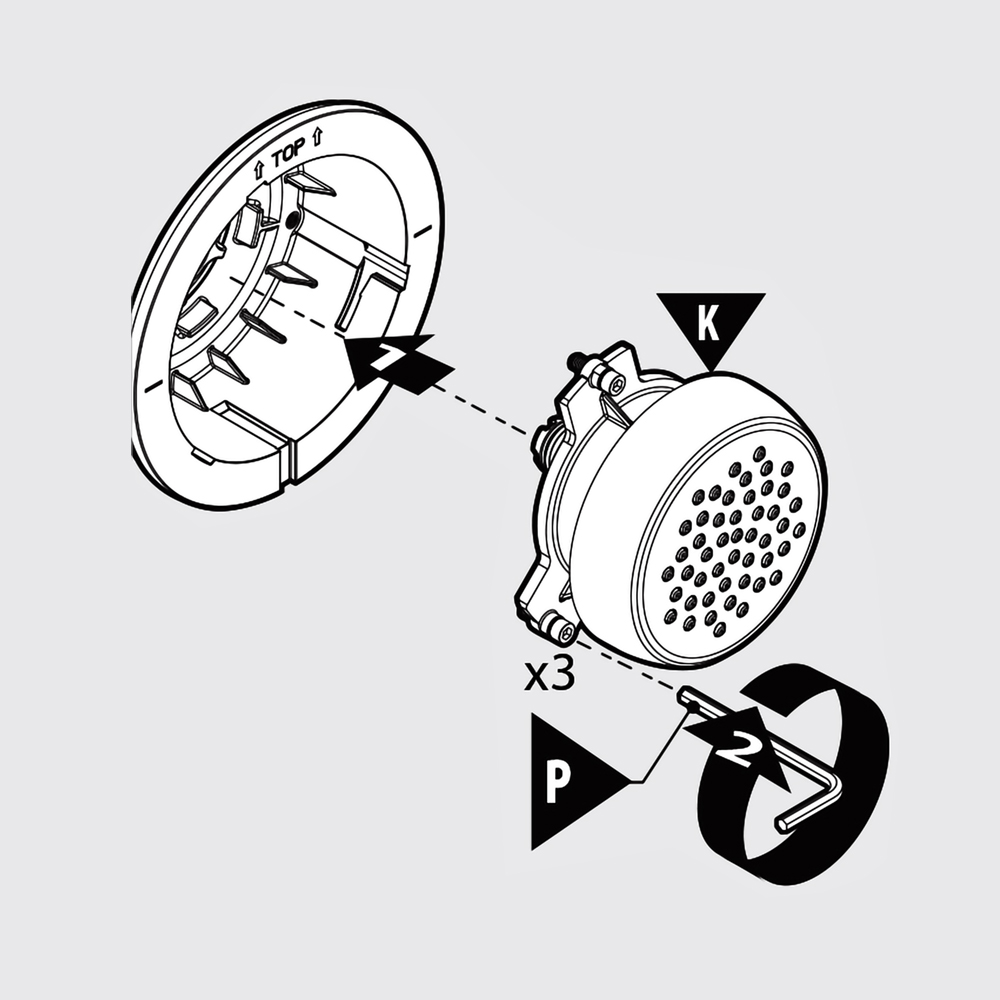
K. Spray Assembly
L. Grease Packet
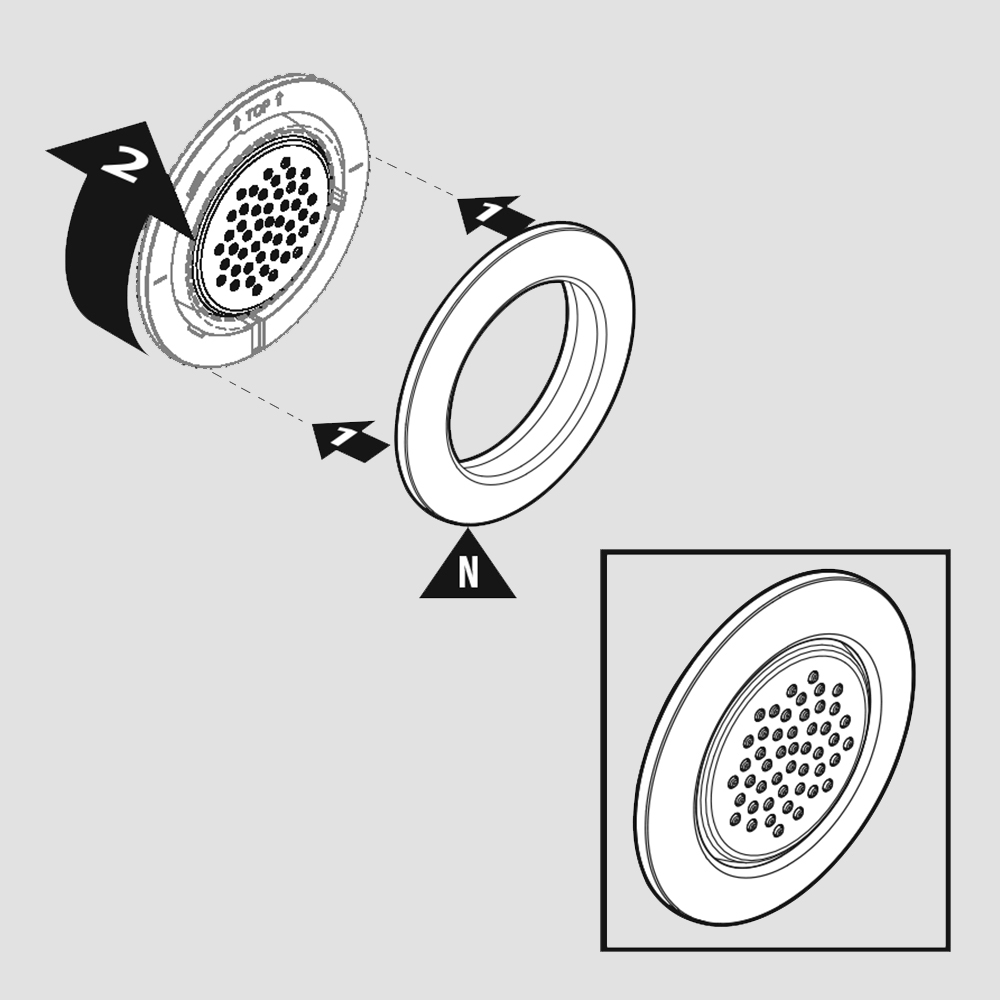
N. Trim Ring-Round
O. Set Screw
P. 9/64" Hex Wrench
Q. 1/16" Hex Wrench
R. Filter
|
|
Body Spray Installation Instructions
|
|
|
|
|
|
Step 3:
|
|
|
Step 4:
|
|
|
|
|
|
|
|
|
|
|
|
|
Body Spray Installation Instructions
|
|
|
|
|
|
Step 5:
|
|
|
Step 6:
|
|
|
|
|
|
|
|
|
|
Flush system before the next step.
|
|
|
Body Spray Installation Instructions
|
|
|
|
|
|
Step 7:
|
|
|
Step 8:
|
|
|
|
|
|
|
|
|
|
|
|
|
Body Spray Installation Instructions
|
|
|
|
|
|
|
|
|
|
|
Shower Thermostatic Mixer Installation Instructions
|
Step 1:
|
|
|
Step 2:
|
|

|
Mixer
|
Valve
|
|

|
|
|
|
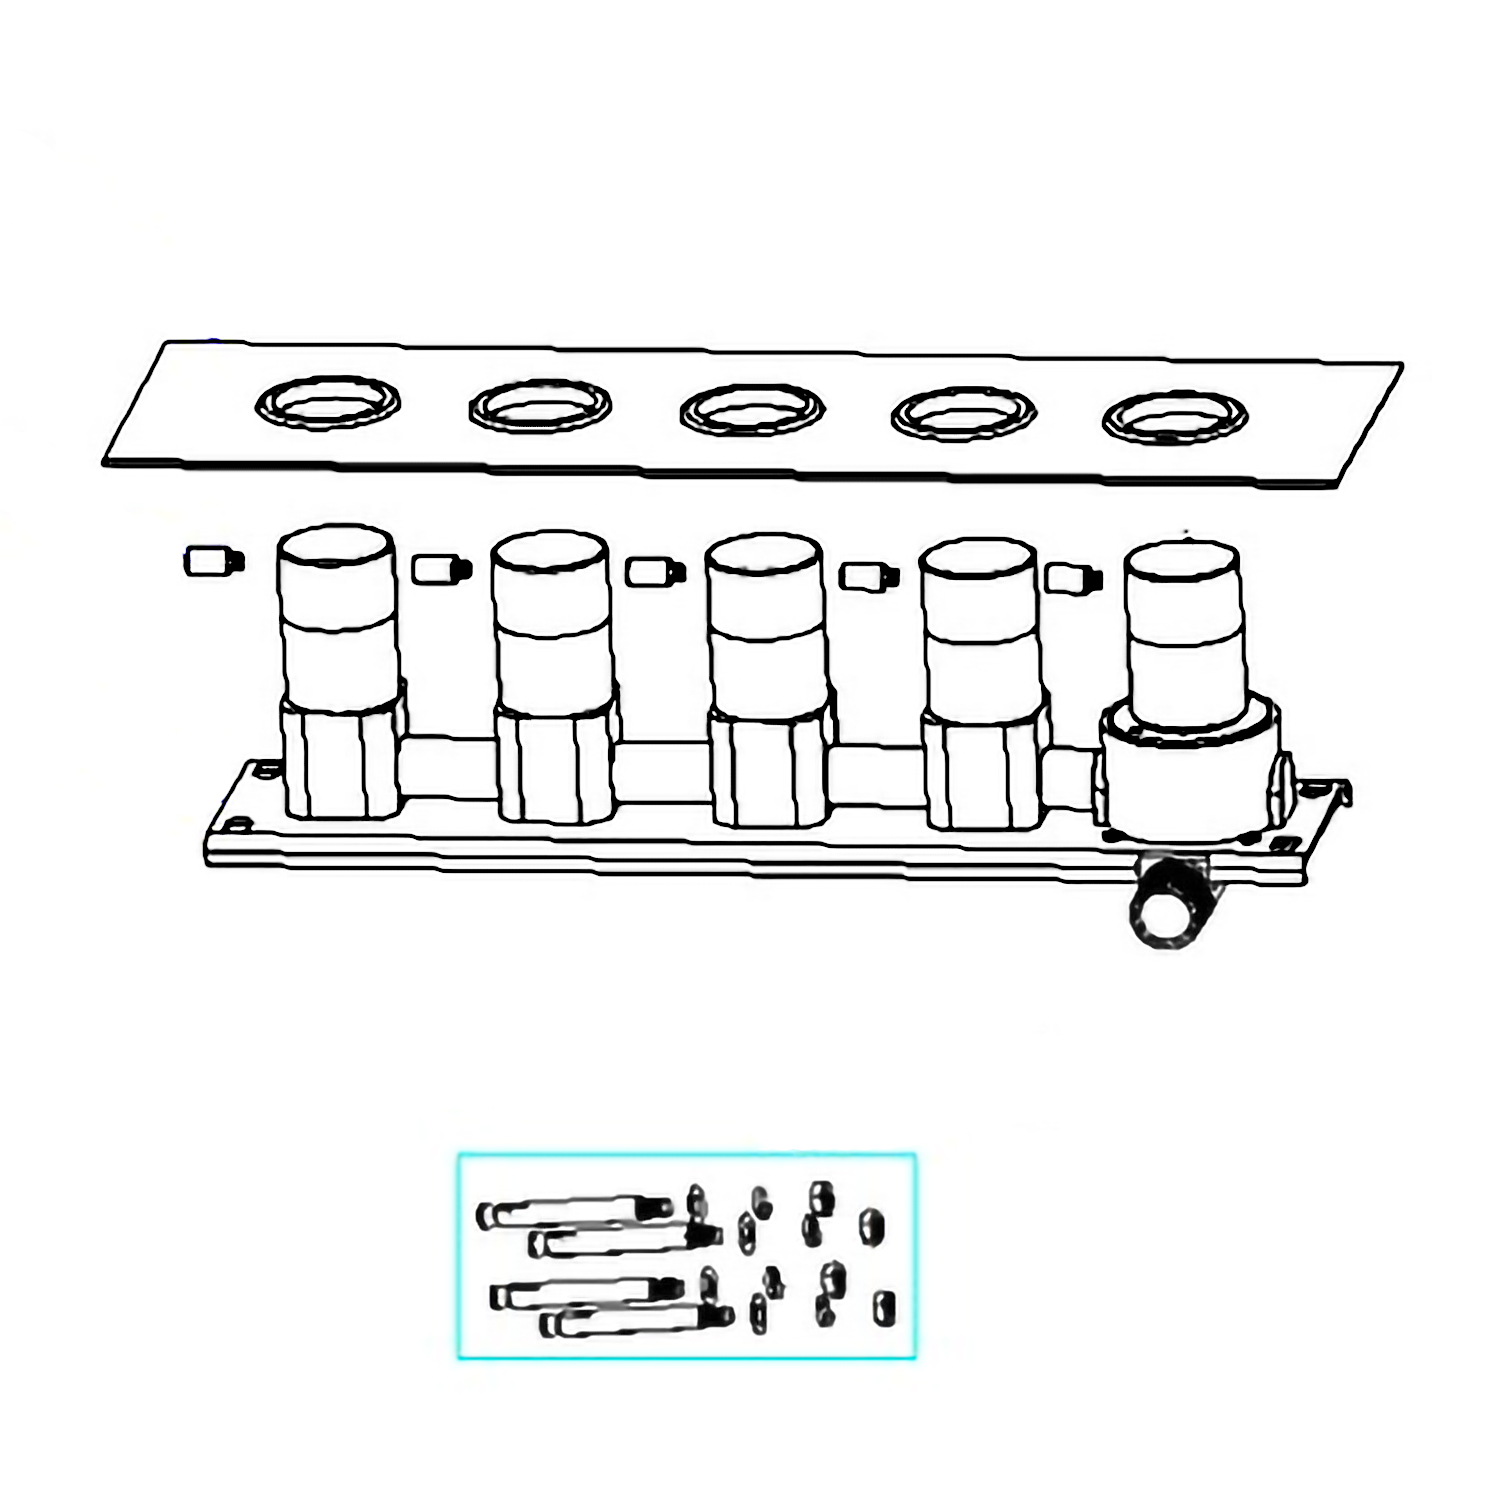
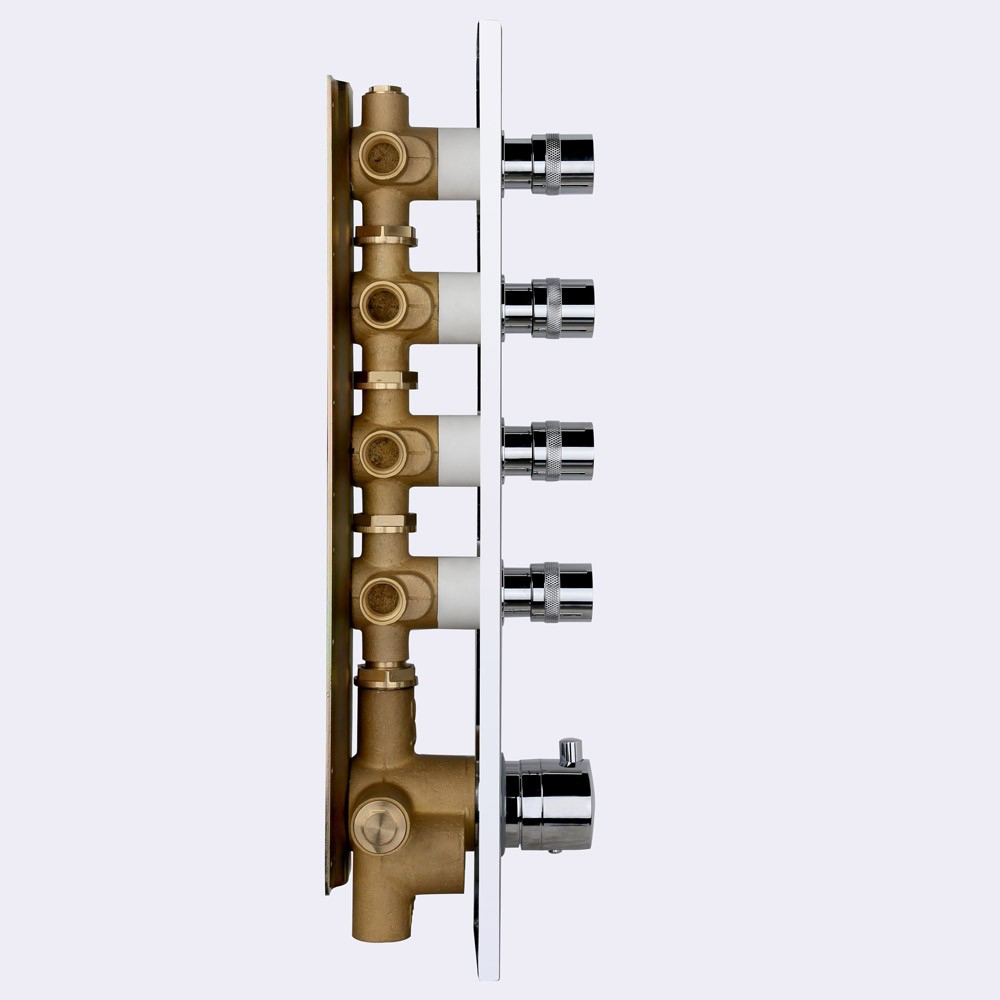
Release 4 handwheel levers according to the above directions.
Take apart the embed valve, panel, and handwheel.
|
|
Mixer Control Valve Installation Instructions
|
|
|
|
|
|
Step 3:
|
|
|
Step 4:
|
|
|
|
|
|
|
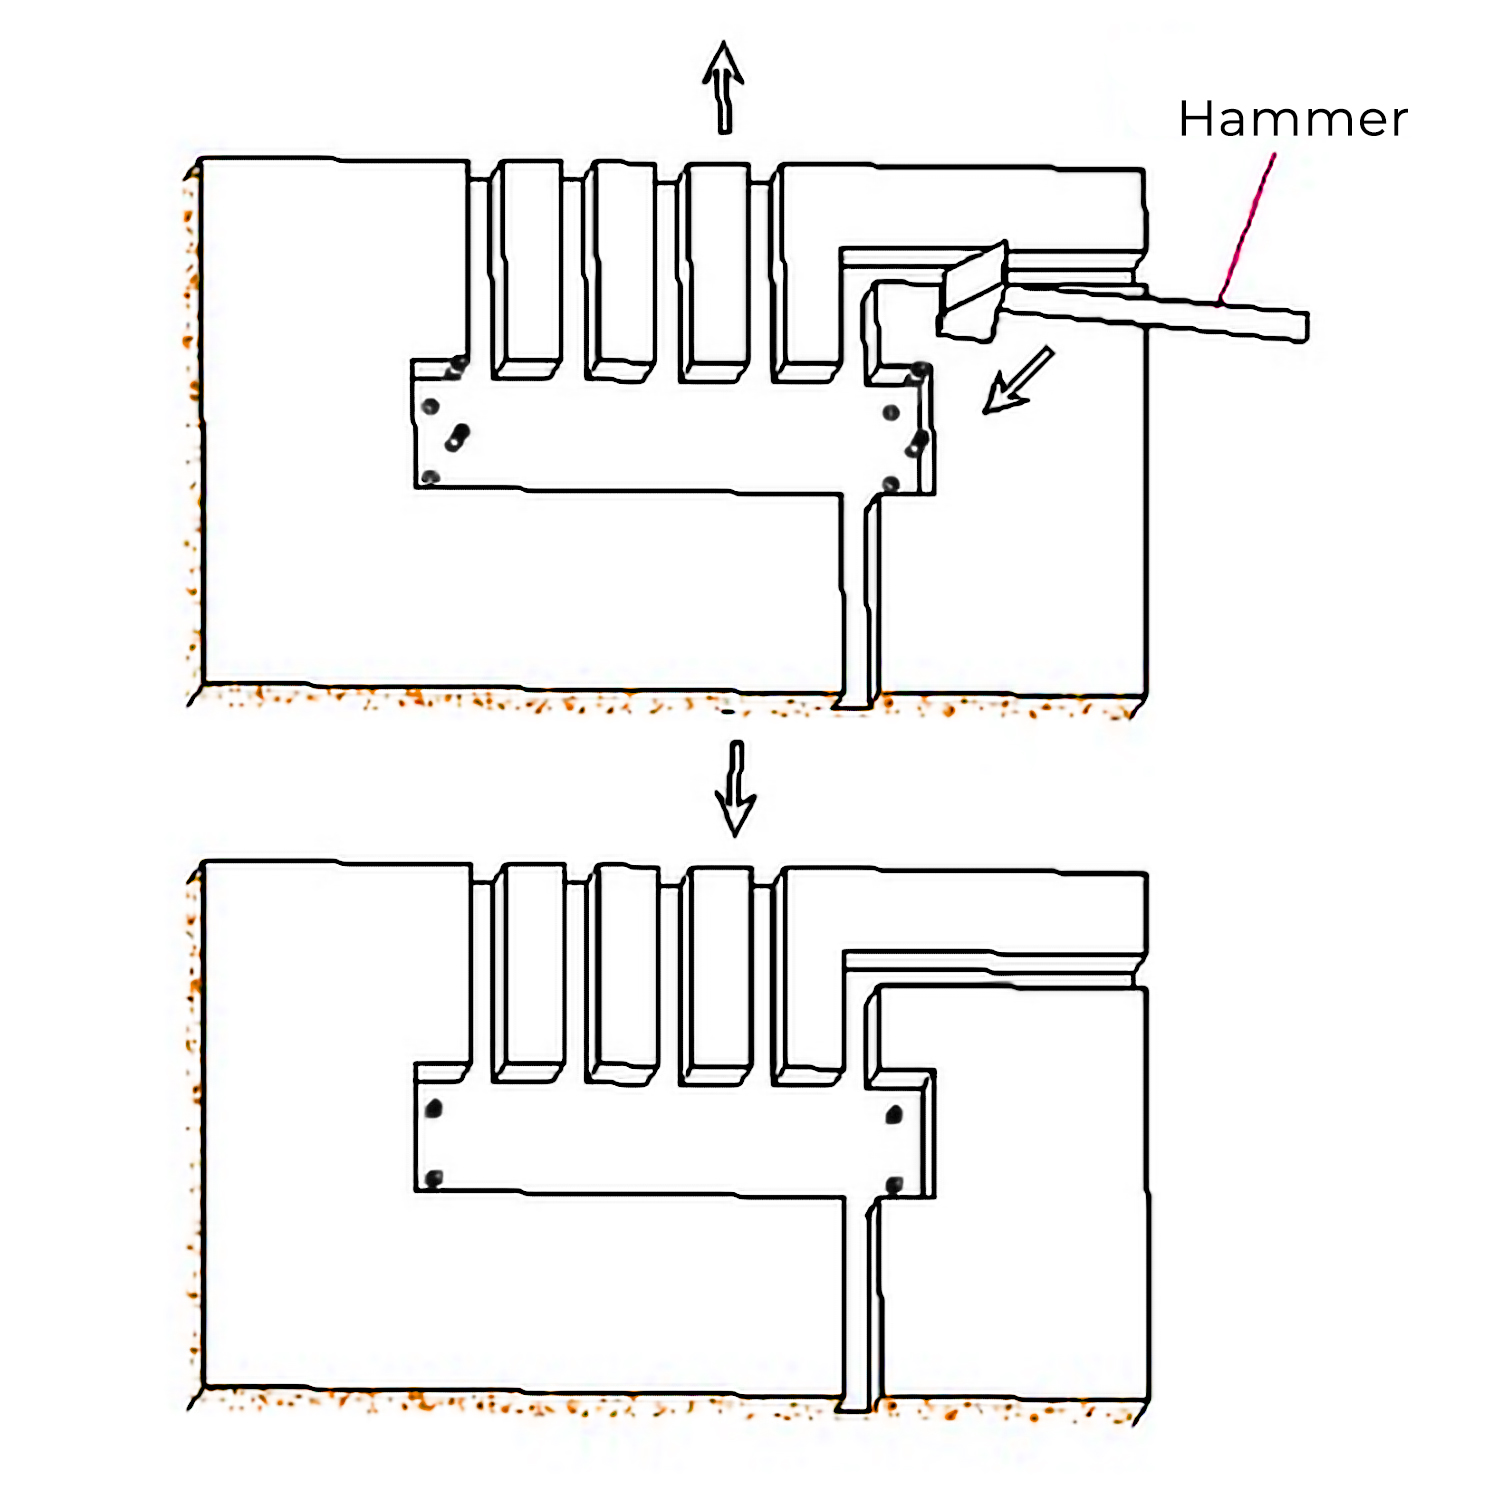
Dig the embed space for the pipe on the wall according to the specification of the valve.
Dig 4 holes according to the position of the screws.
|
|
|
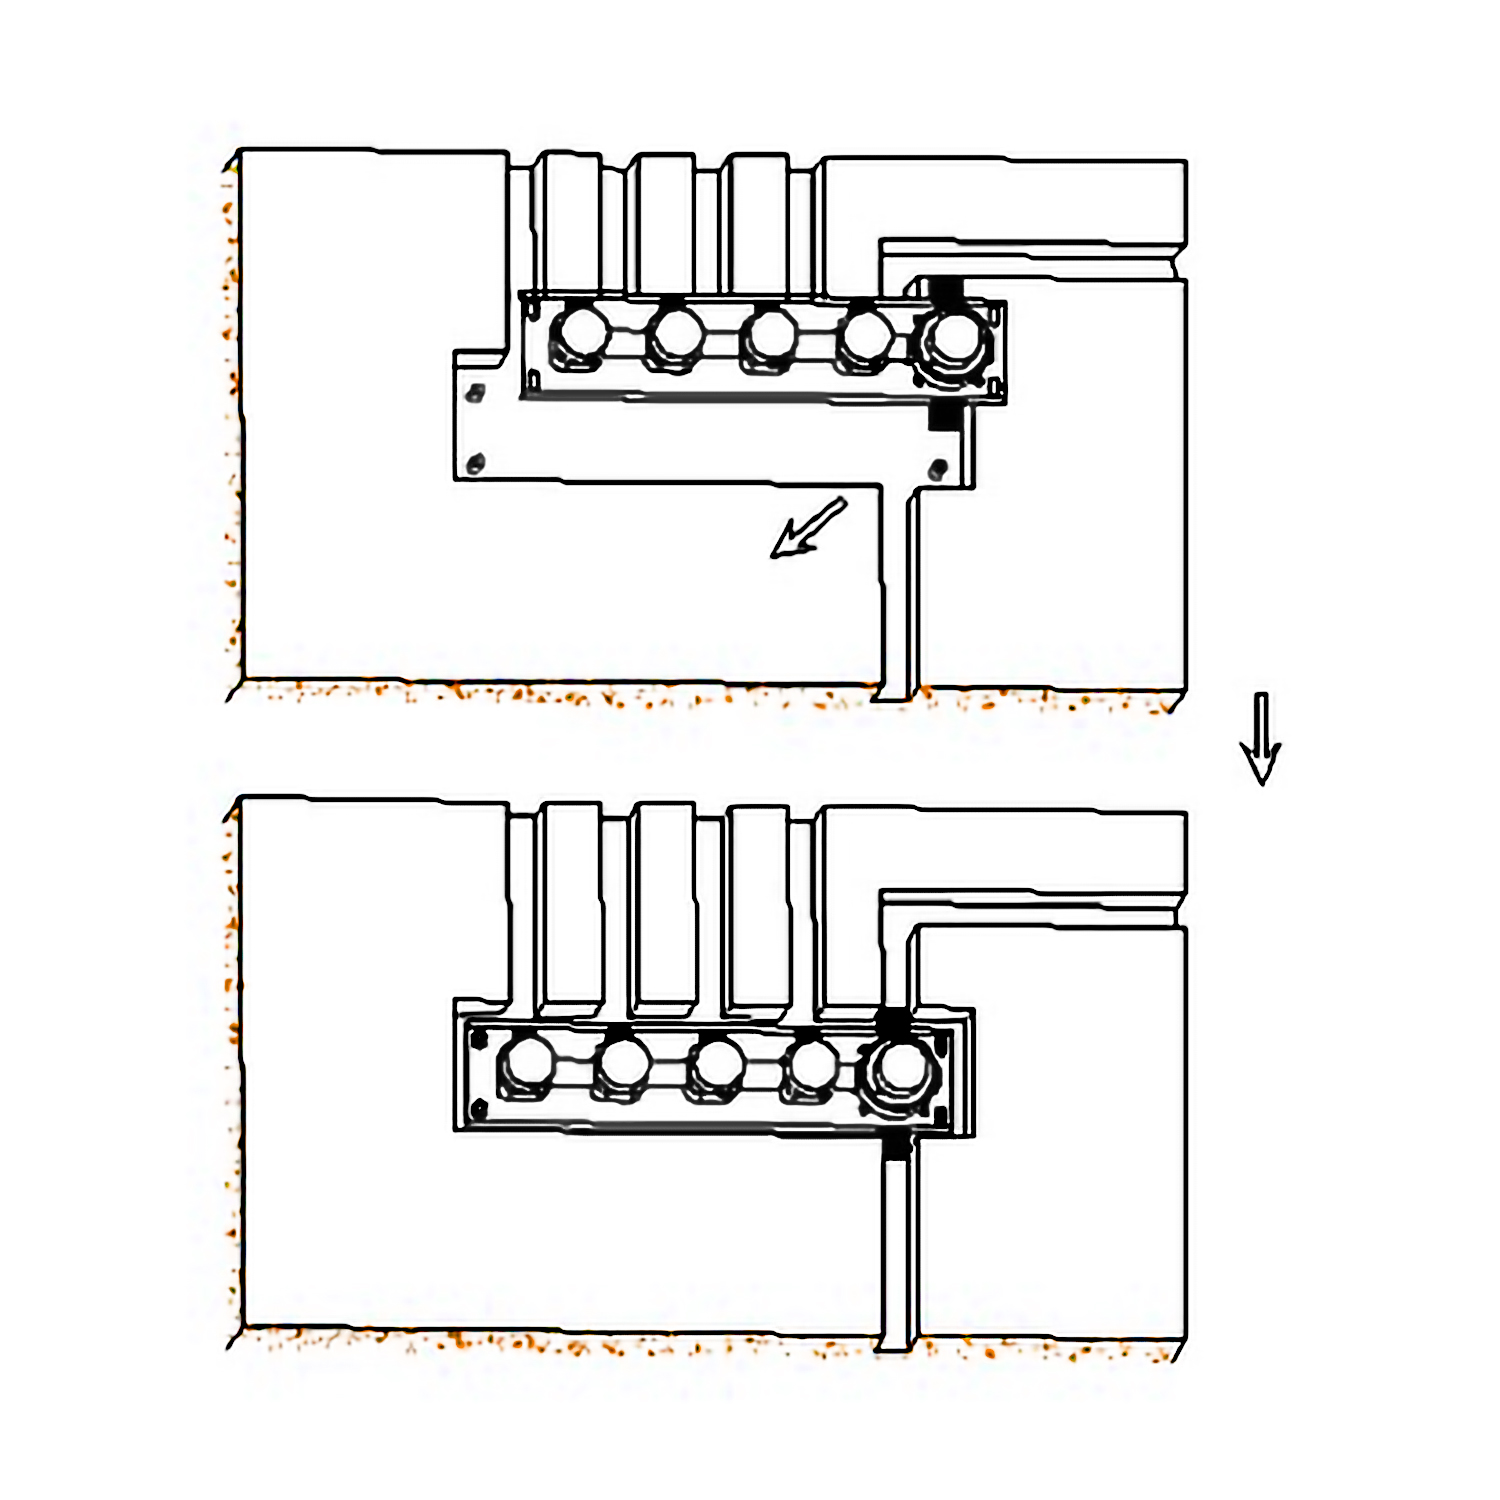
Use a hammer to thwack the screws into 4 holes.
Fix the valve body with 4 screws.
|
|
|
Mixer Control Valve Installation Instruction
|
|
|
|
|
|
Step 5:
|
|
|
Step 6:
|
|
|
|
|
|
|
|
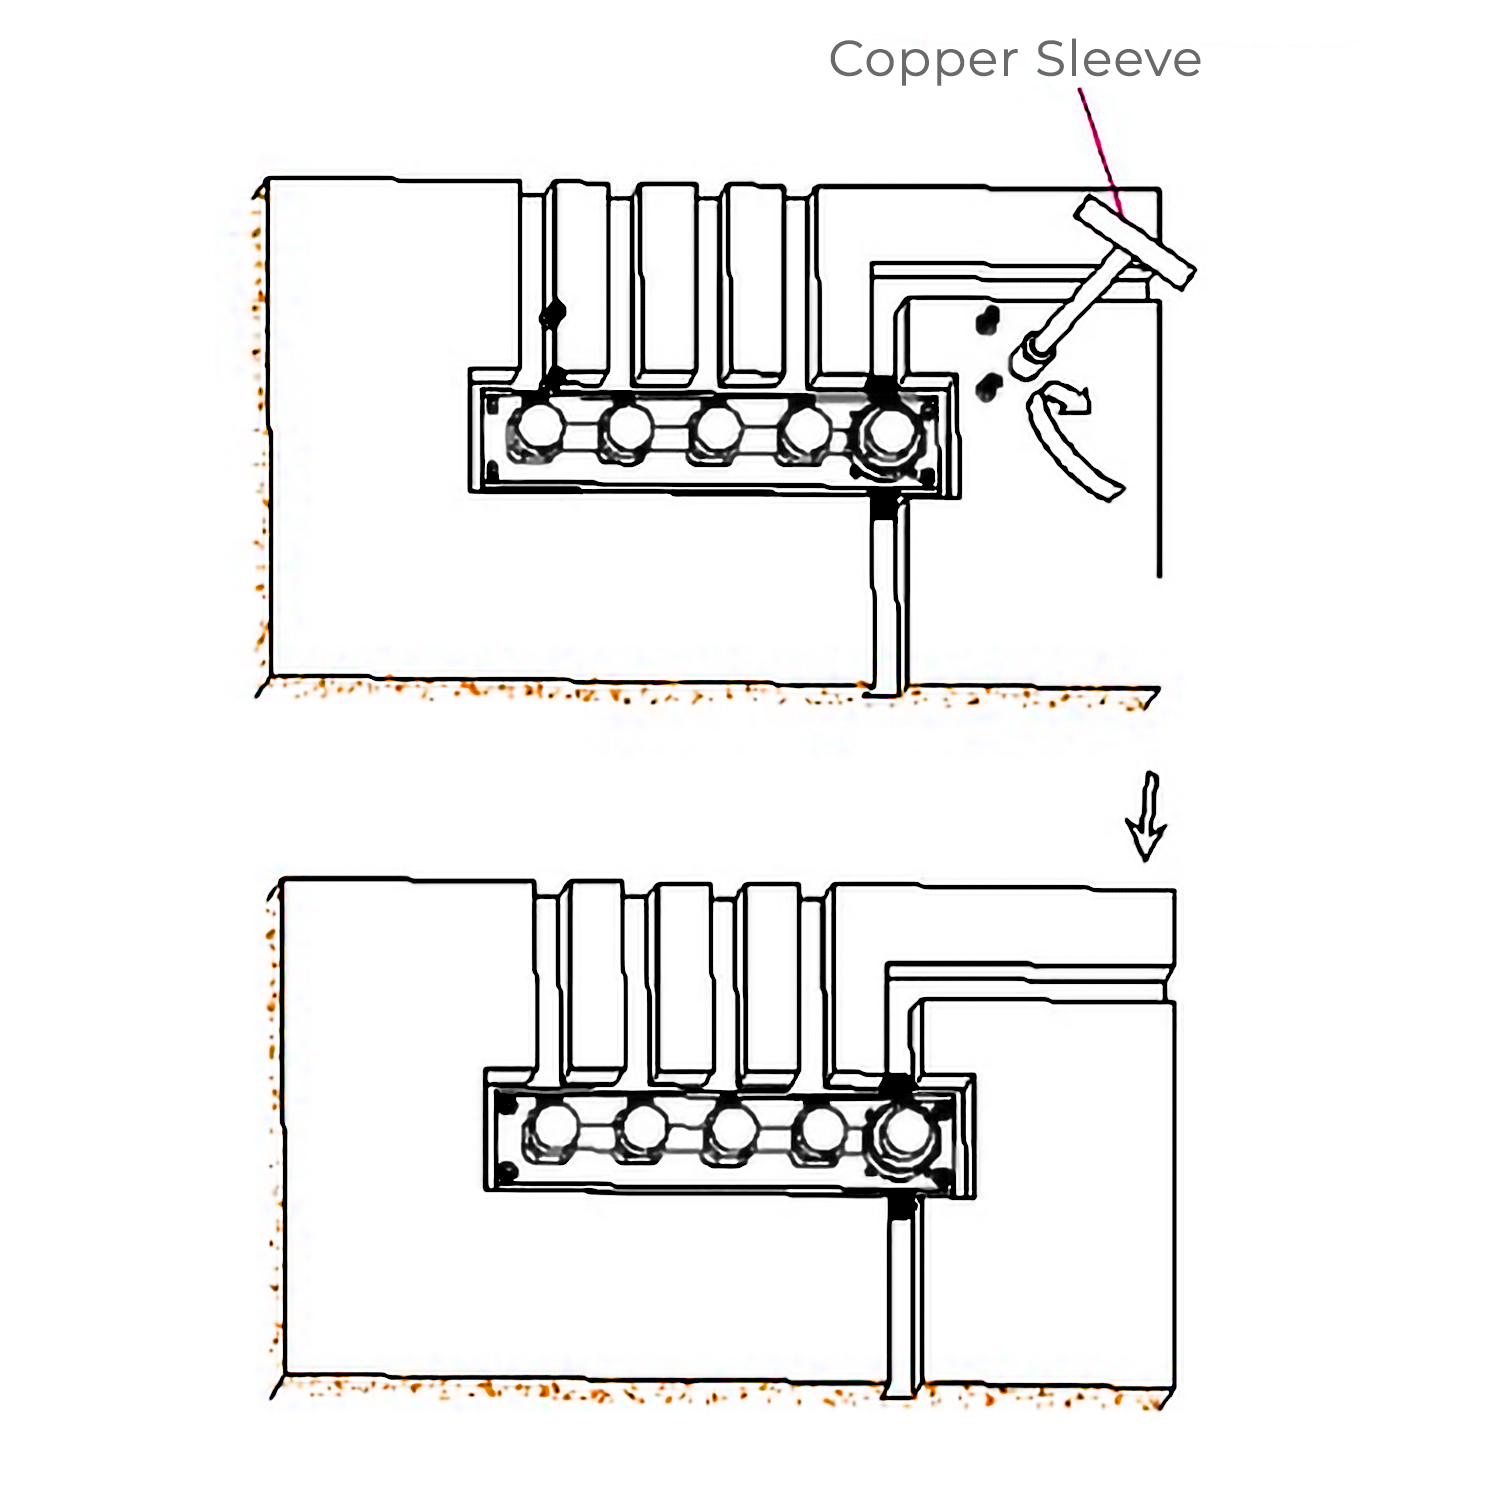
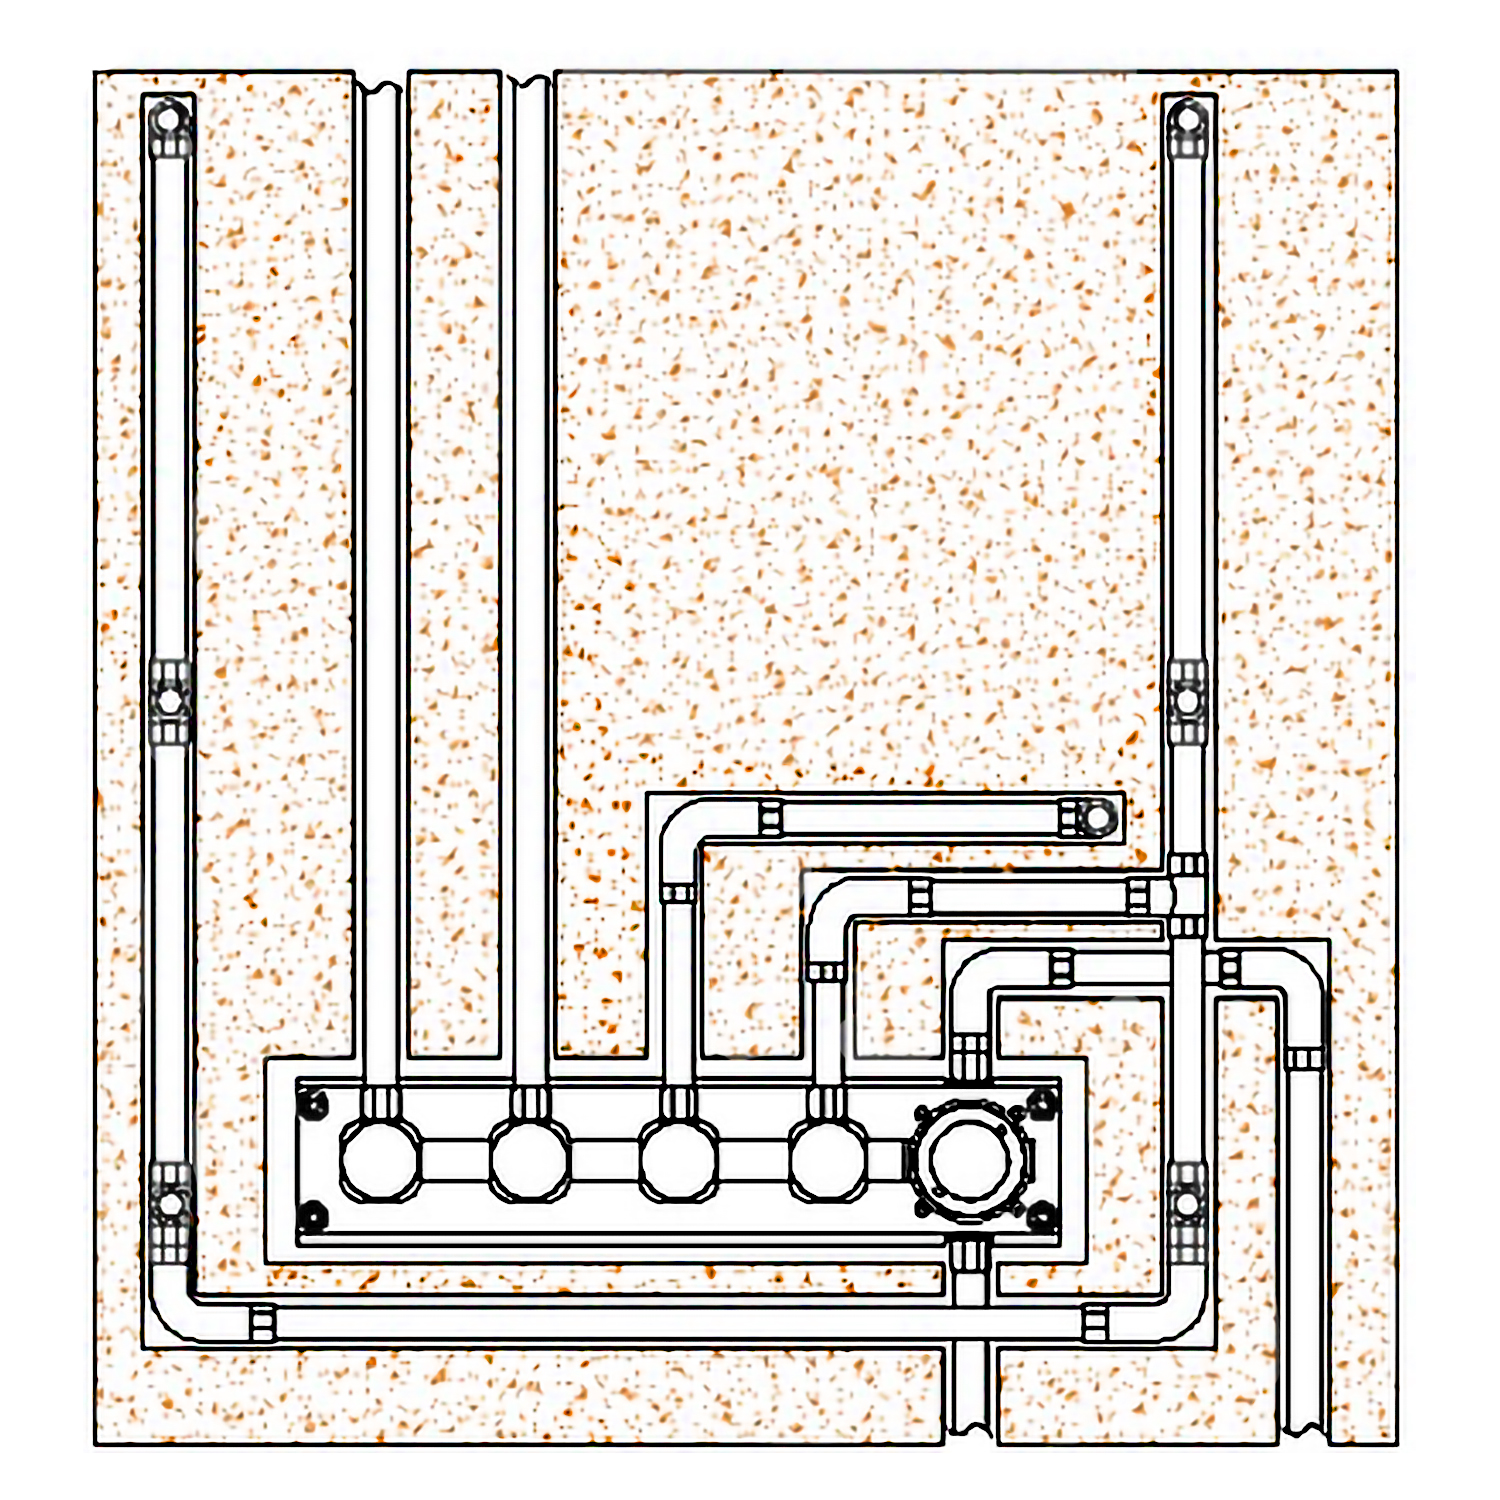
Find out the expansion screw heads with washer and spring washer. Use copper sleeve wrench to lock the screw heads with the embed valve body.
|
|
|
After connecting all the pipes and before sealing the wall with concrete, confirm no leaking problem occurs when you turn on the water.
|
|
|
Mixer Control Valve Installation Instruction
|
|
|
|
|
|
Step 7:
|
|
|
Step 8:
|
|
|
|
|
|
|
|
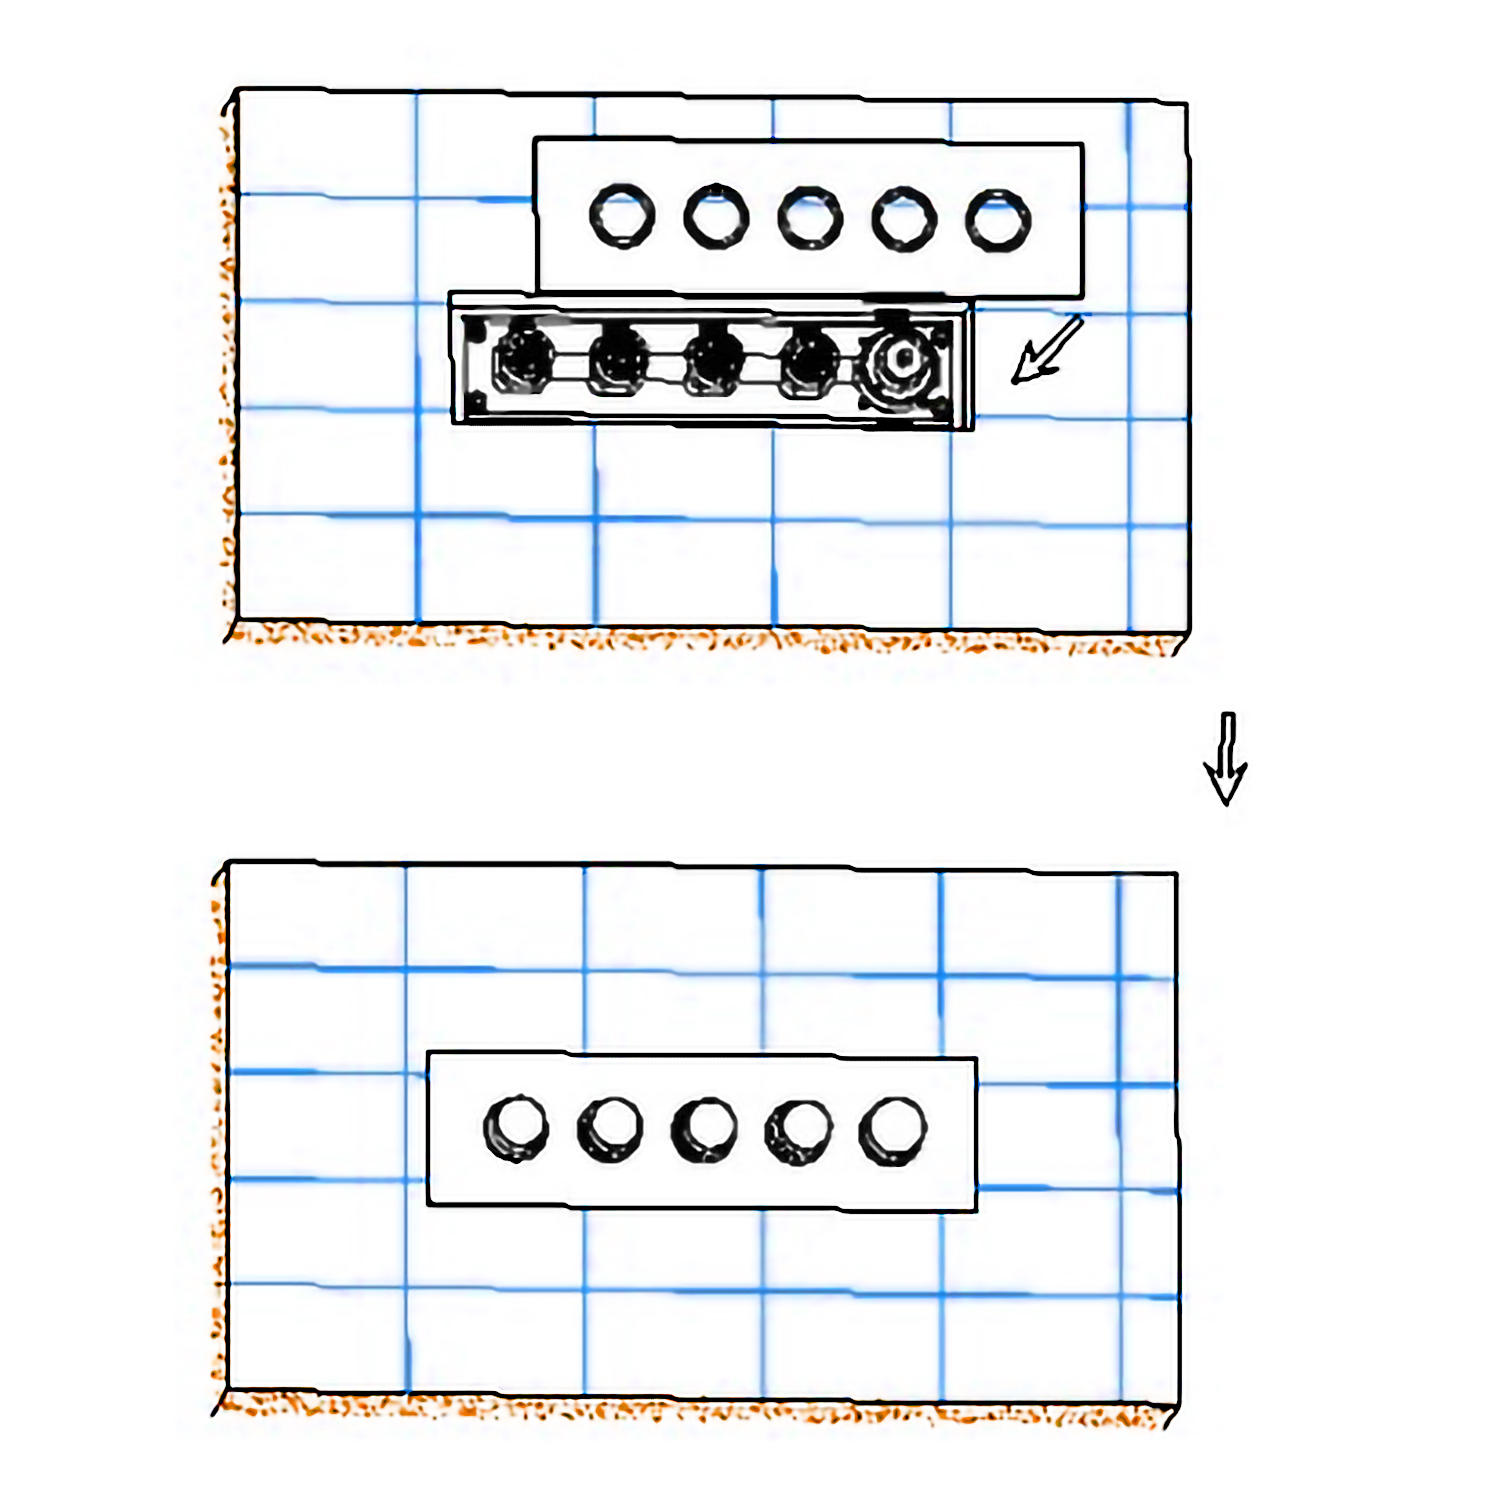
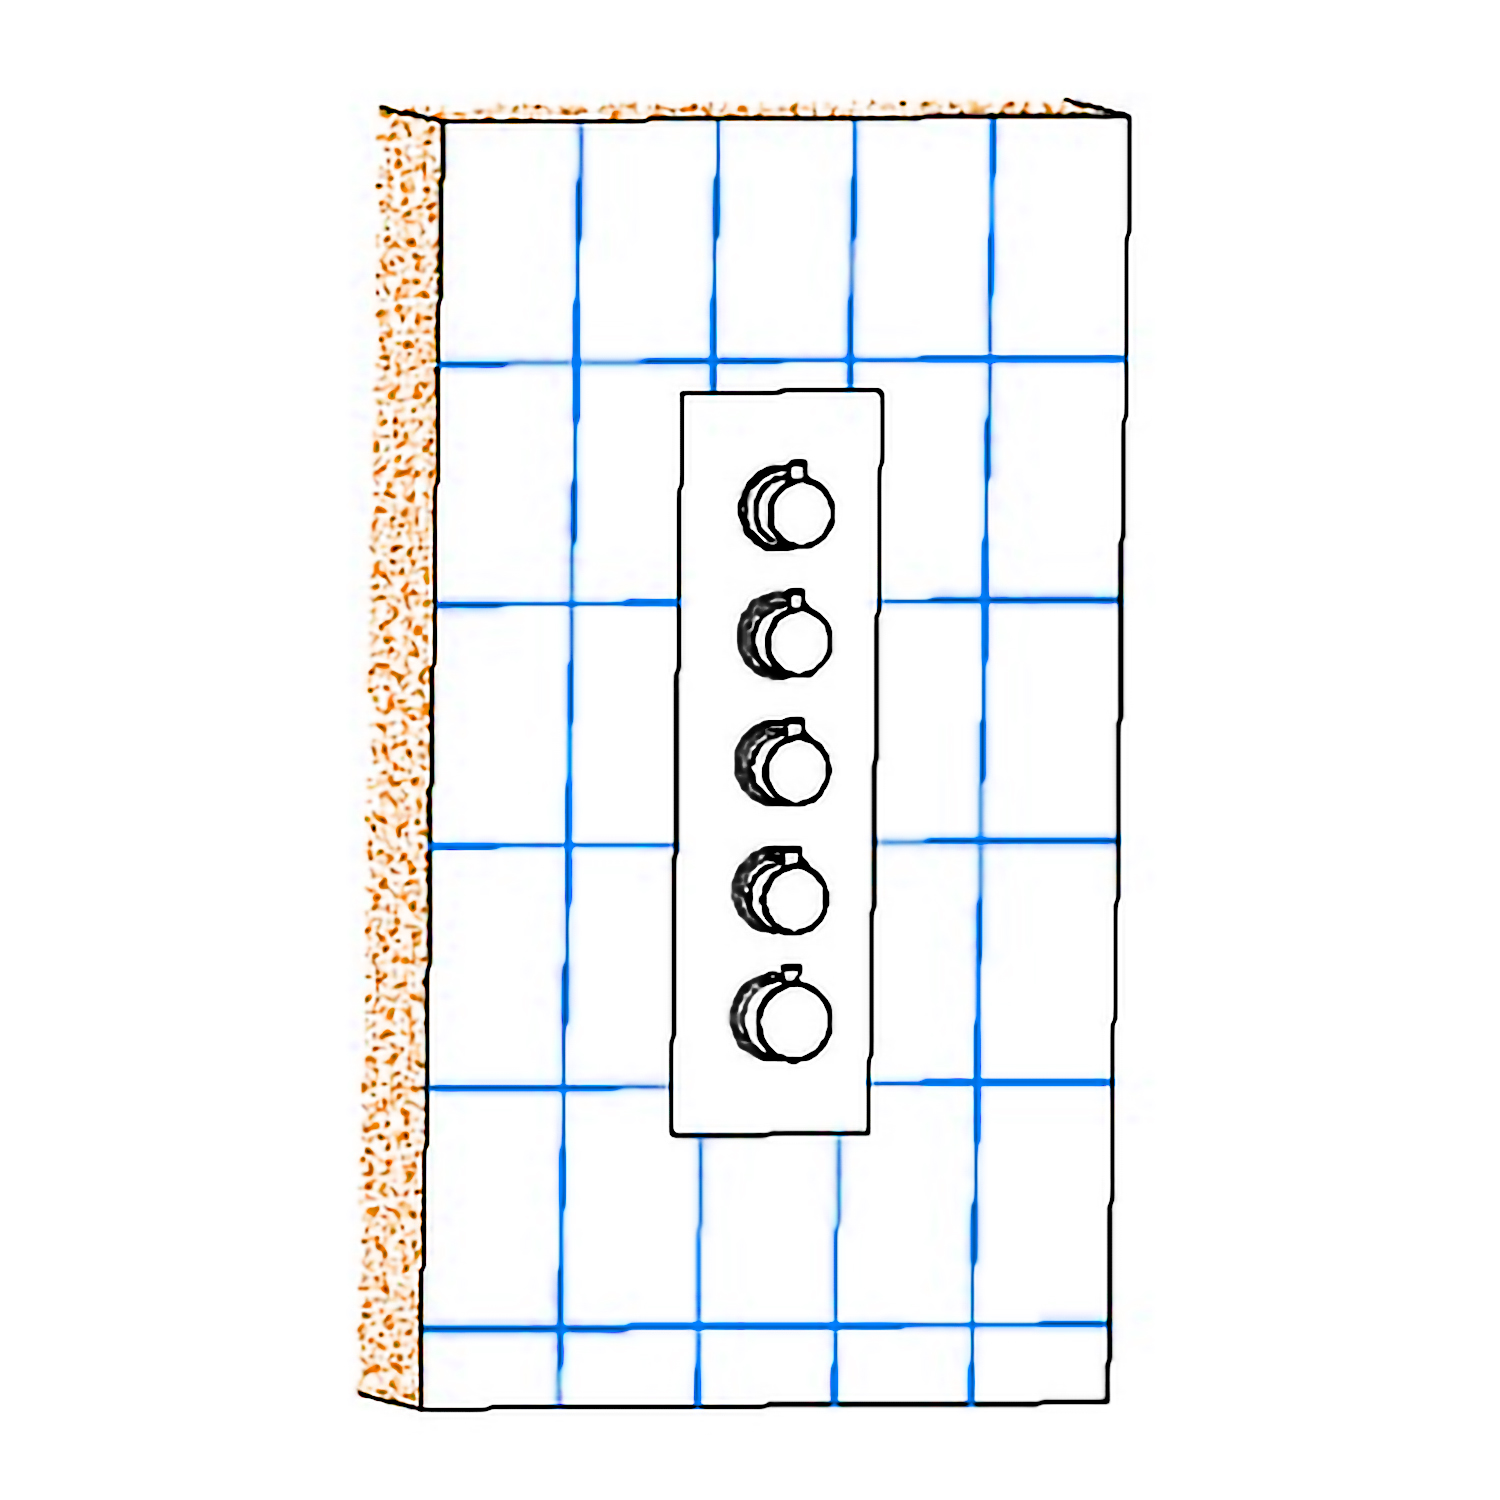
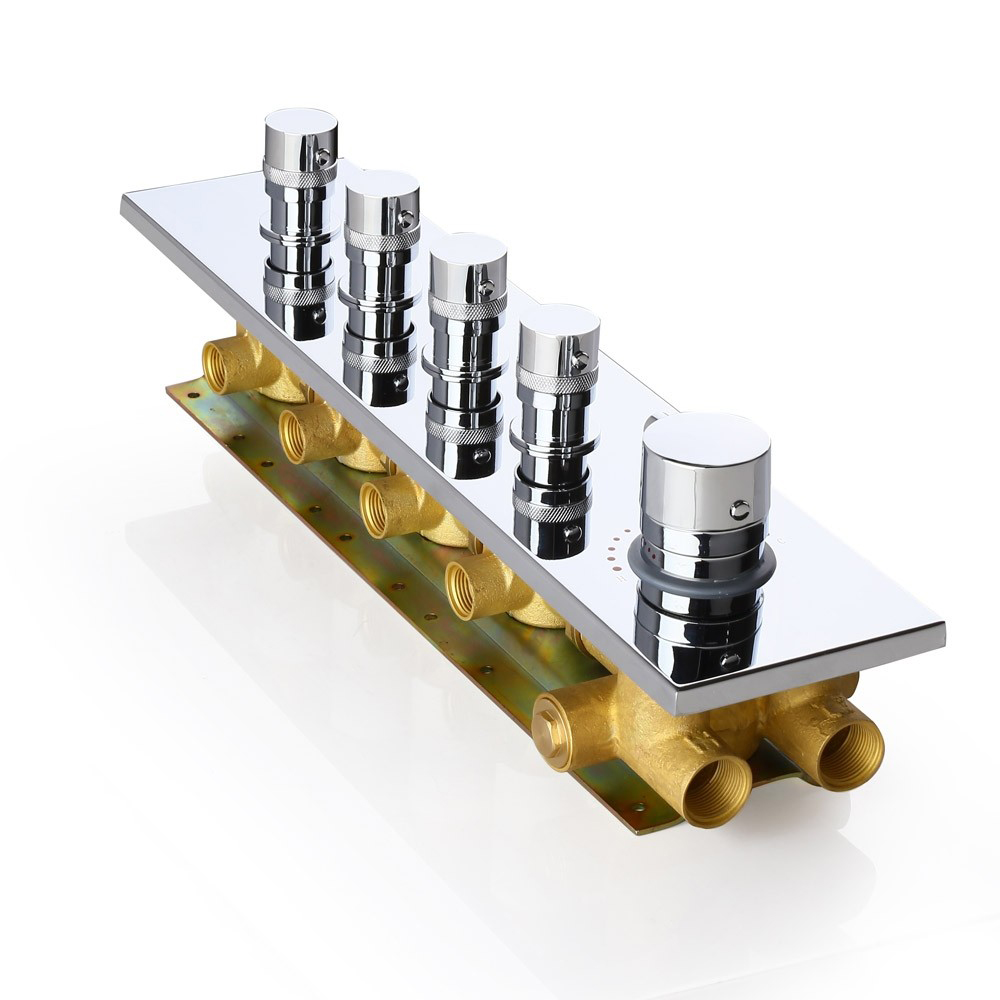
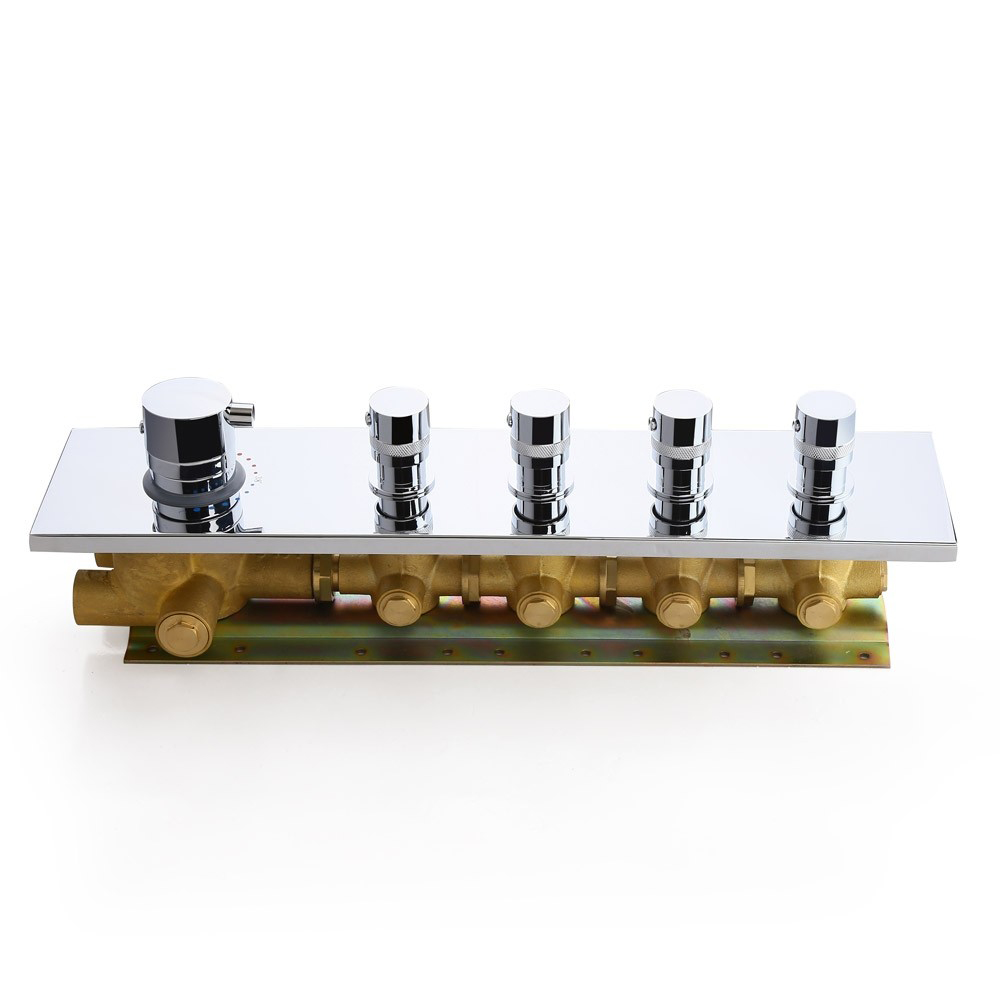
Fix the decorative panel on the embed valve body.
|
|
|
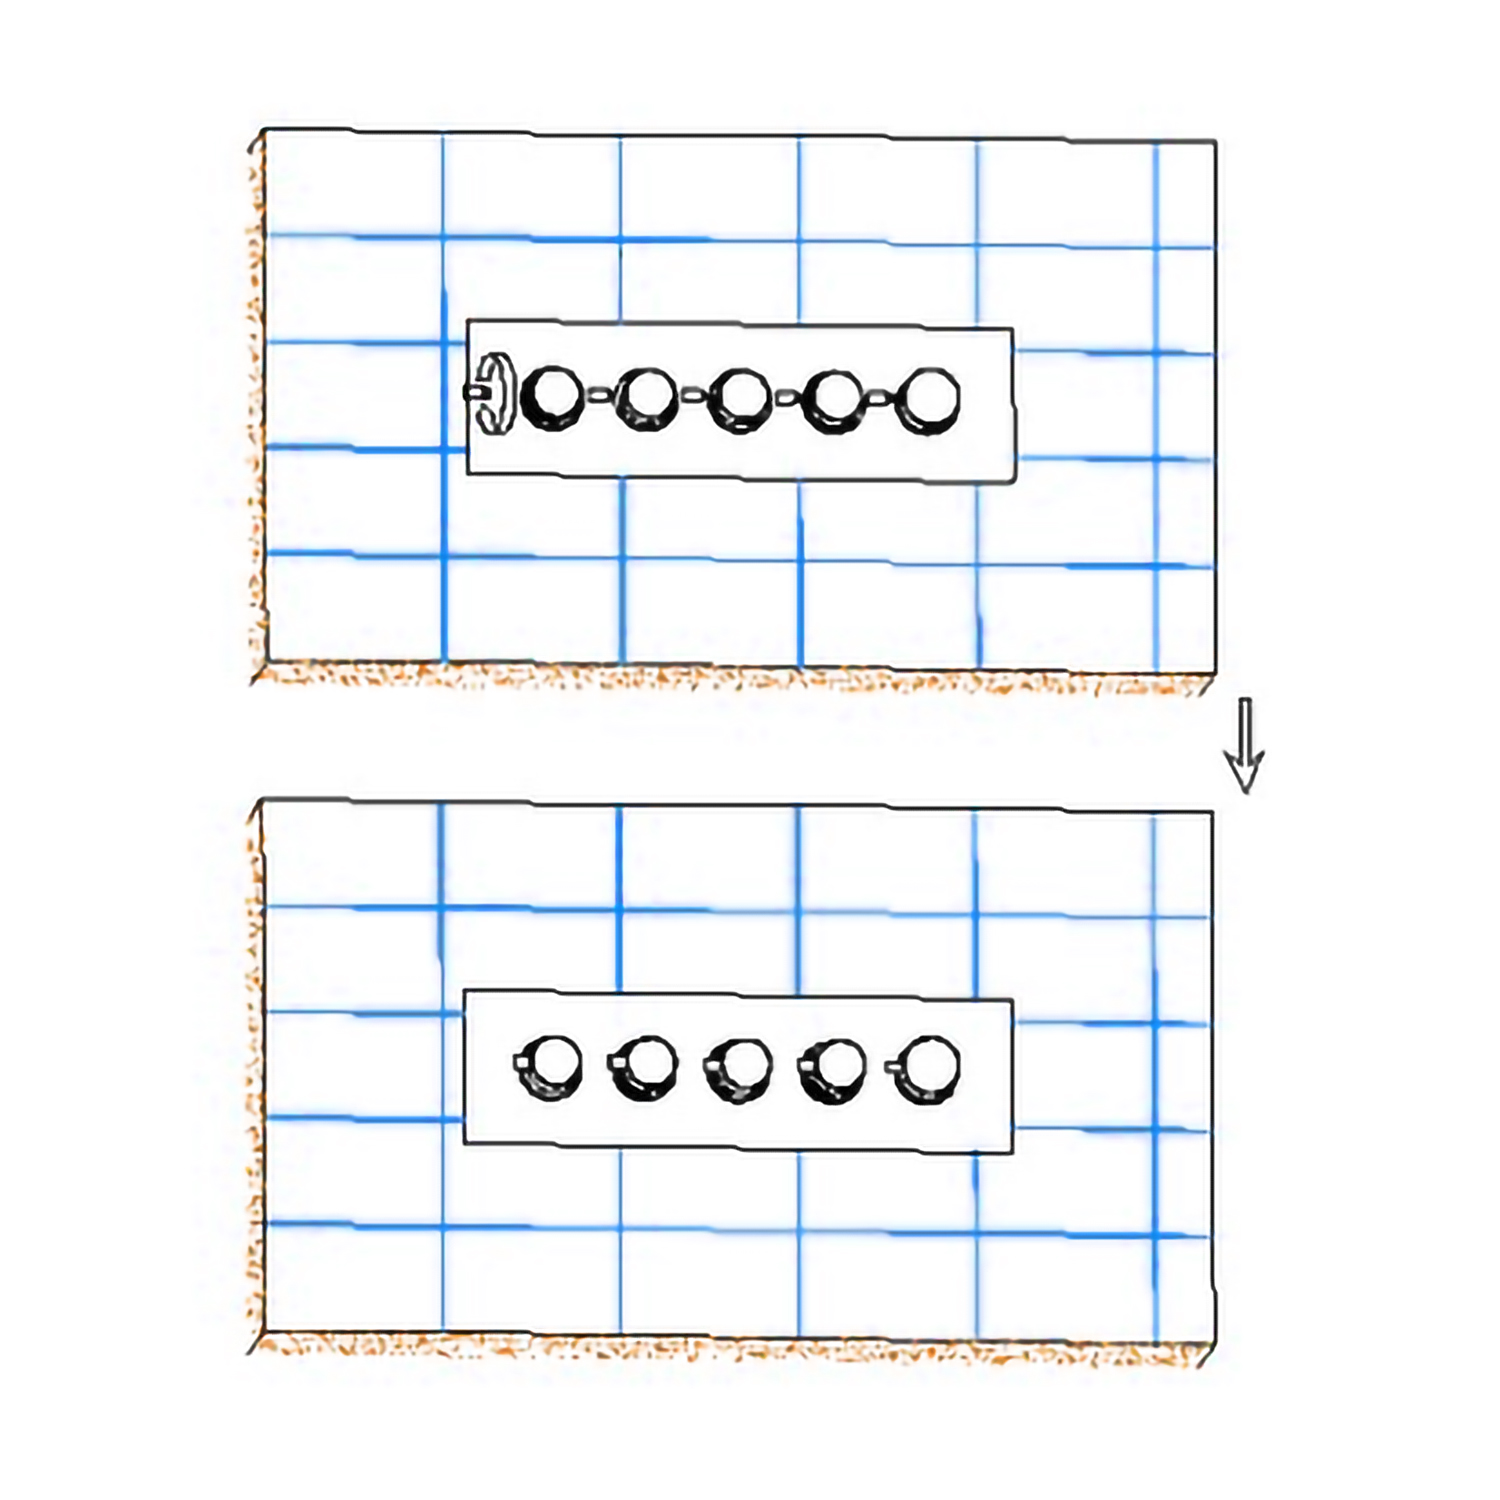
Screw the handwheel arms with the handwheels.
|
|
|
Mixer Control Valve Installation Instruction
|
|
|
|
|
|
Step 9:
|
|
|
Step 10:
|
|
|
|
|
|
|
|
|
|
|
|
|
|
Mixer Control Valve Installation Instruction
|
|
|
|
|
|
Step 11:
|
|
|
Step 12:
|
|
|
|
|
|
|
|
Mixer Control Valve Installation Instruction
|
|
|
|
|
|
Step 13:
|
|
|
|
|
|
|
|
How to install the Shower Set with Showerhead, Hand Held Shower, Body Jets and Shower Mixer
|